

2.2.4. Create and Complete Orders#
The point-of-sale app is designed for quick in-person sales. The merchant enters an amount or builds an order, shows the generated payment request to the customer, and waits until the wallet confirms the payment.
You can also accept cash, card and mixed payments.
2.2.4.1. Create a simple amount-based order#
For a simple sale, open the navigation menu and select Order by amount.

Selecting the amount-based order screen.#
Then enter the amount that the customer should pay.

Entering the amount for a quick order.#
Press Create order (charge amount) to continue. If only GNU Taler is enabled, the app opens the payment QR code. With additional payment methods enabled, it opens Accept Cash, Card and Mixed Payments.
2.2.4.2. Create an Order by Inventory#
Open the navigation menu and select Order by inventory.

Selecting the inventory order screen.#
For a more detailed order, you can use order by inventory. This might simplify order creation, as the merchant simply needs to select products and their quantities to create an order.
Select a category or Everything, then tap products to add them to the current order. Products marked Out of stock cannot be added.
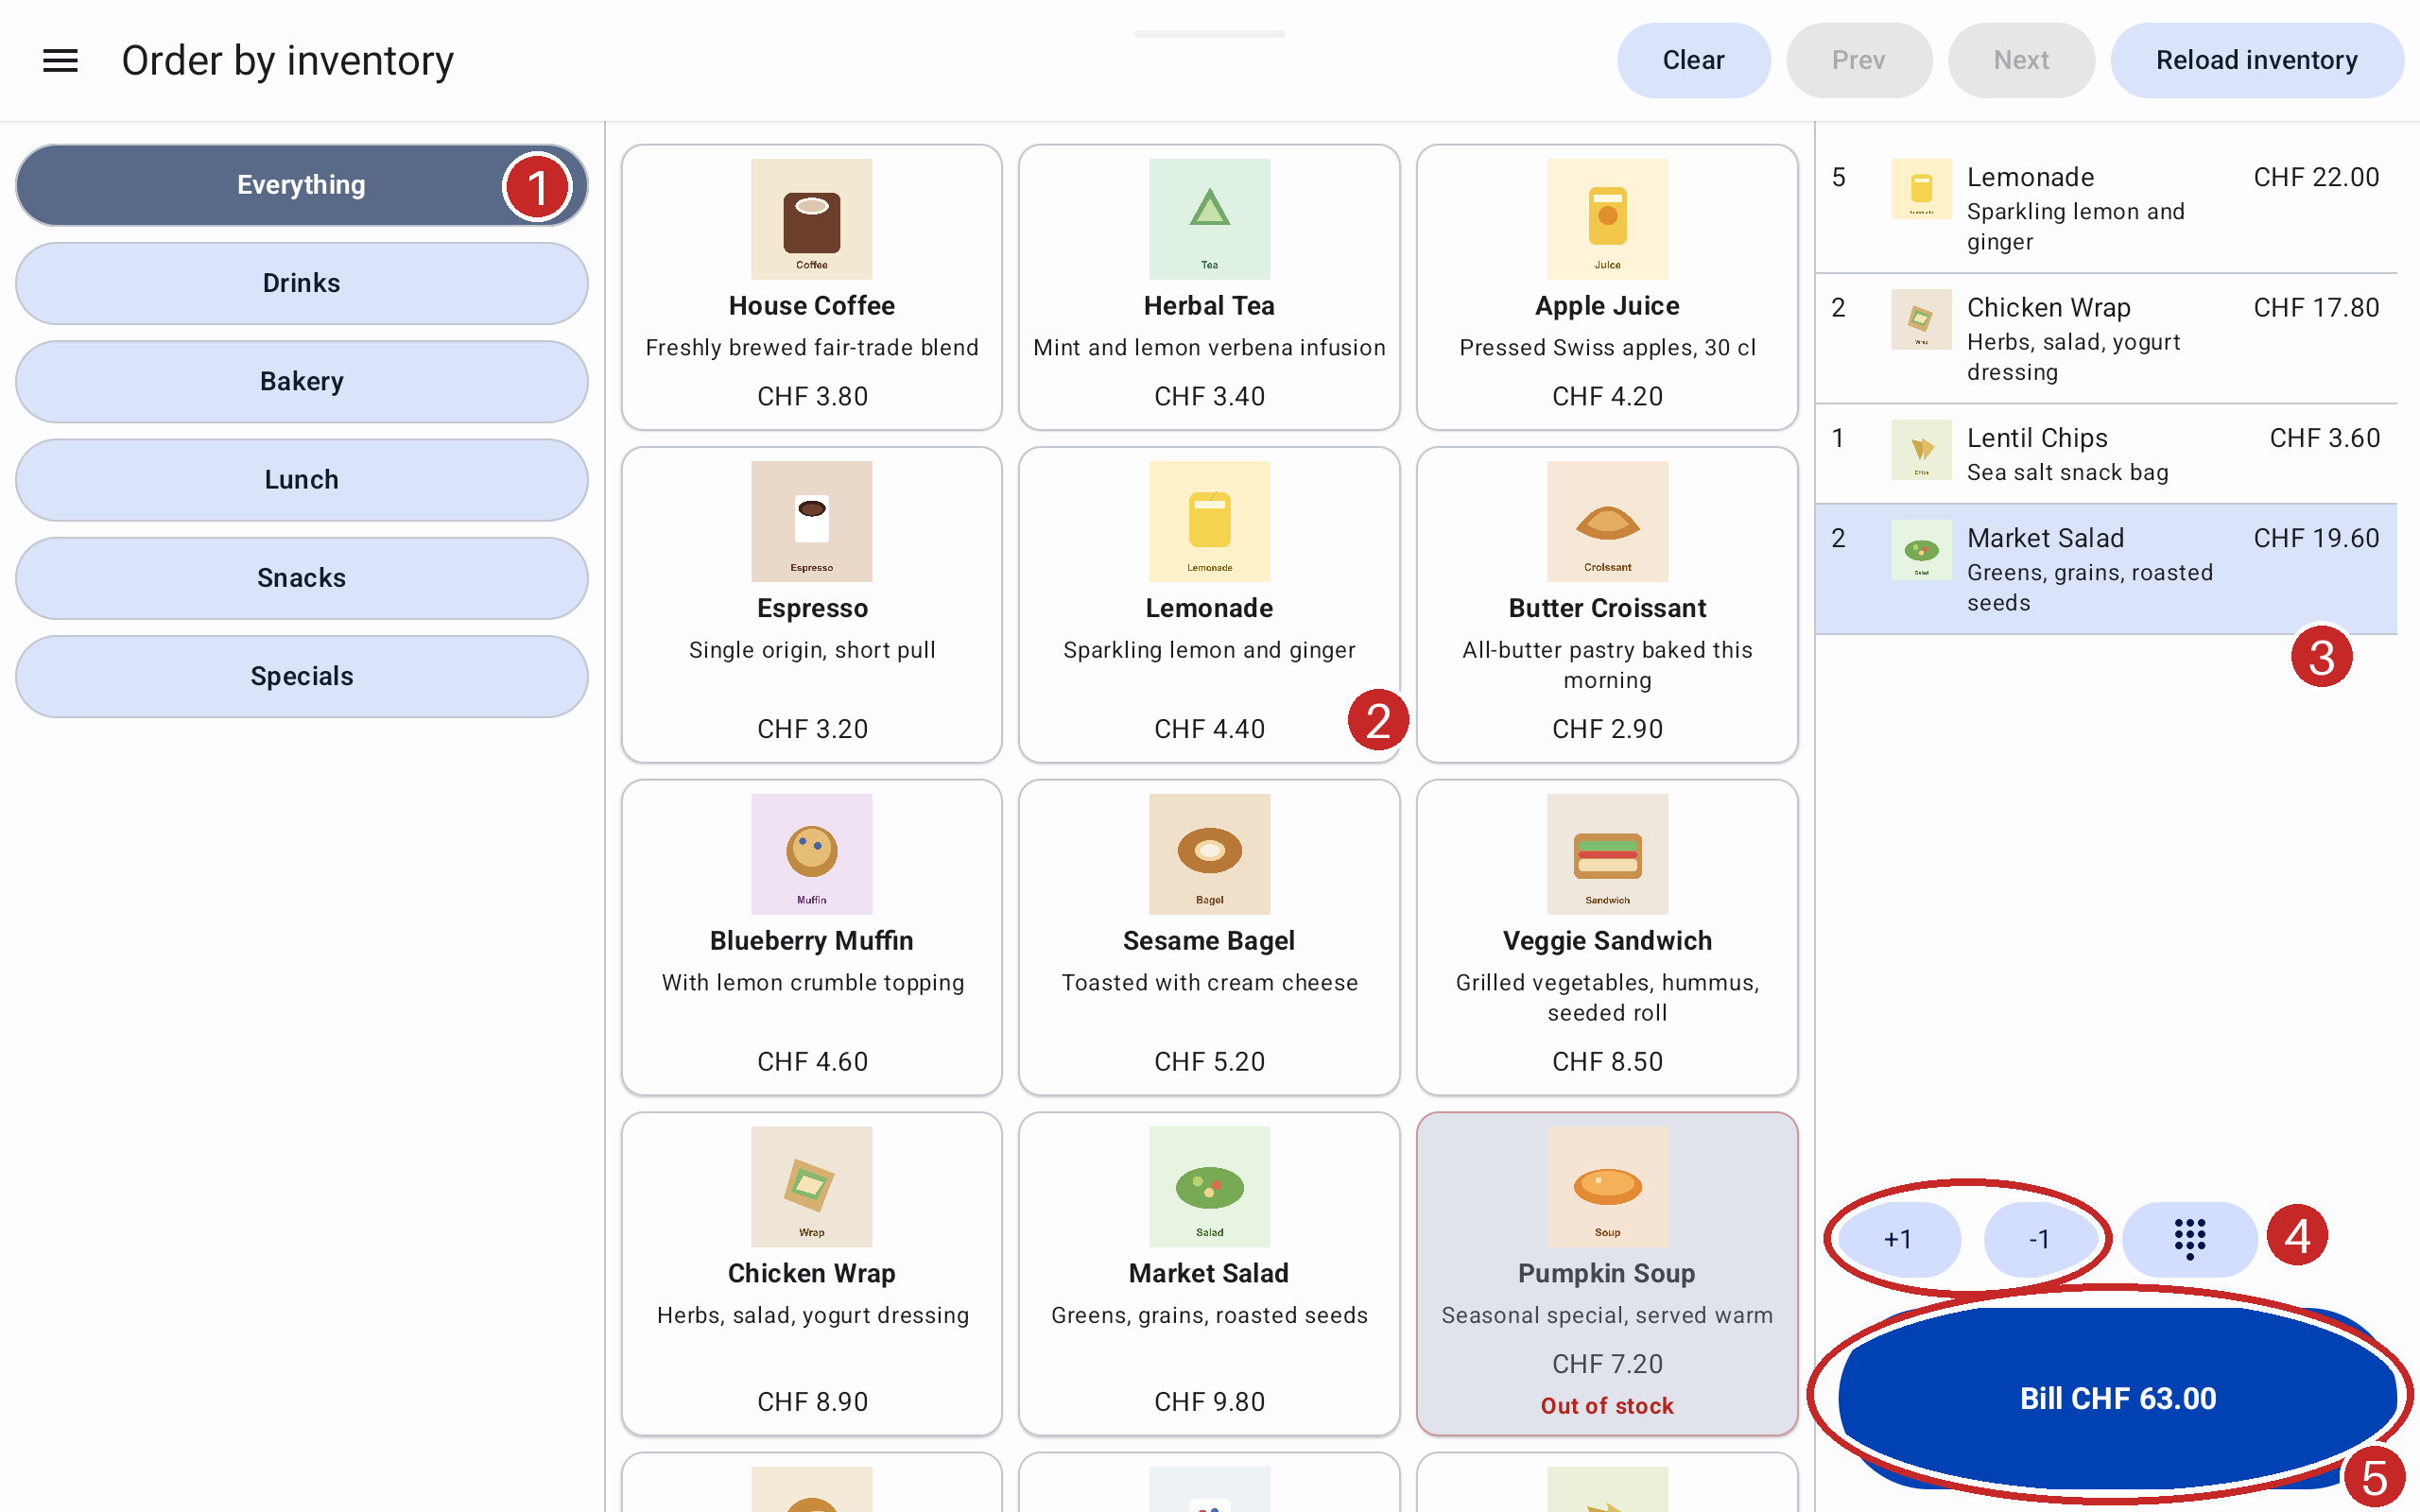
Creating an order from inventory.#
2.2.4.3. Adjust quantities and clear an order#
Select a line in Current order, then use +1 or -1 to change its quantity.
Use Clear to empty the current order and Undo to restore it immediately afterwards. Prev and Next switch between orders; Next can also create another order. On smartphones, open Actions for these controls. After changing products in the Merchant Portal, use Reload inventory.
2.2.4.4. Adding a custom product#
To add a tip or an item that is not available in the inventory list:
Open Add custom product using the keypad icon beside the quantity controls.
Enter a Custom product name and a price in the account’s currency.
Press Add. Check that the new line and the order total are correct.
On smartphone devices, the keypad icon (1) is in Current order. Actions (2) contains Clear, Prev, Next and Reload inventory.
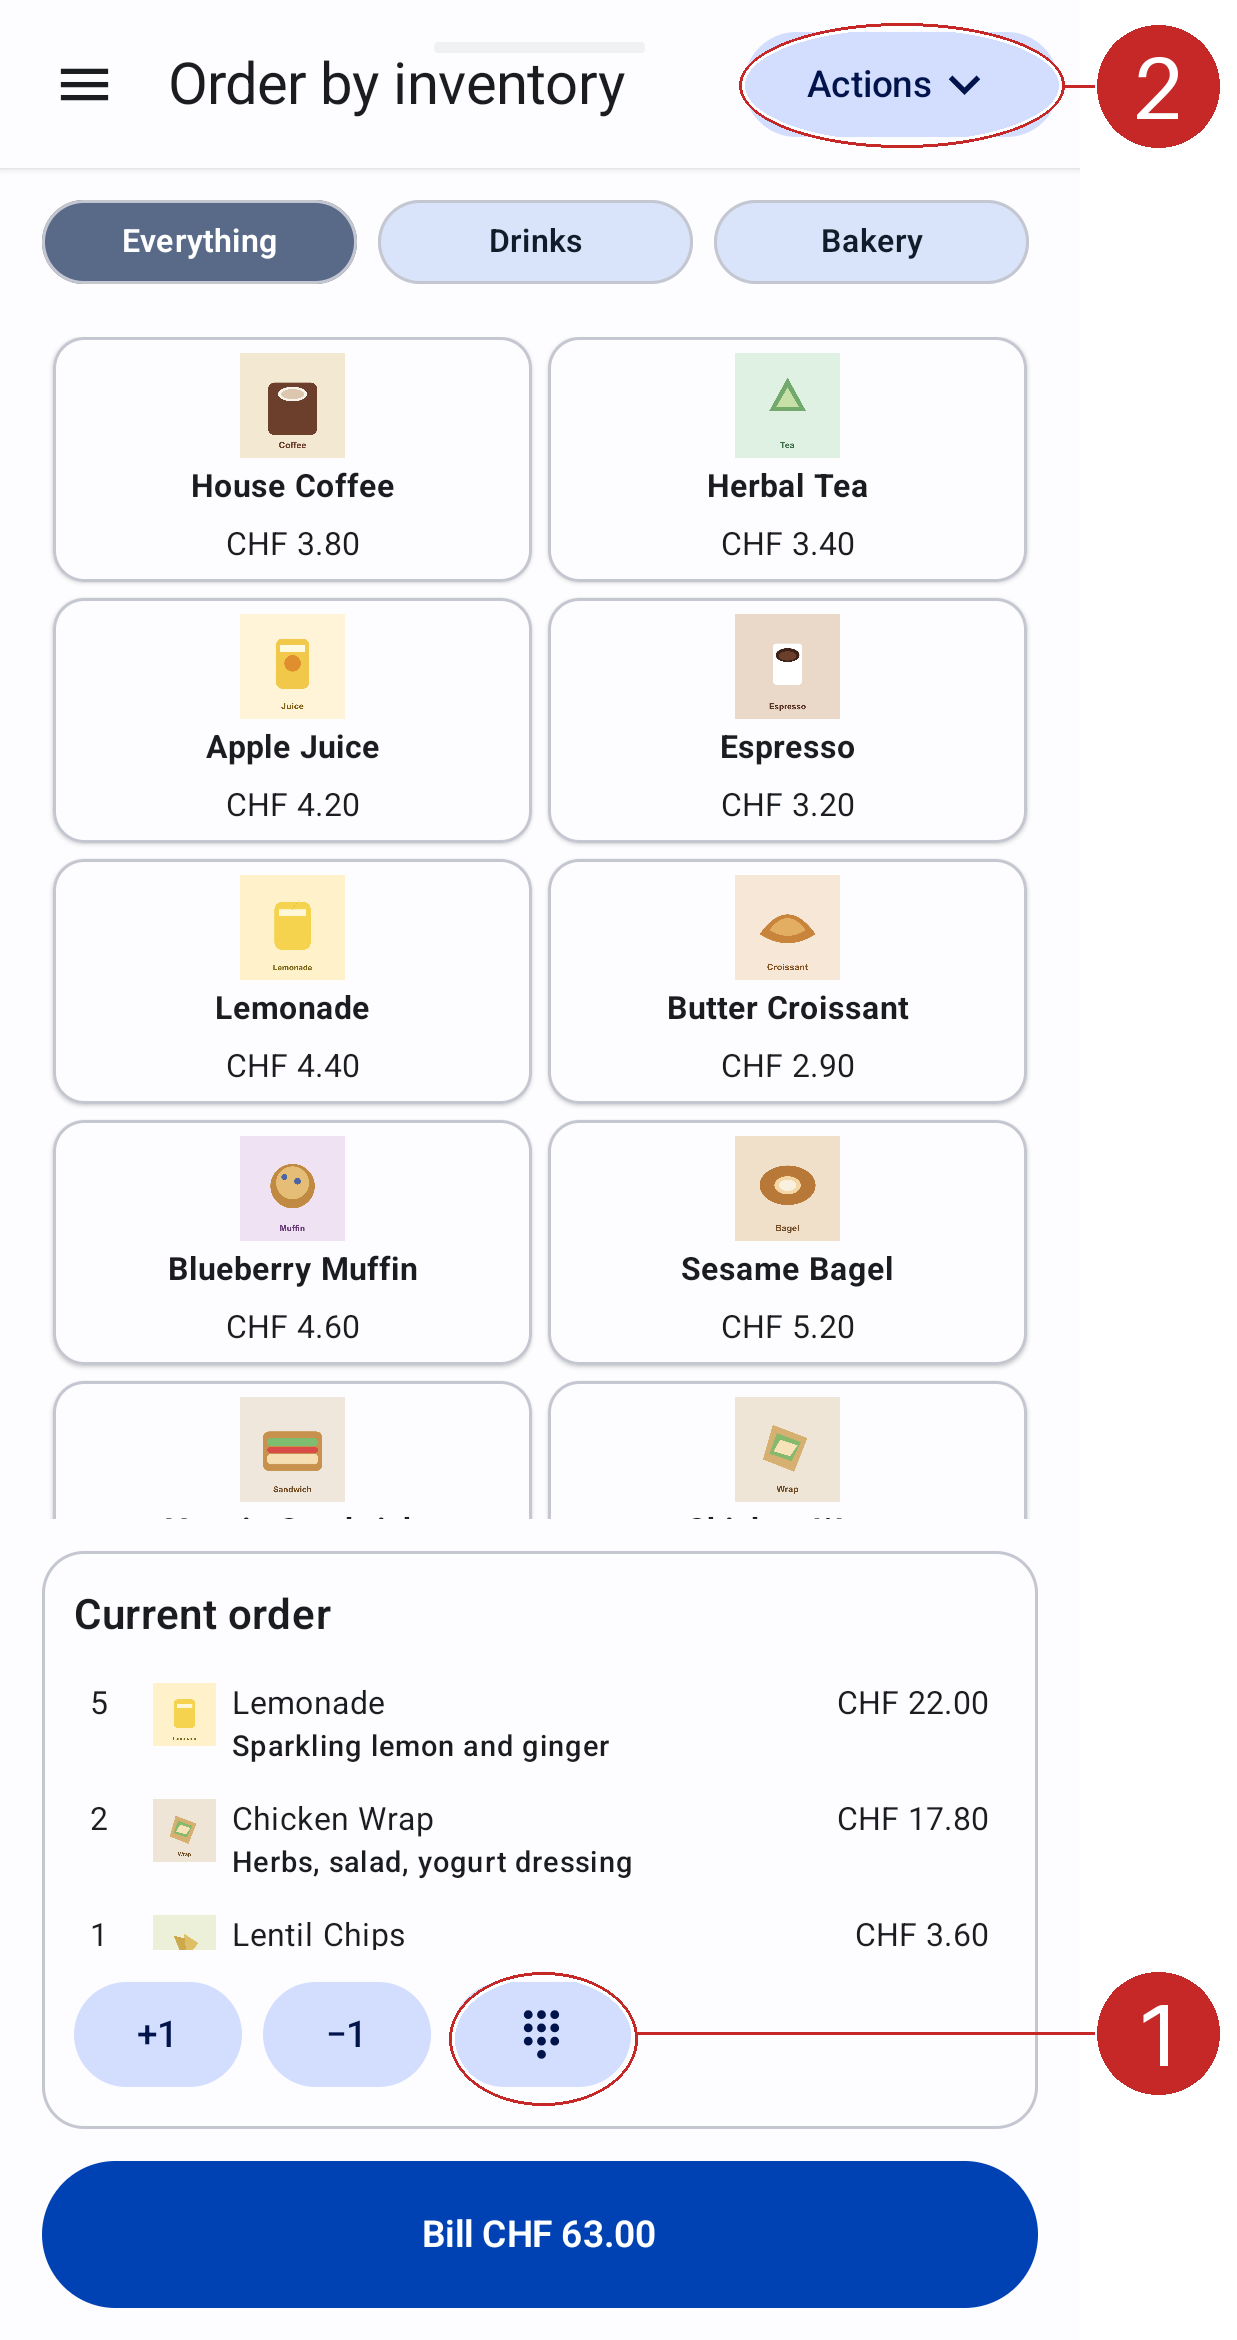
On a smartphone, tap the keypad icon (1) to add a custom product.#
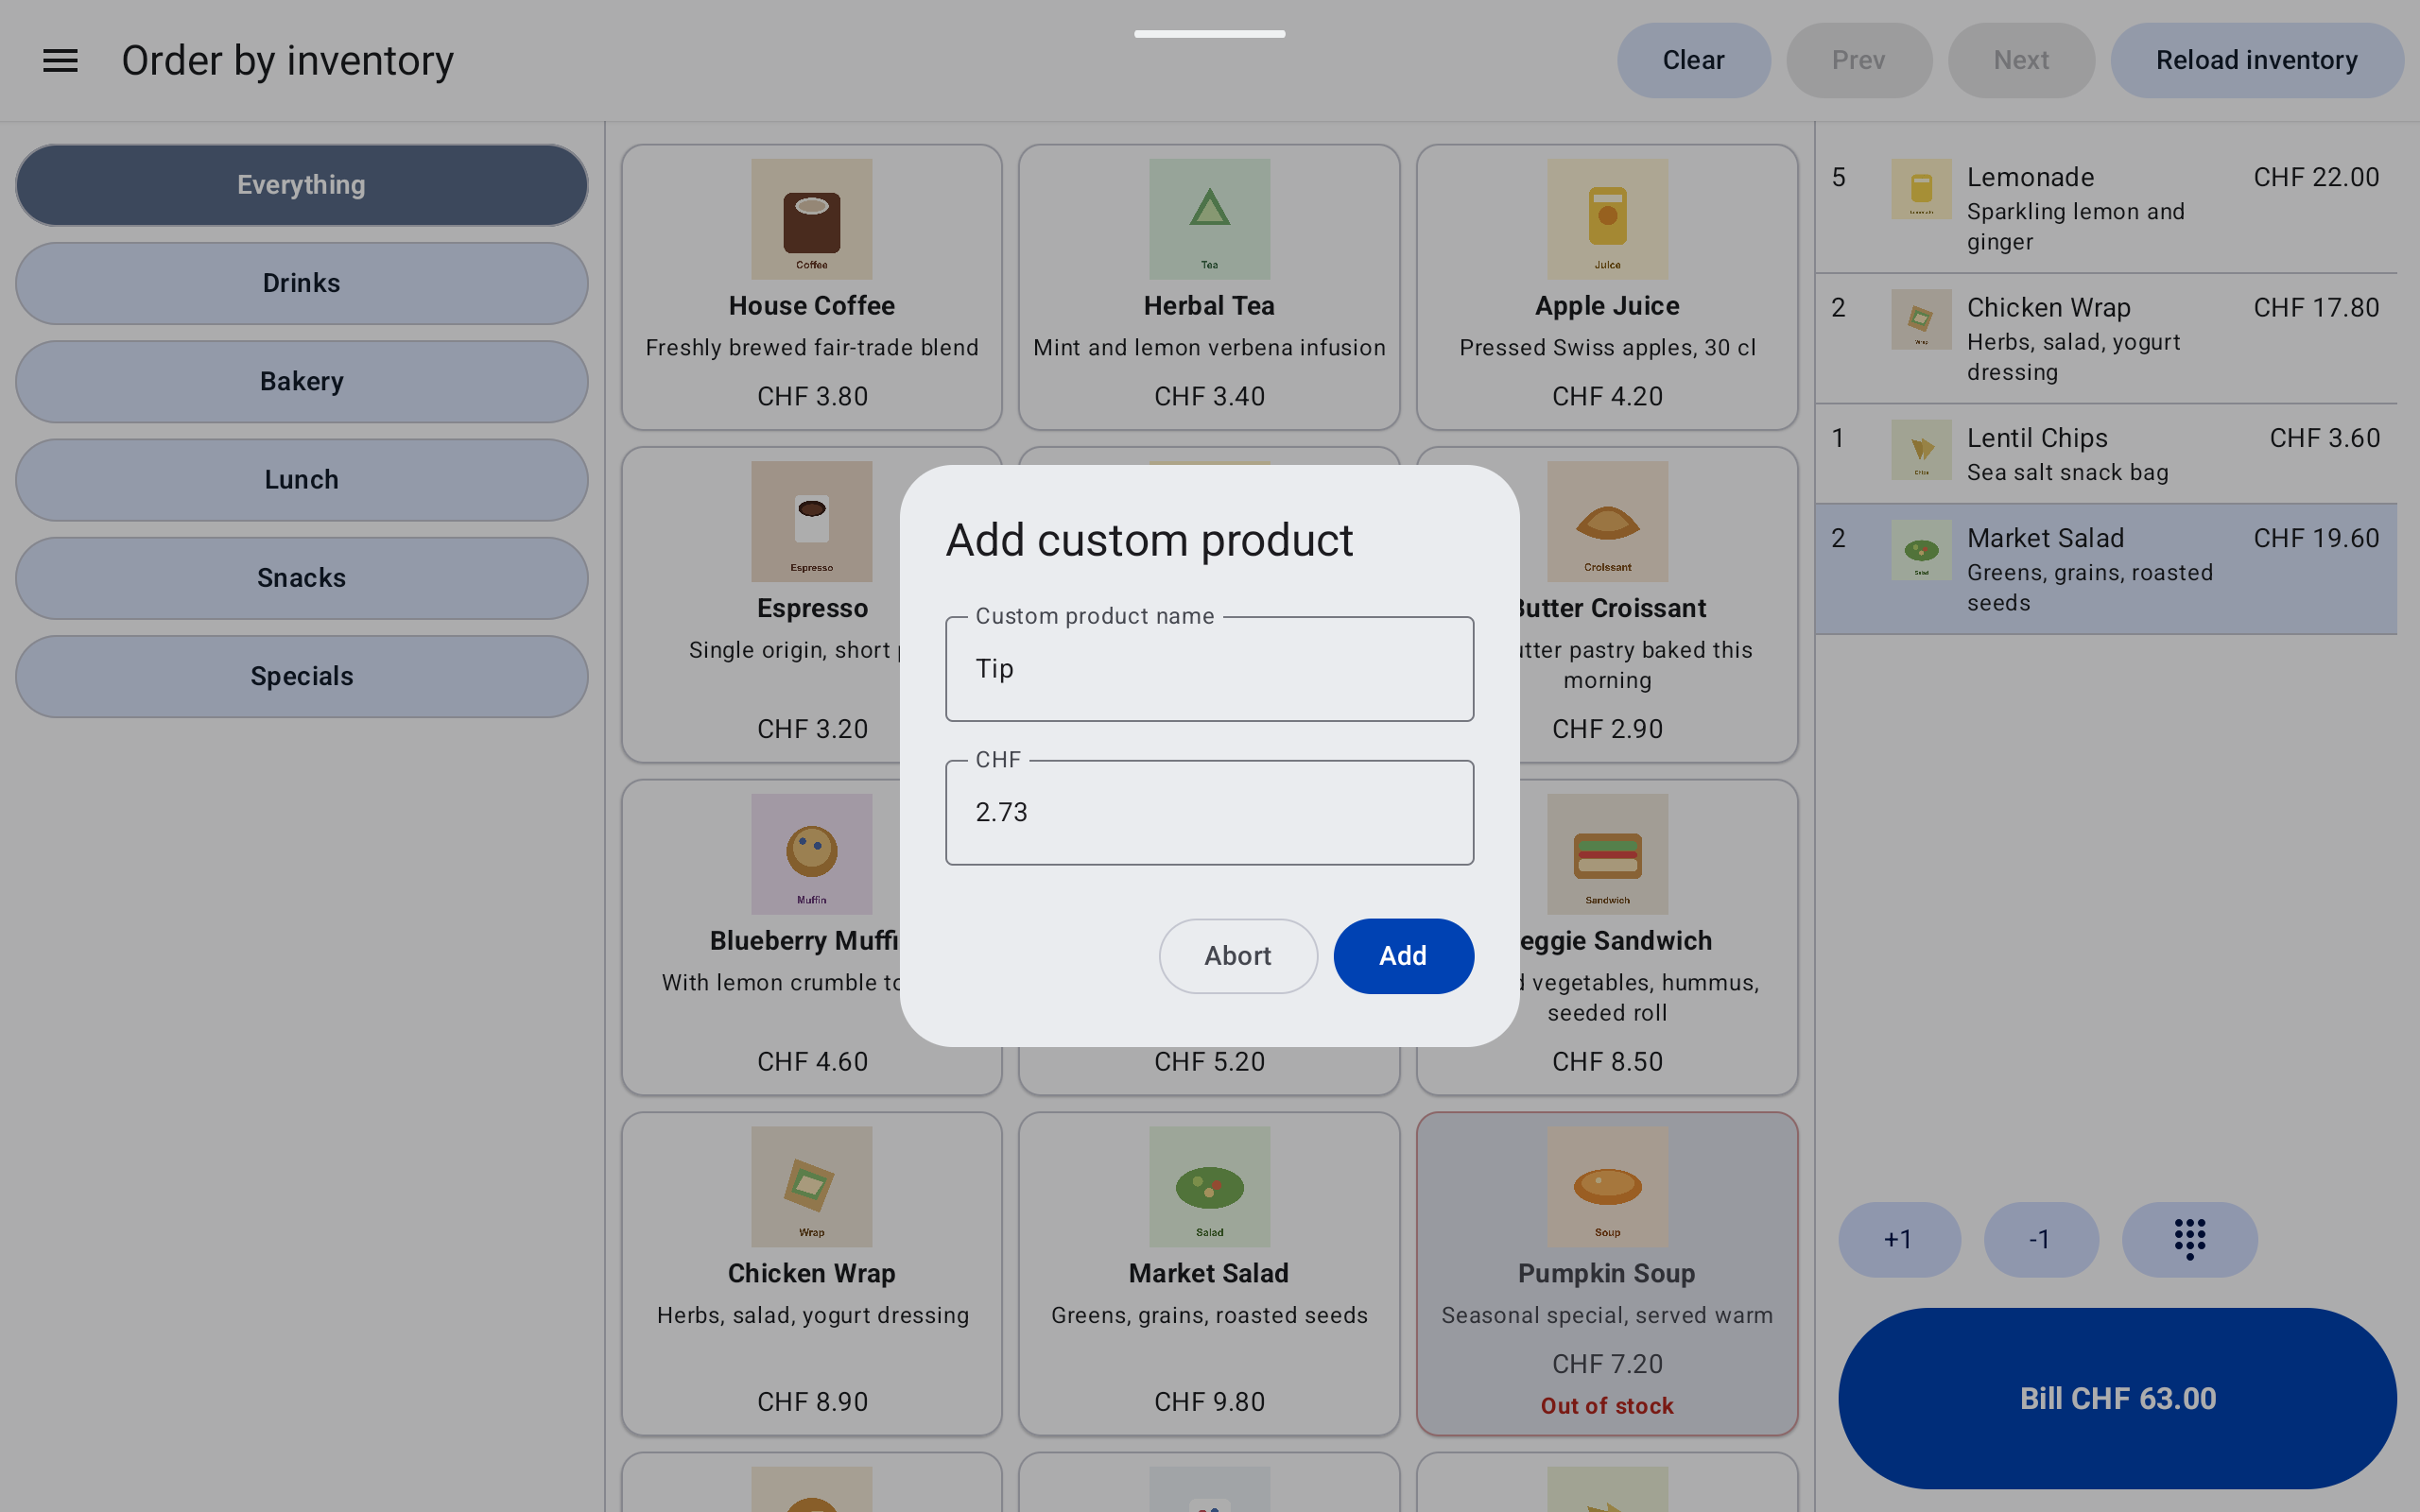
Adding a custom product to the order.#
After adding the custom item, review the order total and item list. Press Bill to open the Taler QR code, or continue to Accept Cash, Card and Mixed Payments if additional payment methods are enabled.

Order by inventory after adding an item.#
2.2.4.5. Payment QR Code#
When the order is successfully created, the payment processing page shows the Taler payment QR code, which must be shared with the customer.
Check the order total.
Ask the customer to scan the QR code with their Taler wallet. They can also tap their phone on an NFC-enabled POS or a connected Taler Payment Device.
Wait while the customer confirms the payment in their wallet. A claimed order or Payment in progress means the wallet has opened the payment; it does not yet mean that payment has succeeded.
Wait for Payment received, then press Continue to return to order entry.
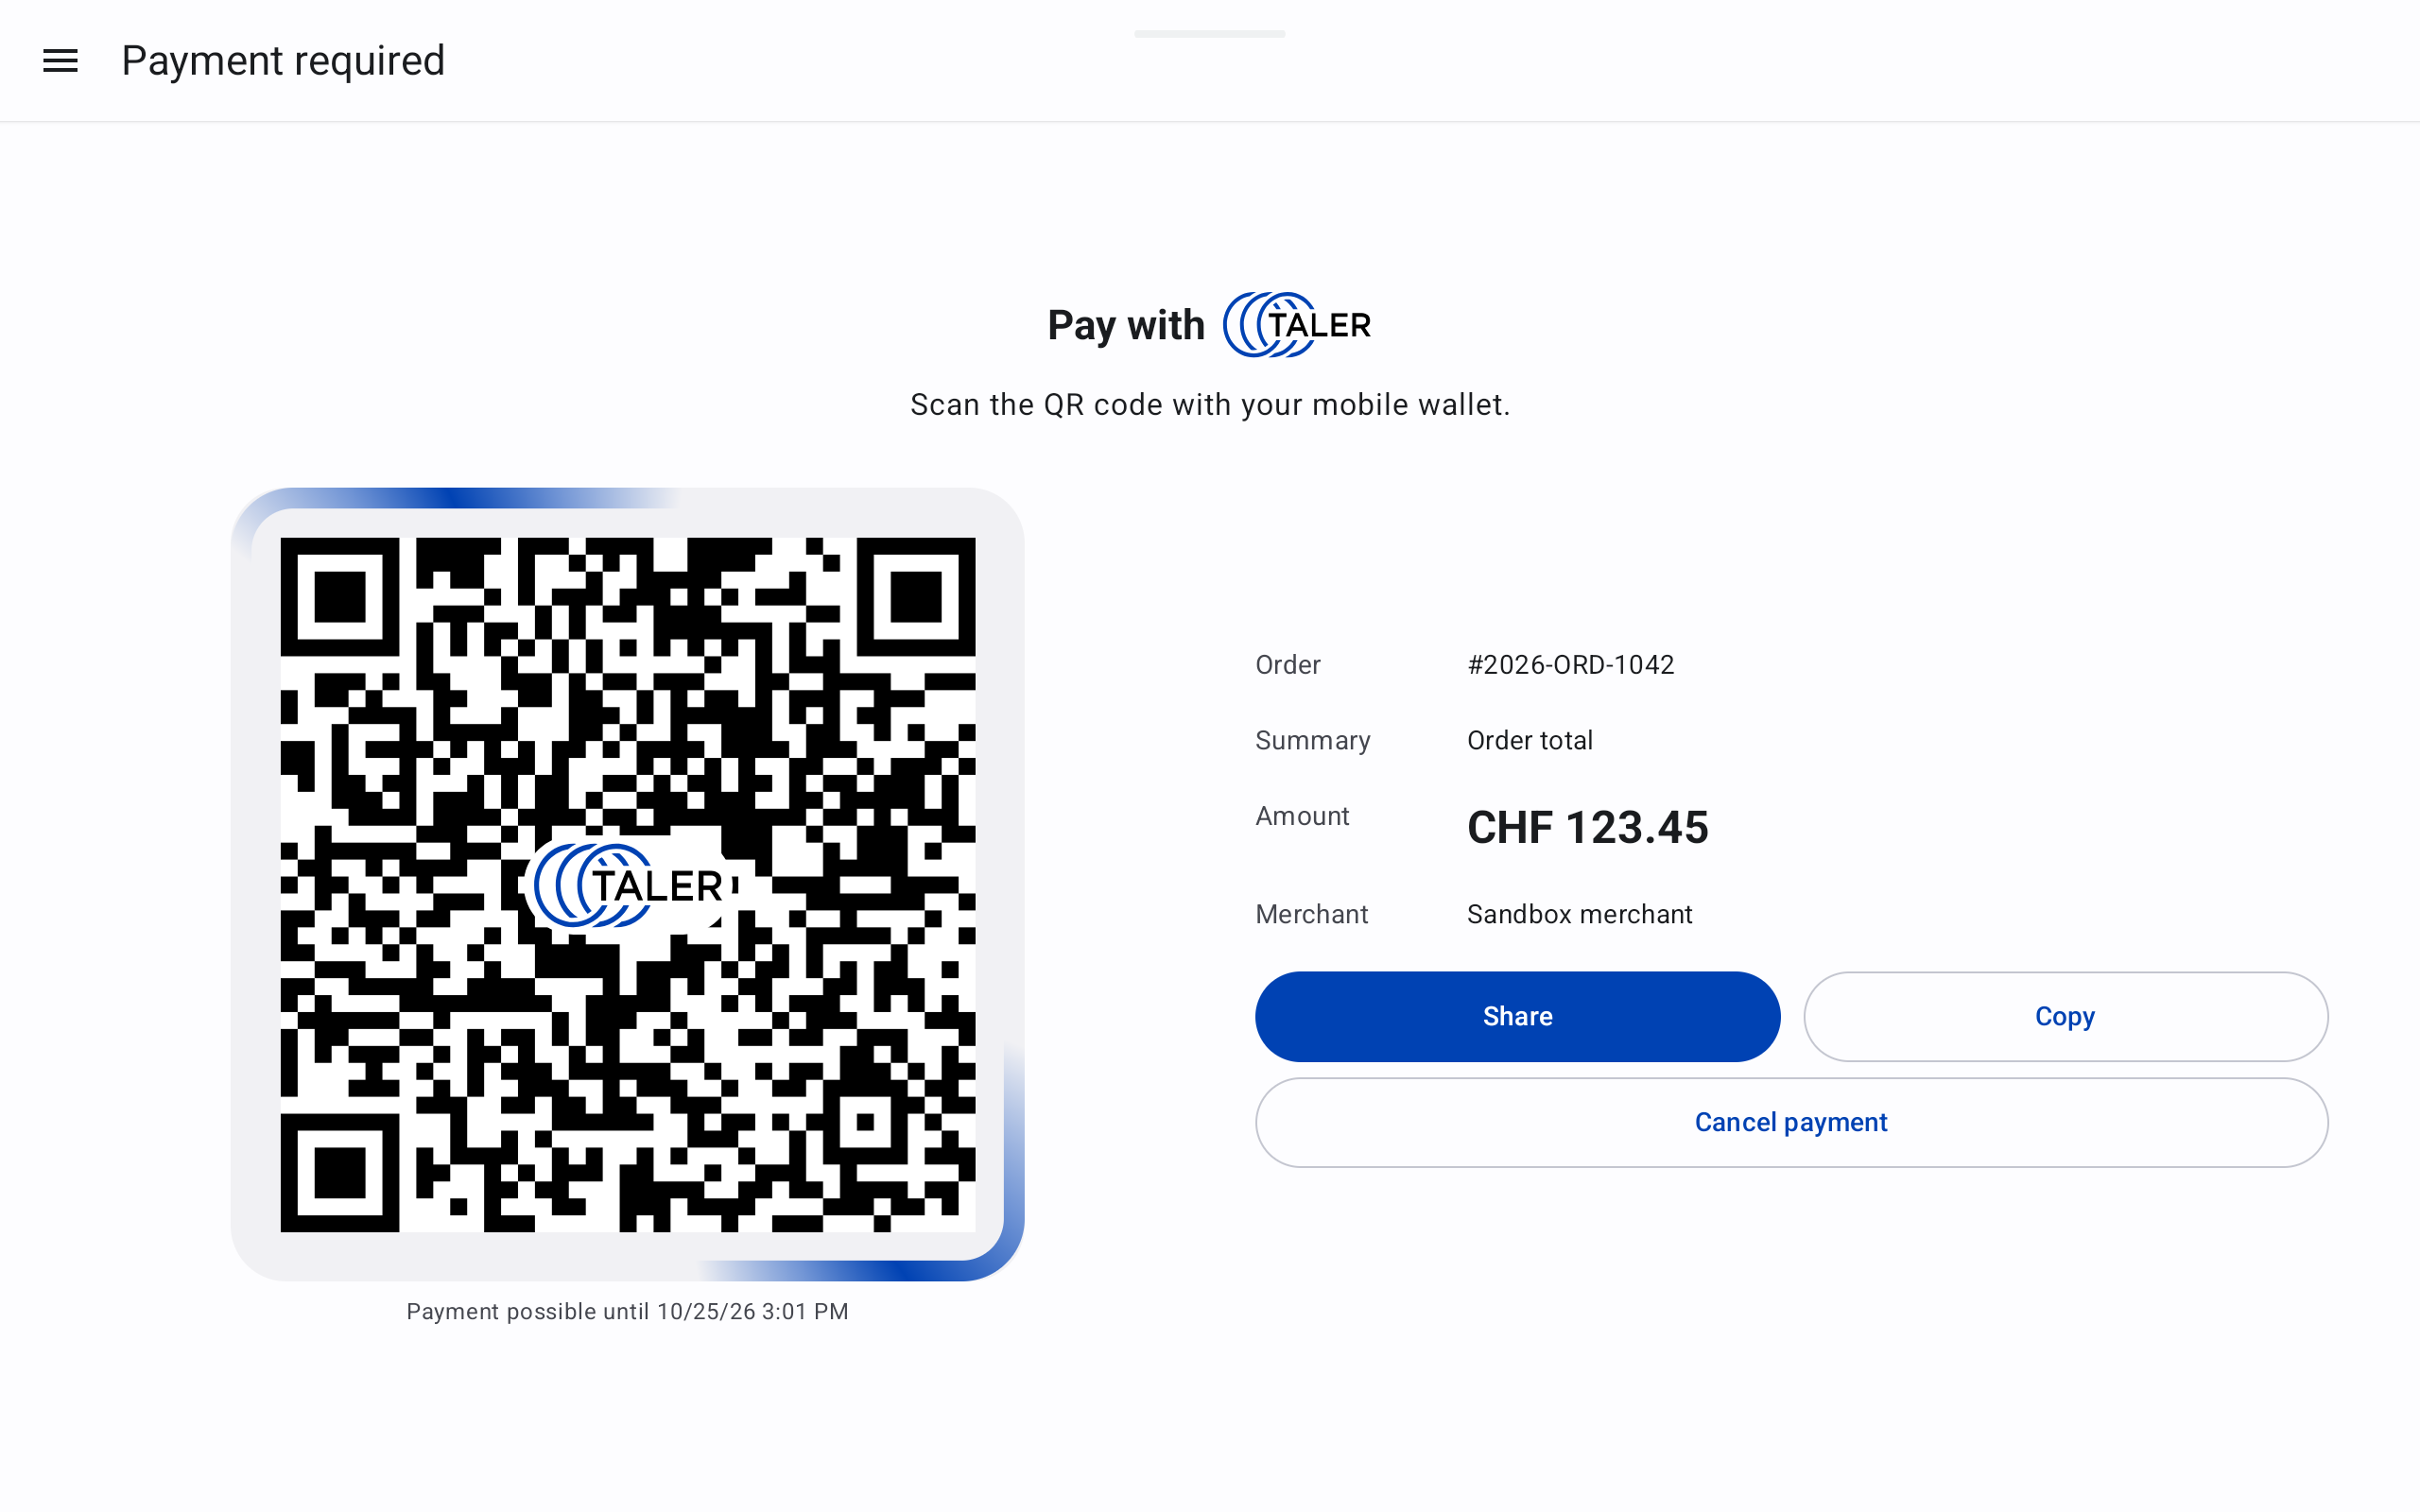
Payment request shown to the customer.#
Use Share to send the payment link or Copy to copy it.
Once the customer pays, the app shows the successful payment screen. At this point, the sale is complete and the order is visible in the order history.
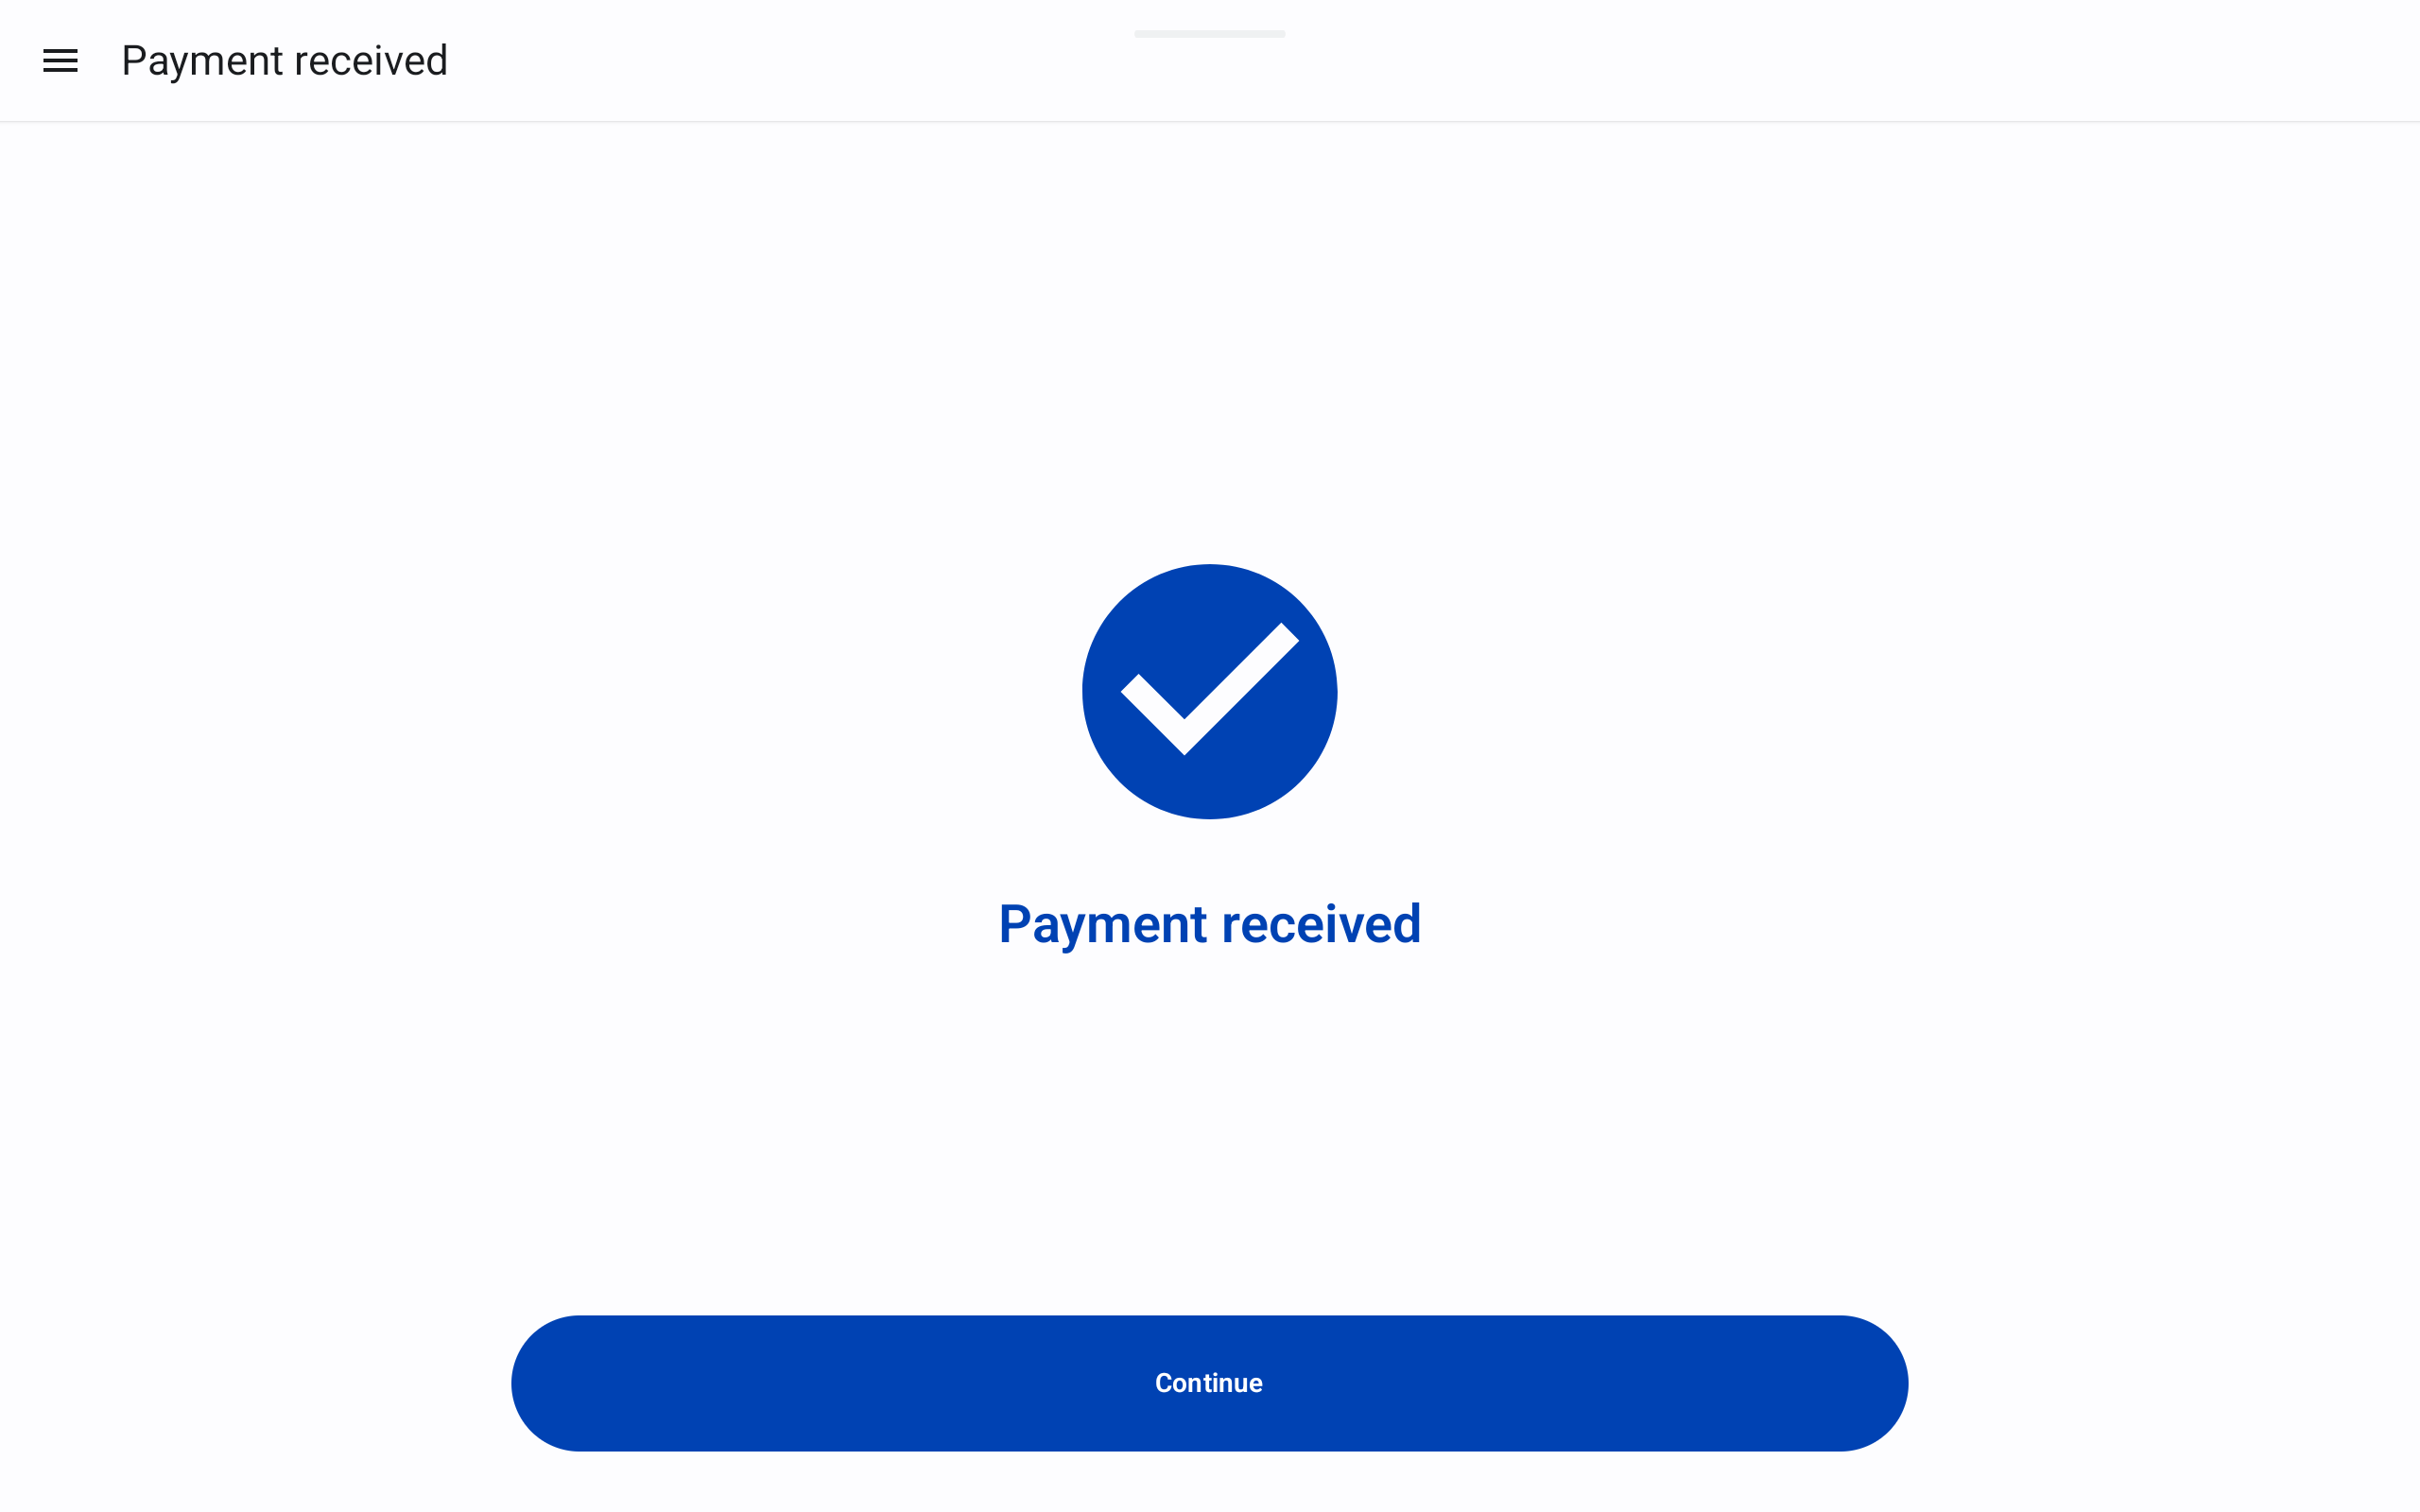
Successful payment confirmation.#
2.2.4.6. Leave or Reopen a Payment Request#
To leave the payment page and continue with the next customer, press the back button. This closes the payment page and opens the order page again.
To add another cash or card payment, press Back to payment options and wait for checkout to reopen. If the customer has already paid, the POS completes the order. If it cannot continue, see Recover an Interrupted Payment.
To return to a payment request, open the history page, find the order, and use the order’s Show payment action. The payment page for that order opens again.

Order history used to find a previous payment request.#
2.2.4.7. Cancel a Pending Payment#
On a Taler-only payment request, press Cancel payment to cancel an unpaid order. For a checkout with recorded cash or card payments, follow Recover an Interrupted Payment to account for money already received.
If the customer has already scanned or opened the payment request, the app may show the Force delete order? confirmation. This means that the customer’s wallet already knows about the order. Press Force delete only if you want to delete the order anyway. After the order is deleted, the customer can no longer complete that payment.