

2.2.3. Sign in to the Point-of-Sale App#
The point-of-sale app connects to a GNU Taler Merchant Portal account. The
account and the password must already exist before the merchant can use the app.
For the Merchant Portal setup, see the
Merchant Portal tutorials. To obtain a hosted account on
my.taler-ops.ch, see Obtain an Instance on my.taler-ops.ch. To try the app
with the public demo Merchant Portal instead, see
the sandbox instructions.
Open the app and enter the Merchant Portal URL and password.

Login screen for connecting the app to a Merchant Portal account.#
If the Merchant Portal account requires multi-factor authentication, select the available authentication method.

Selecting the authentication method for the Merchant Portal account.#
Then enter the generated one-time code to finish the login.

Entering the one-time code required by the Merchant Portal.#
2.2.3.1. Configuring the account with a QR code#
If you are doing this for the first time, a notification asking for camera access will appear. If you previously declined access, a pop-up will explain what you need to do.
If camera access has been blocked, the app offers Open settings (1). Open Permissions → Camera in Android’s app settings, allow camera access while using the app, and return to the POS.
As soon as you see the camera preview on the display, point the camera at the setup QR code and wait for the app to load the configuration.
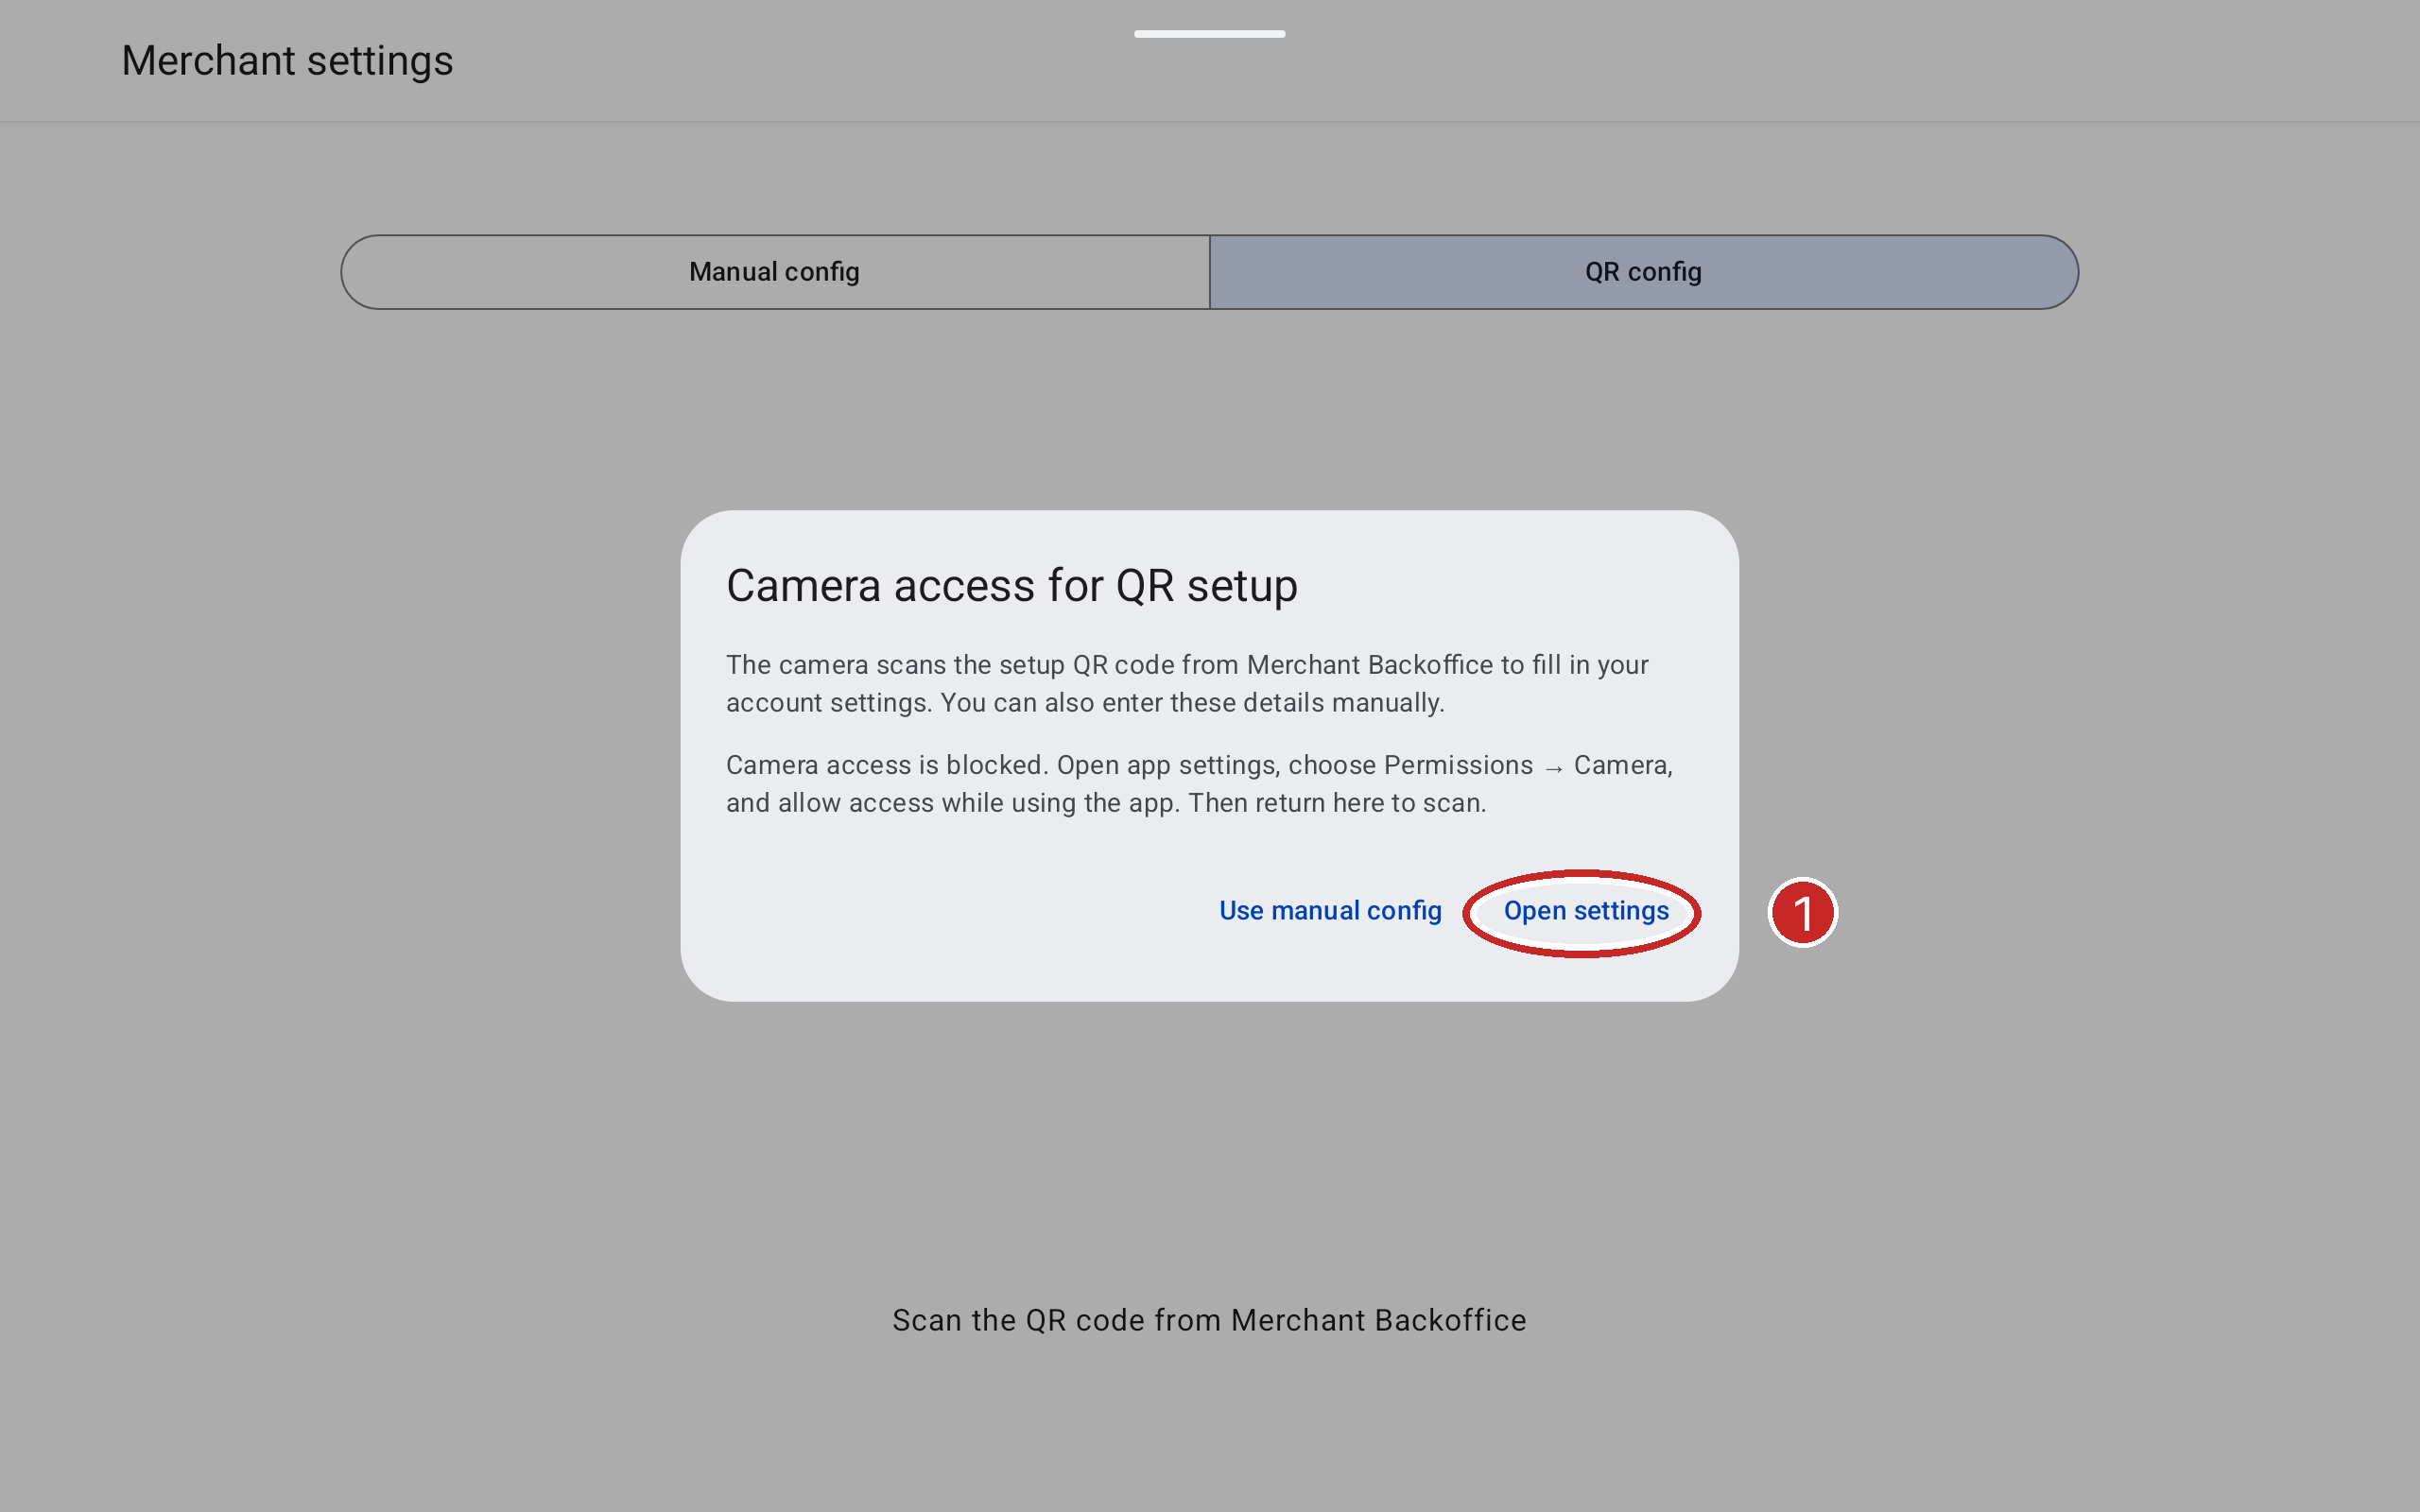
Restore camera access in Android settings, or continue with manual configuration.#
Aviso
Keep your merchant setup QR code private. Sharing this QR code with others gives them access to your merchant account. This QR code should NEVER be displayed to customers.
2.2.3.2. Connecting to a local merchant server#
On Android 17 or later, connecting to a merchant server on your local network requires permission. This applies to both manual and QR configuration.
This works like the camera permission.
If your system requires permission, you will see a message from the app, followed by the system pop-up, as shown below.
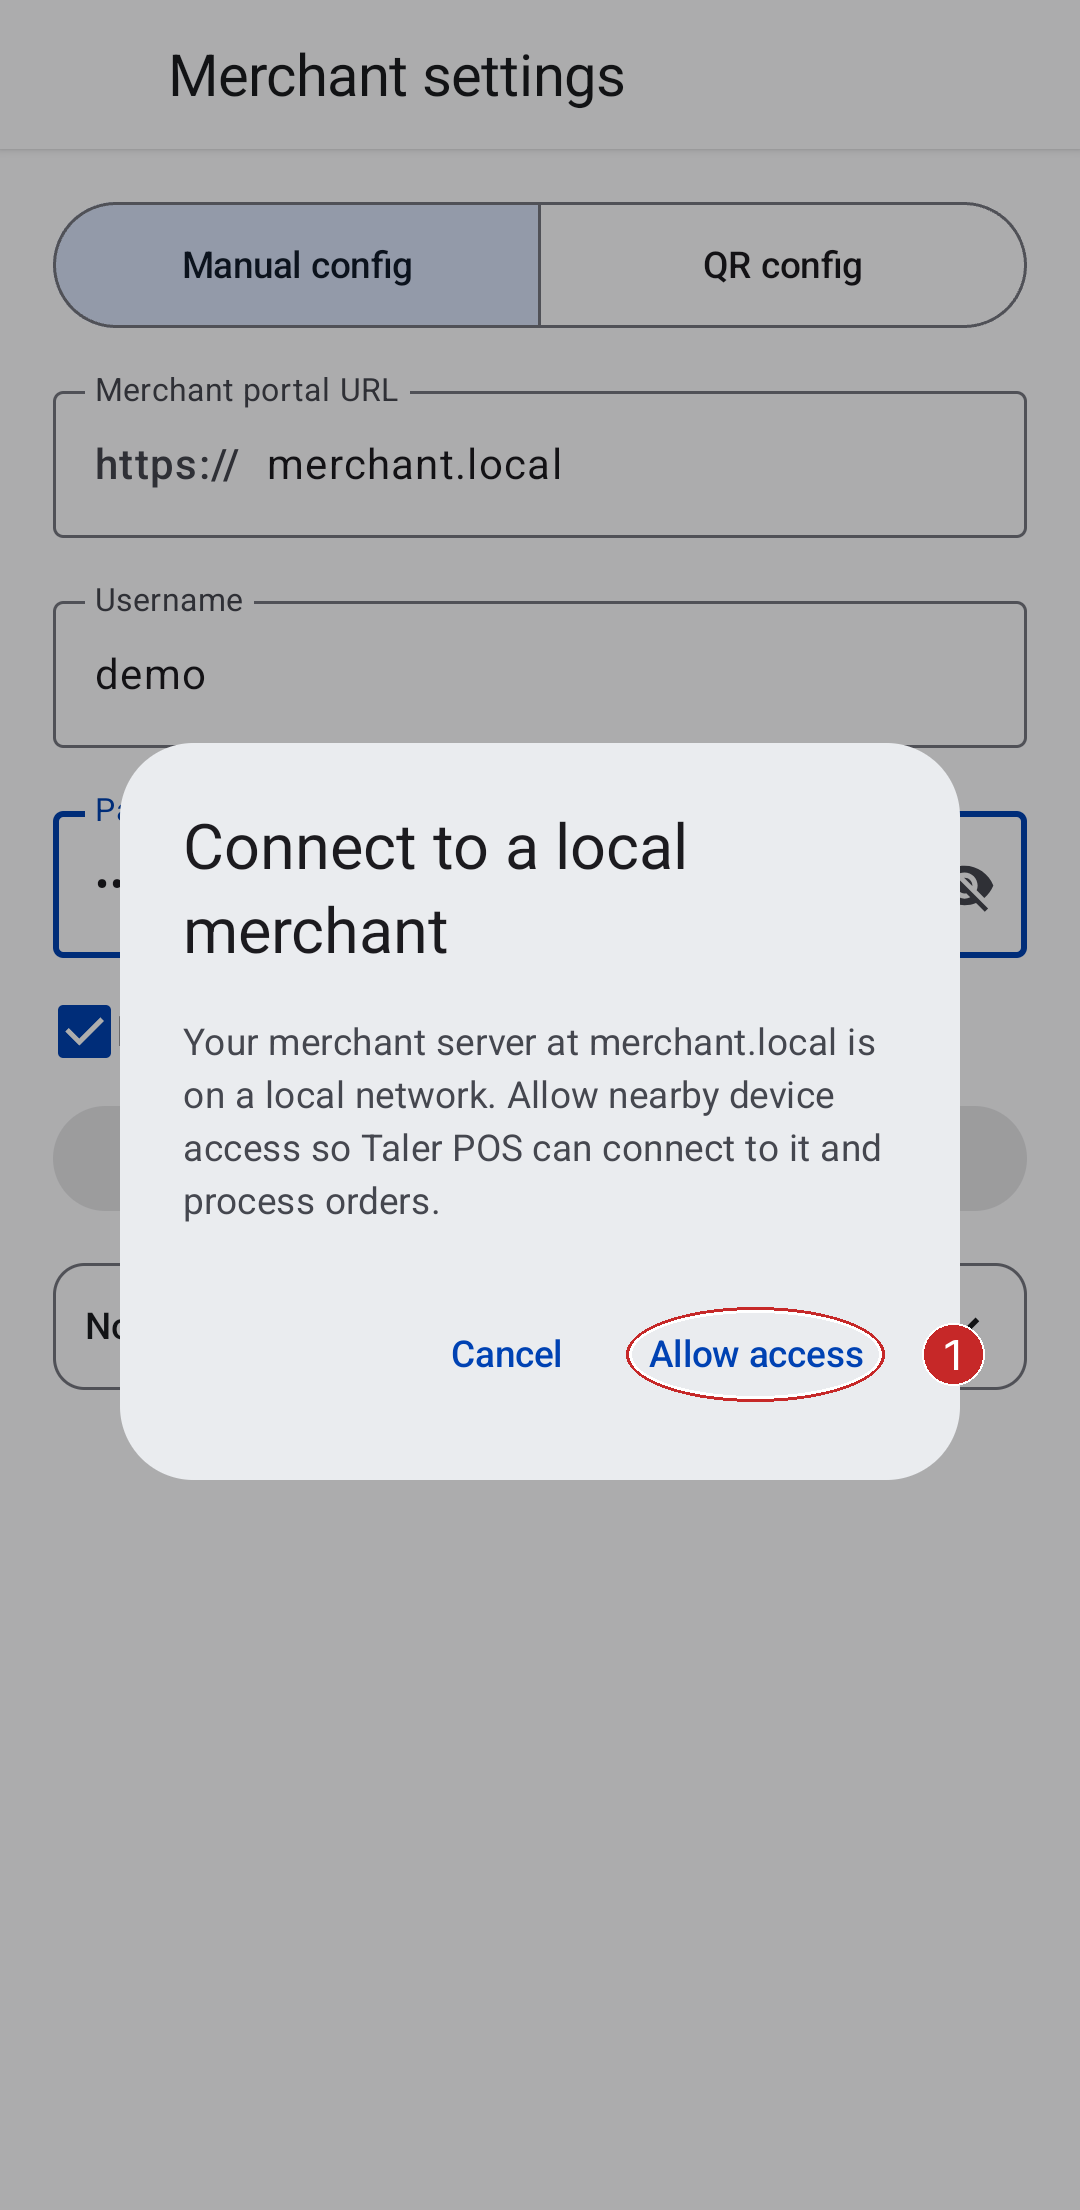
In Taler POS, press Allow access. |
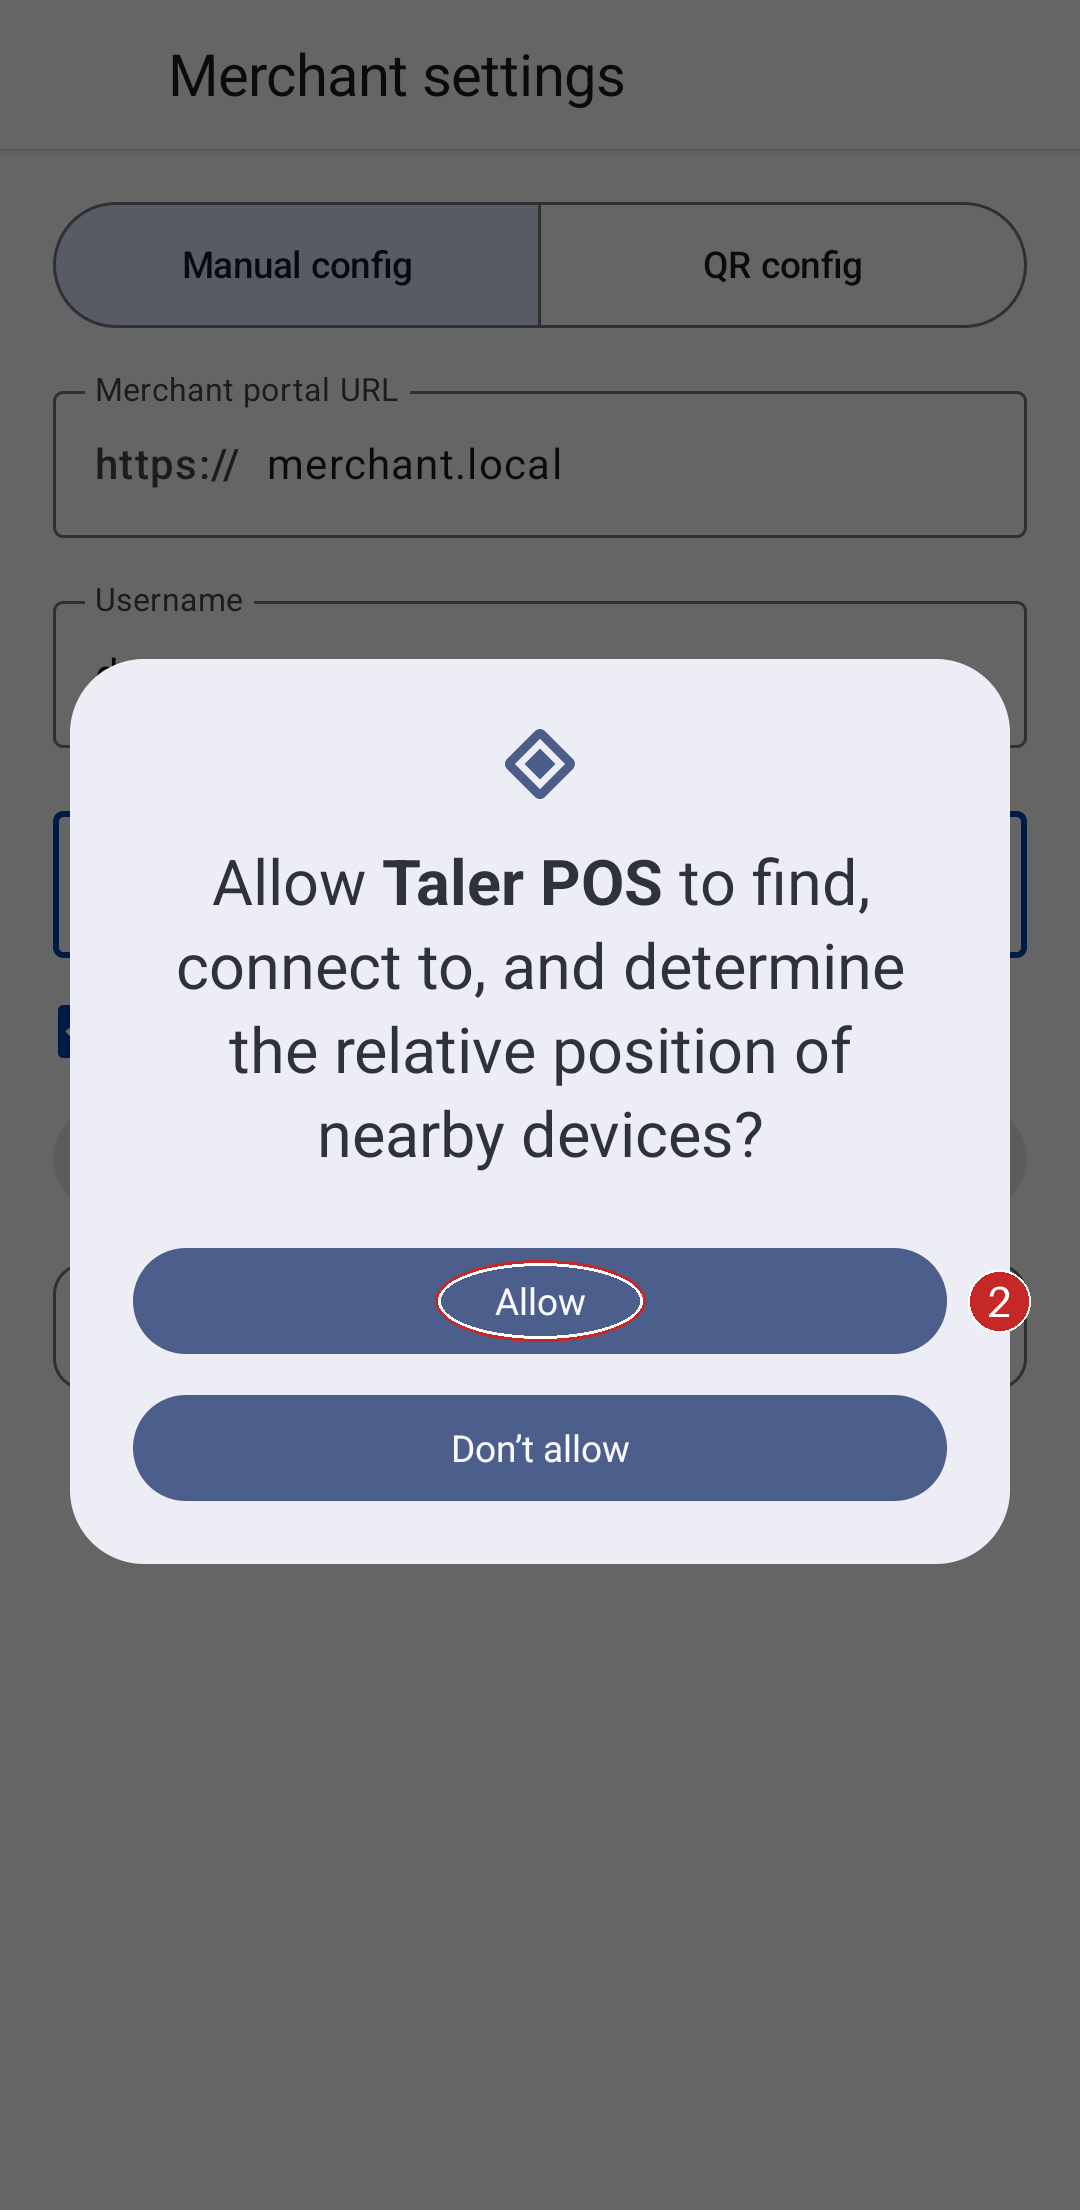
In the Android prompt, press Allow. |
If you previously blocked access, you will need to press Open settings, open Permissions -> Nearby devices, and allow access. Return to the POS to continue connecting.
2.2.3.3. Main navigation#
After a successful sign-in, the main navigation is available. From here, the merchant can create orders, inspect the order history, and handle refunds.

Main navigation after the app is connected to the Merchant Portal.#