2.3.4. Manage Inventory#
TalerBarr can synchronise product and stock information between Dolibarr and the Taler Merchant inventory. This can be done in two ways: from Dolibarr to Taler or from Taler to Dolibarr. Which path is active depends on the choice you made in the previous configuration tutorial, or directly in the configuration card. In any case, you can always verify the currently selected direction on the module home page, as shown below.
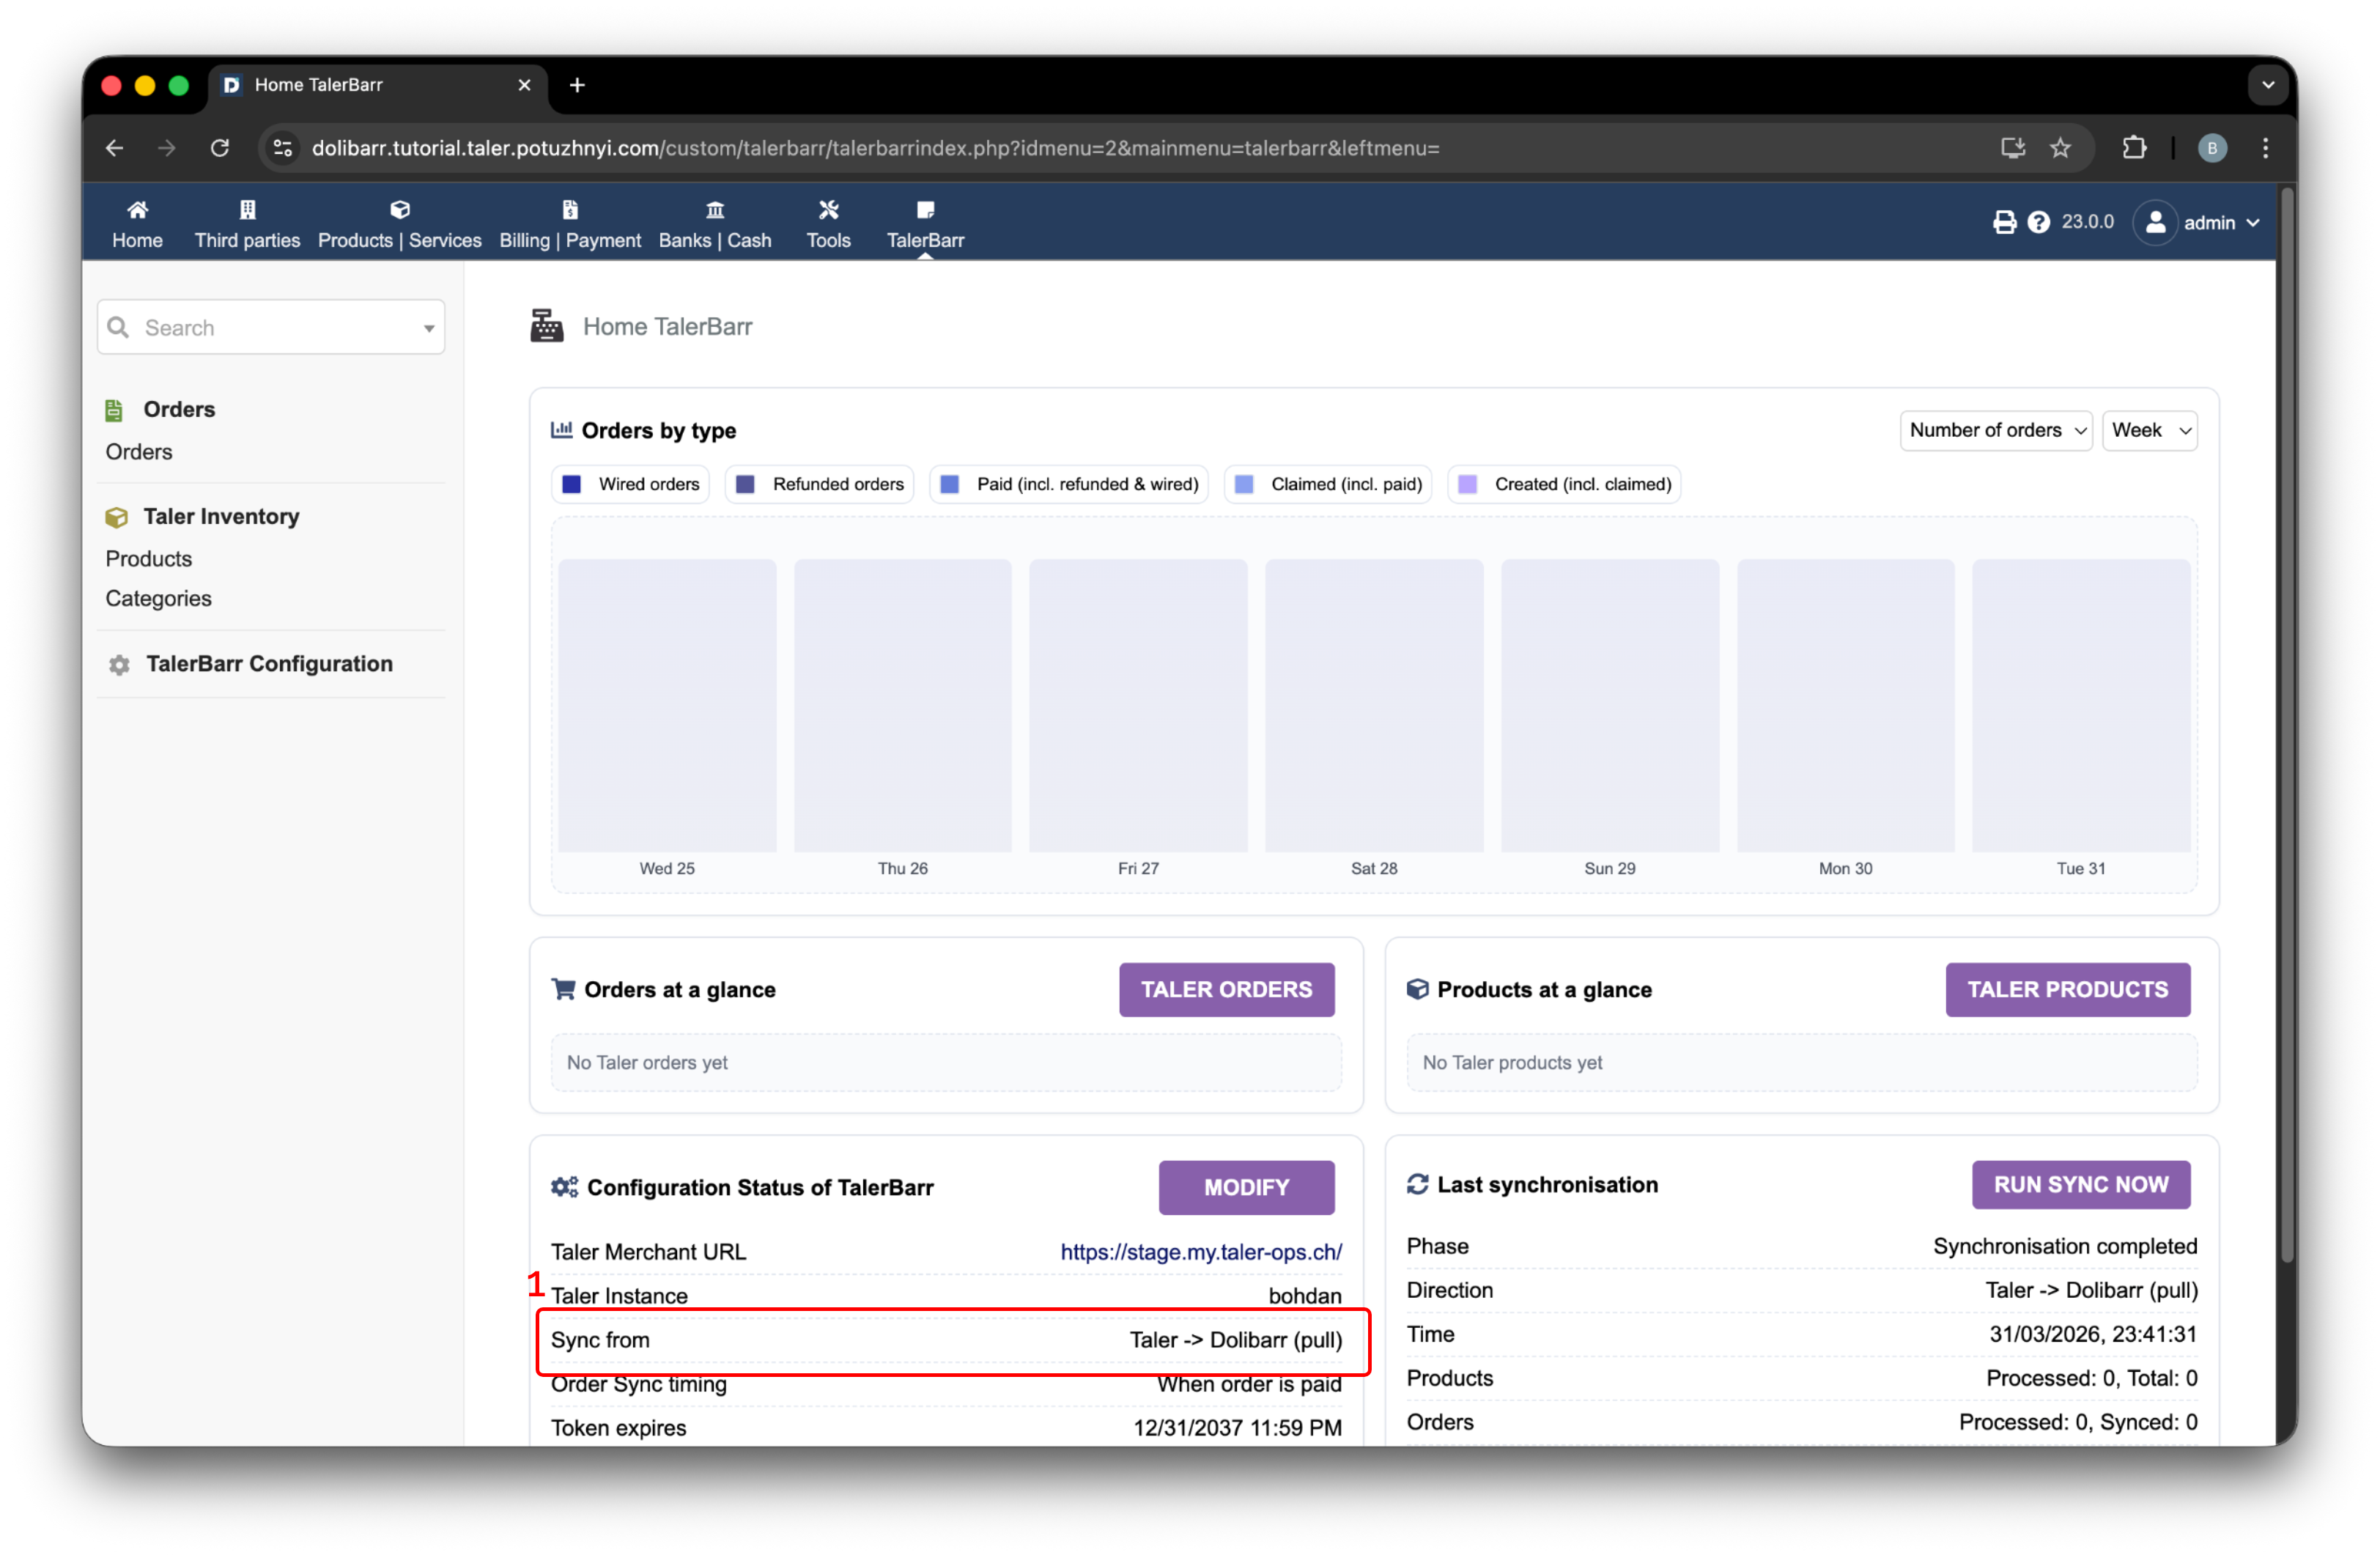
TalerBarr home page with the active synchronisation direction highlighted.#
Please consider this tutorial mainly as a description of how inventory works with the TalerBarr module. For the detailed meaning of Dolibarr and Taler inventory objects, it is always better to consult the original sources, such as the GNU Taler documentation and the Dolibarr Products module documentation.
2.3.4.1. How to operate inventory from Dolibarr#
You should use this flow if your configuration is set to Dolibarr -> Taler. The typical workflow is:
Create or update products in Dolibarr.
Adjust stock levels in Dolibarr.
Open the Taler system and verify that the product is present there.
For example:
Navigate using the top bar to Products | Services.
Press New product.
Fill in the relevant fields.
An example is shown in the next picture. After all fields are filled in, scroll down and press Create.
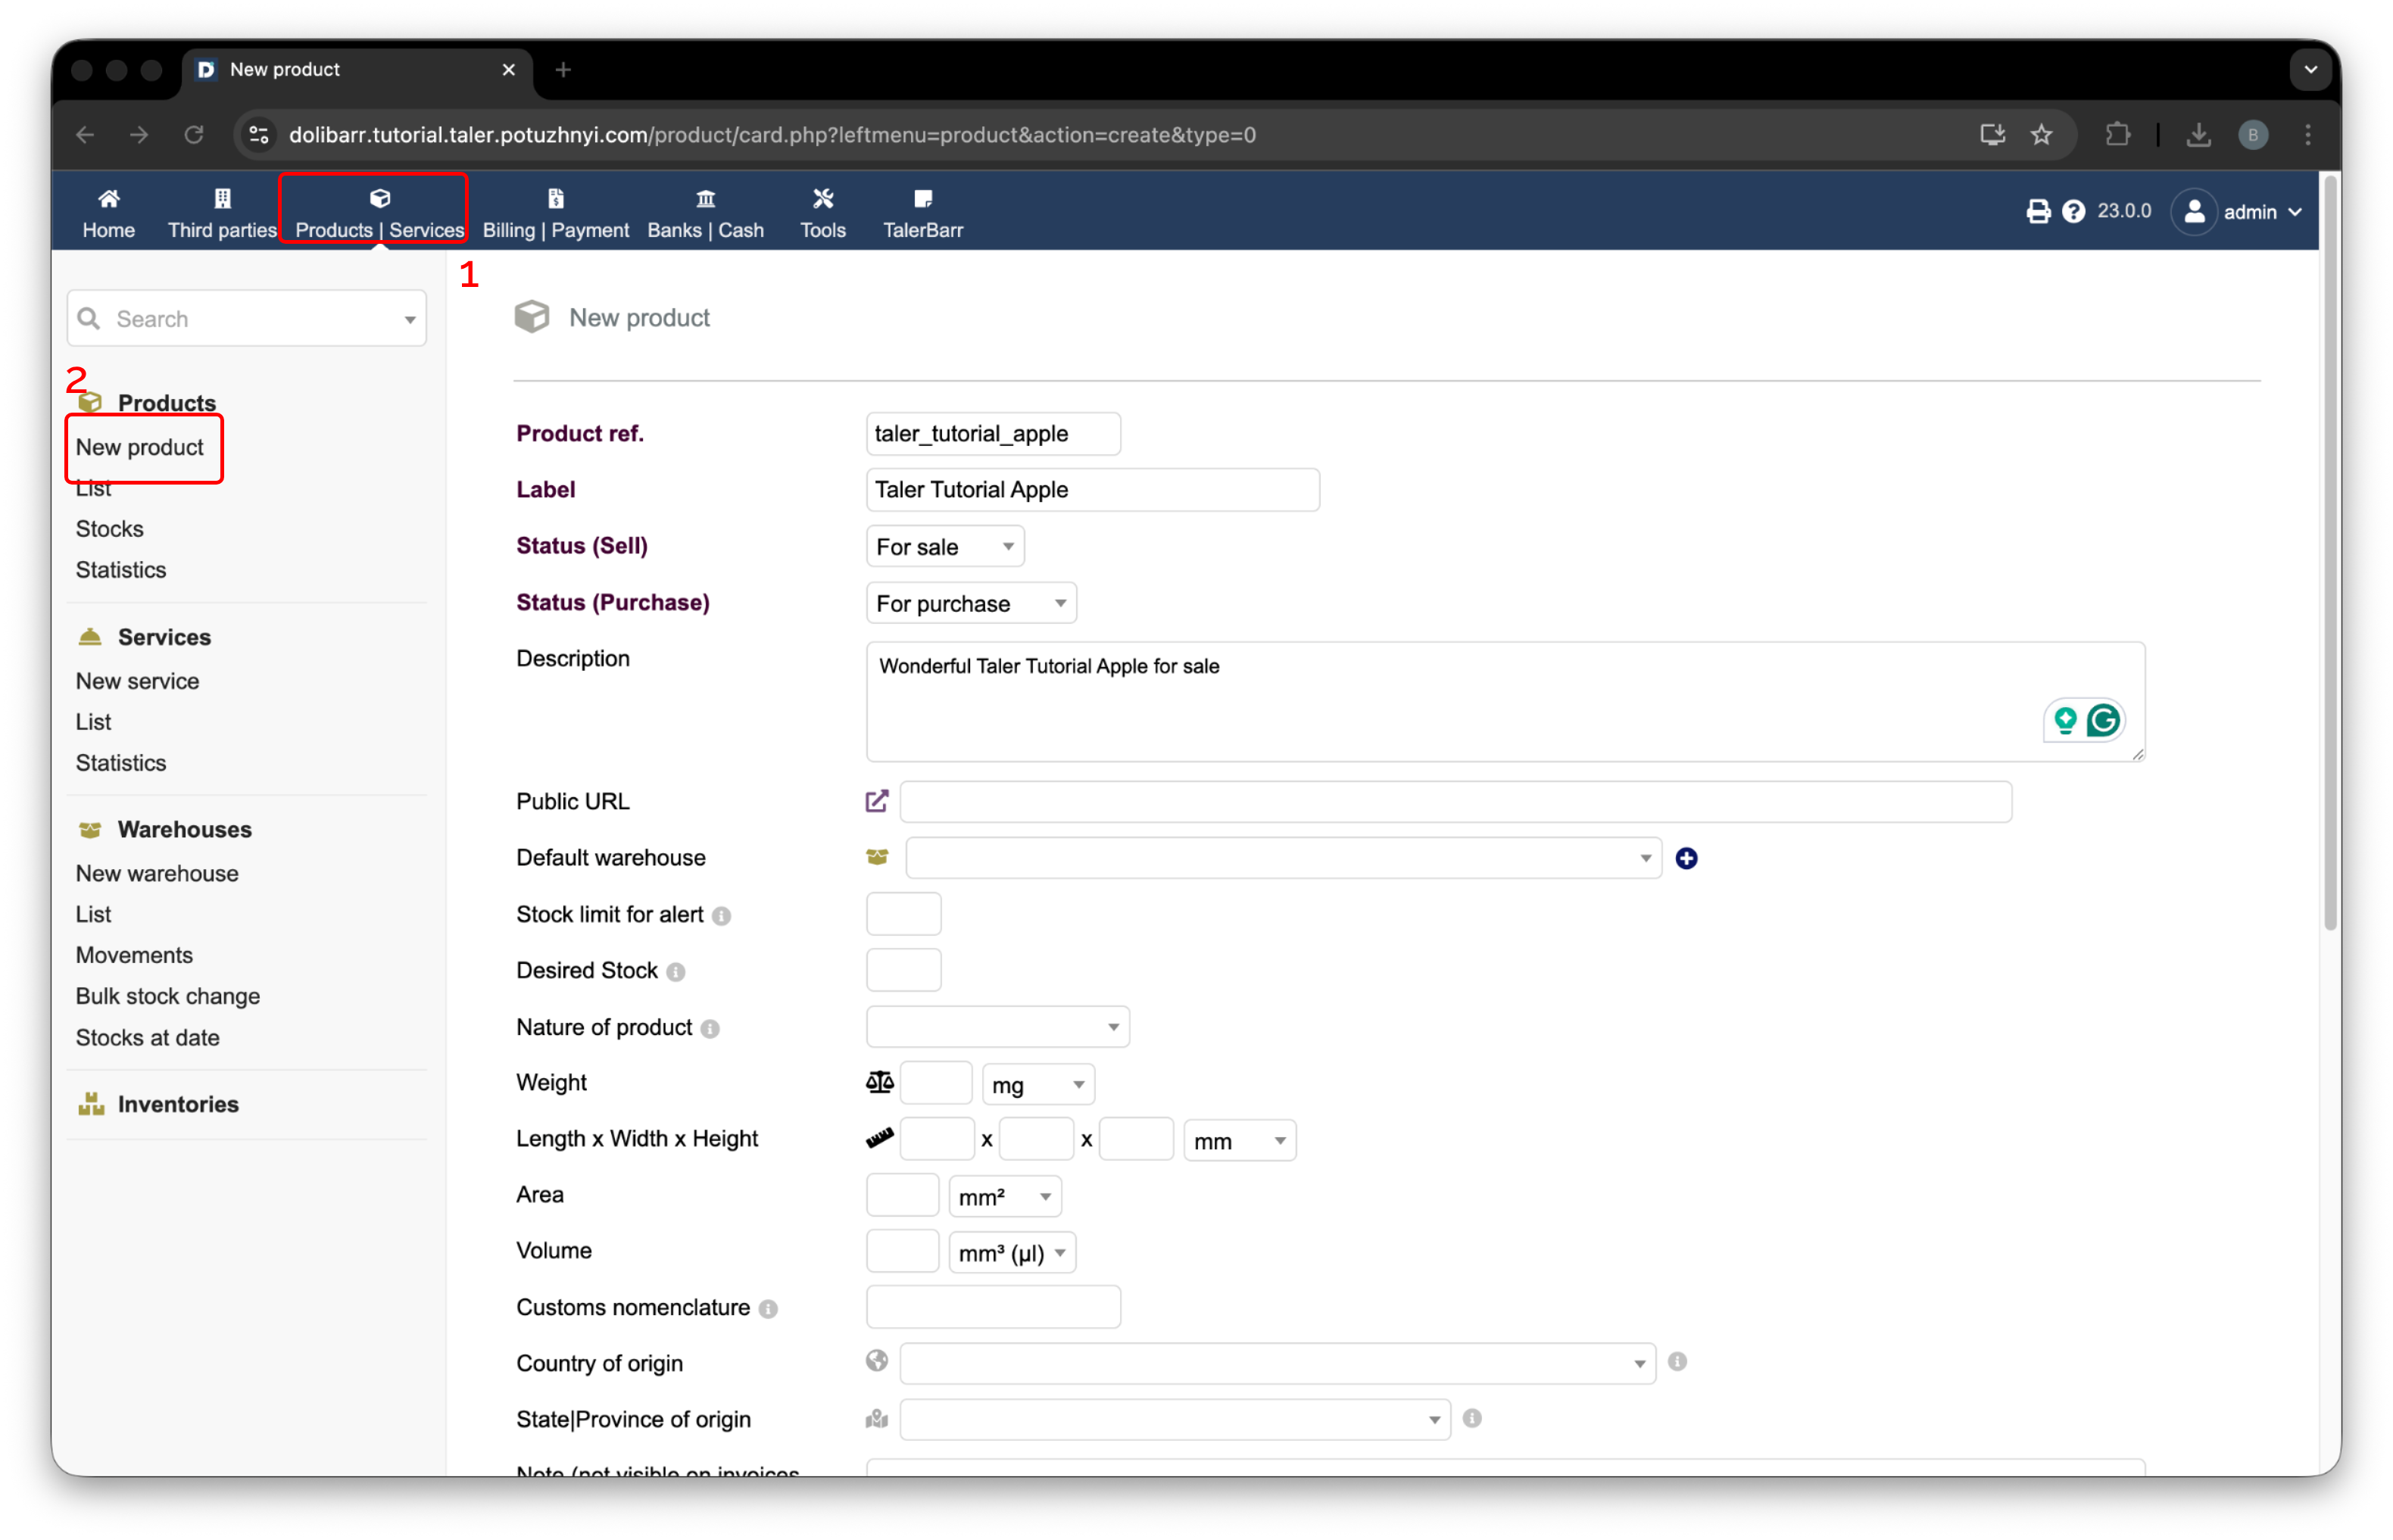
Creating a new product in Dolibarr.#
After you press the button, the product is created in Dolibarr. The TalerBarr module is then triggered, creates the corresponding internal product logic, and sends the product to Taler. After that, the standard Dolibarr product page appears, as shown in the next picture.
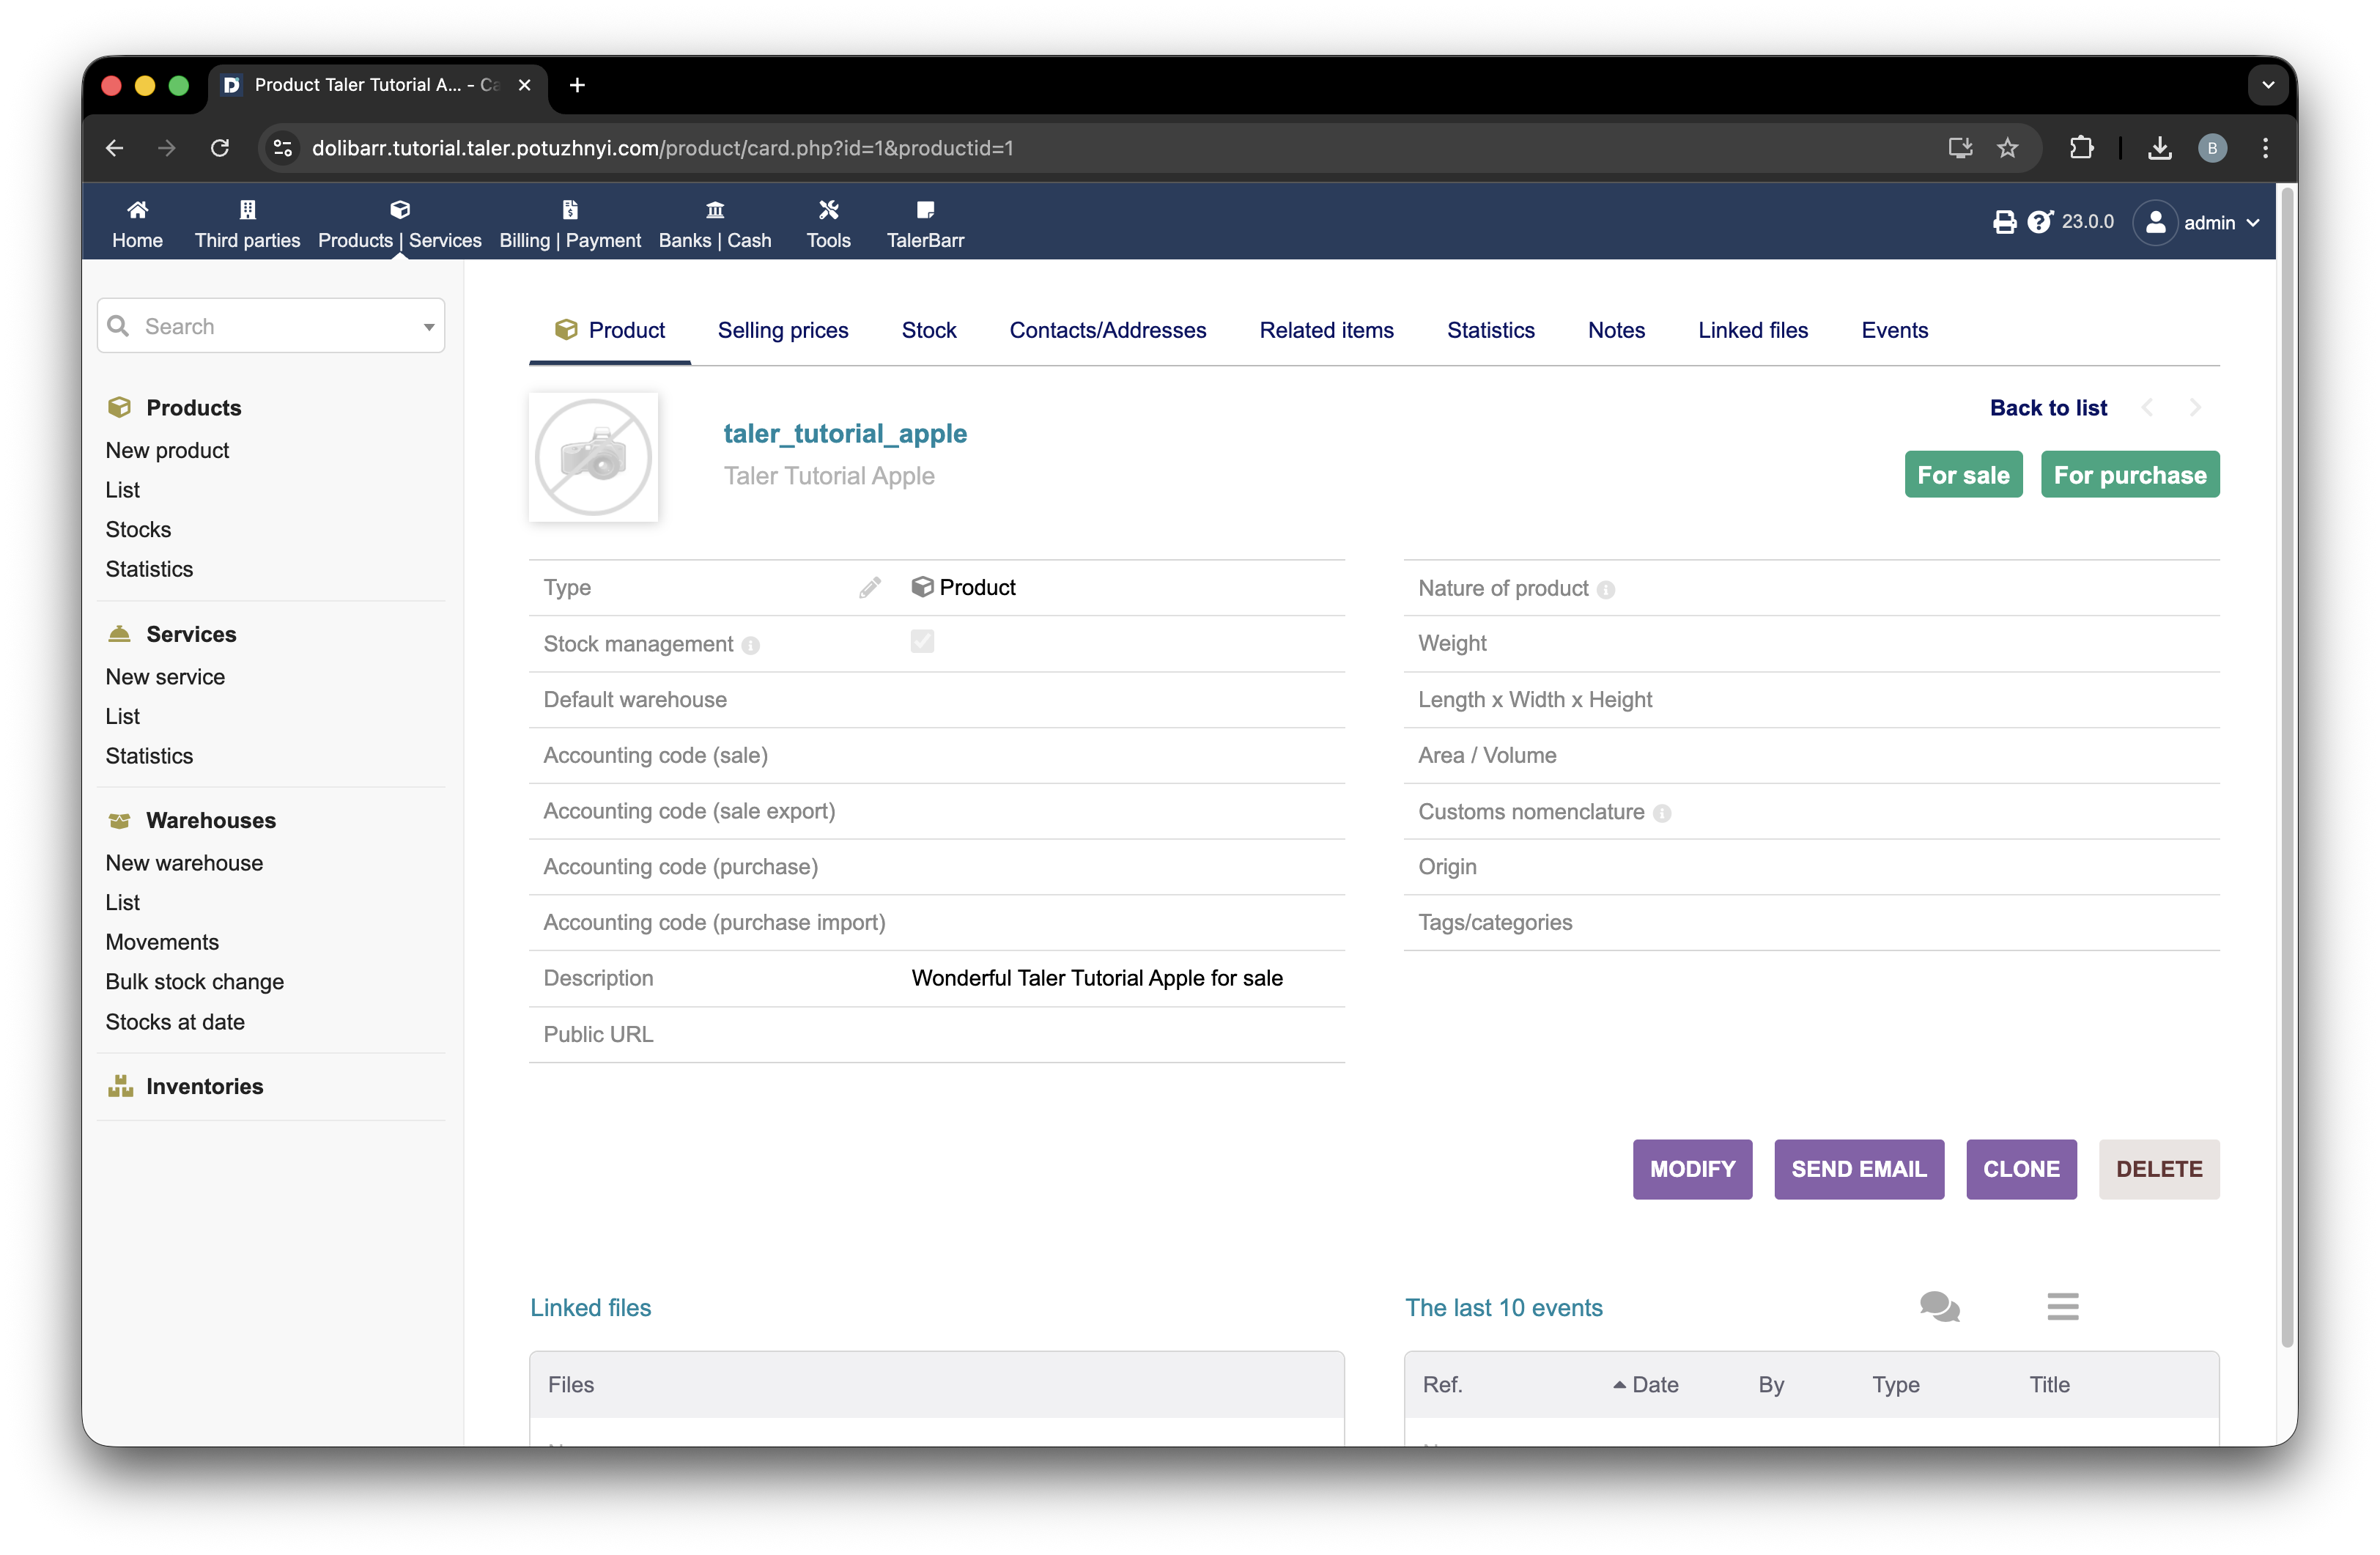
Example product page in Dolibarr after creation.#
To check that TalerBarr has actually processed the inventory, open the TalerBarr module page using label 1 in the next picture. Then open the products list using label 2. The table with all processed products appears there. By pressing label 3, you can open the individual product page.
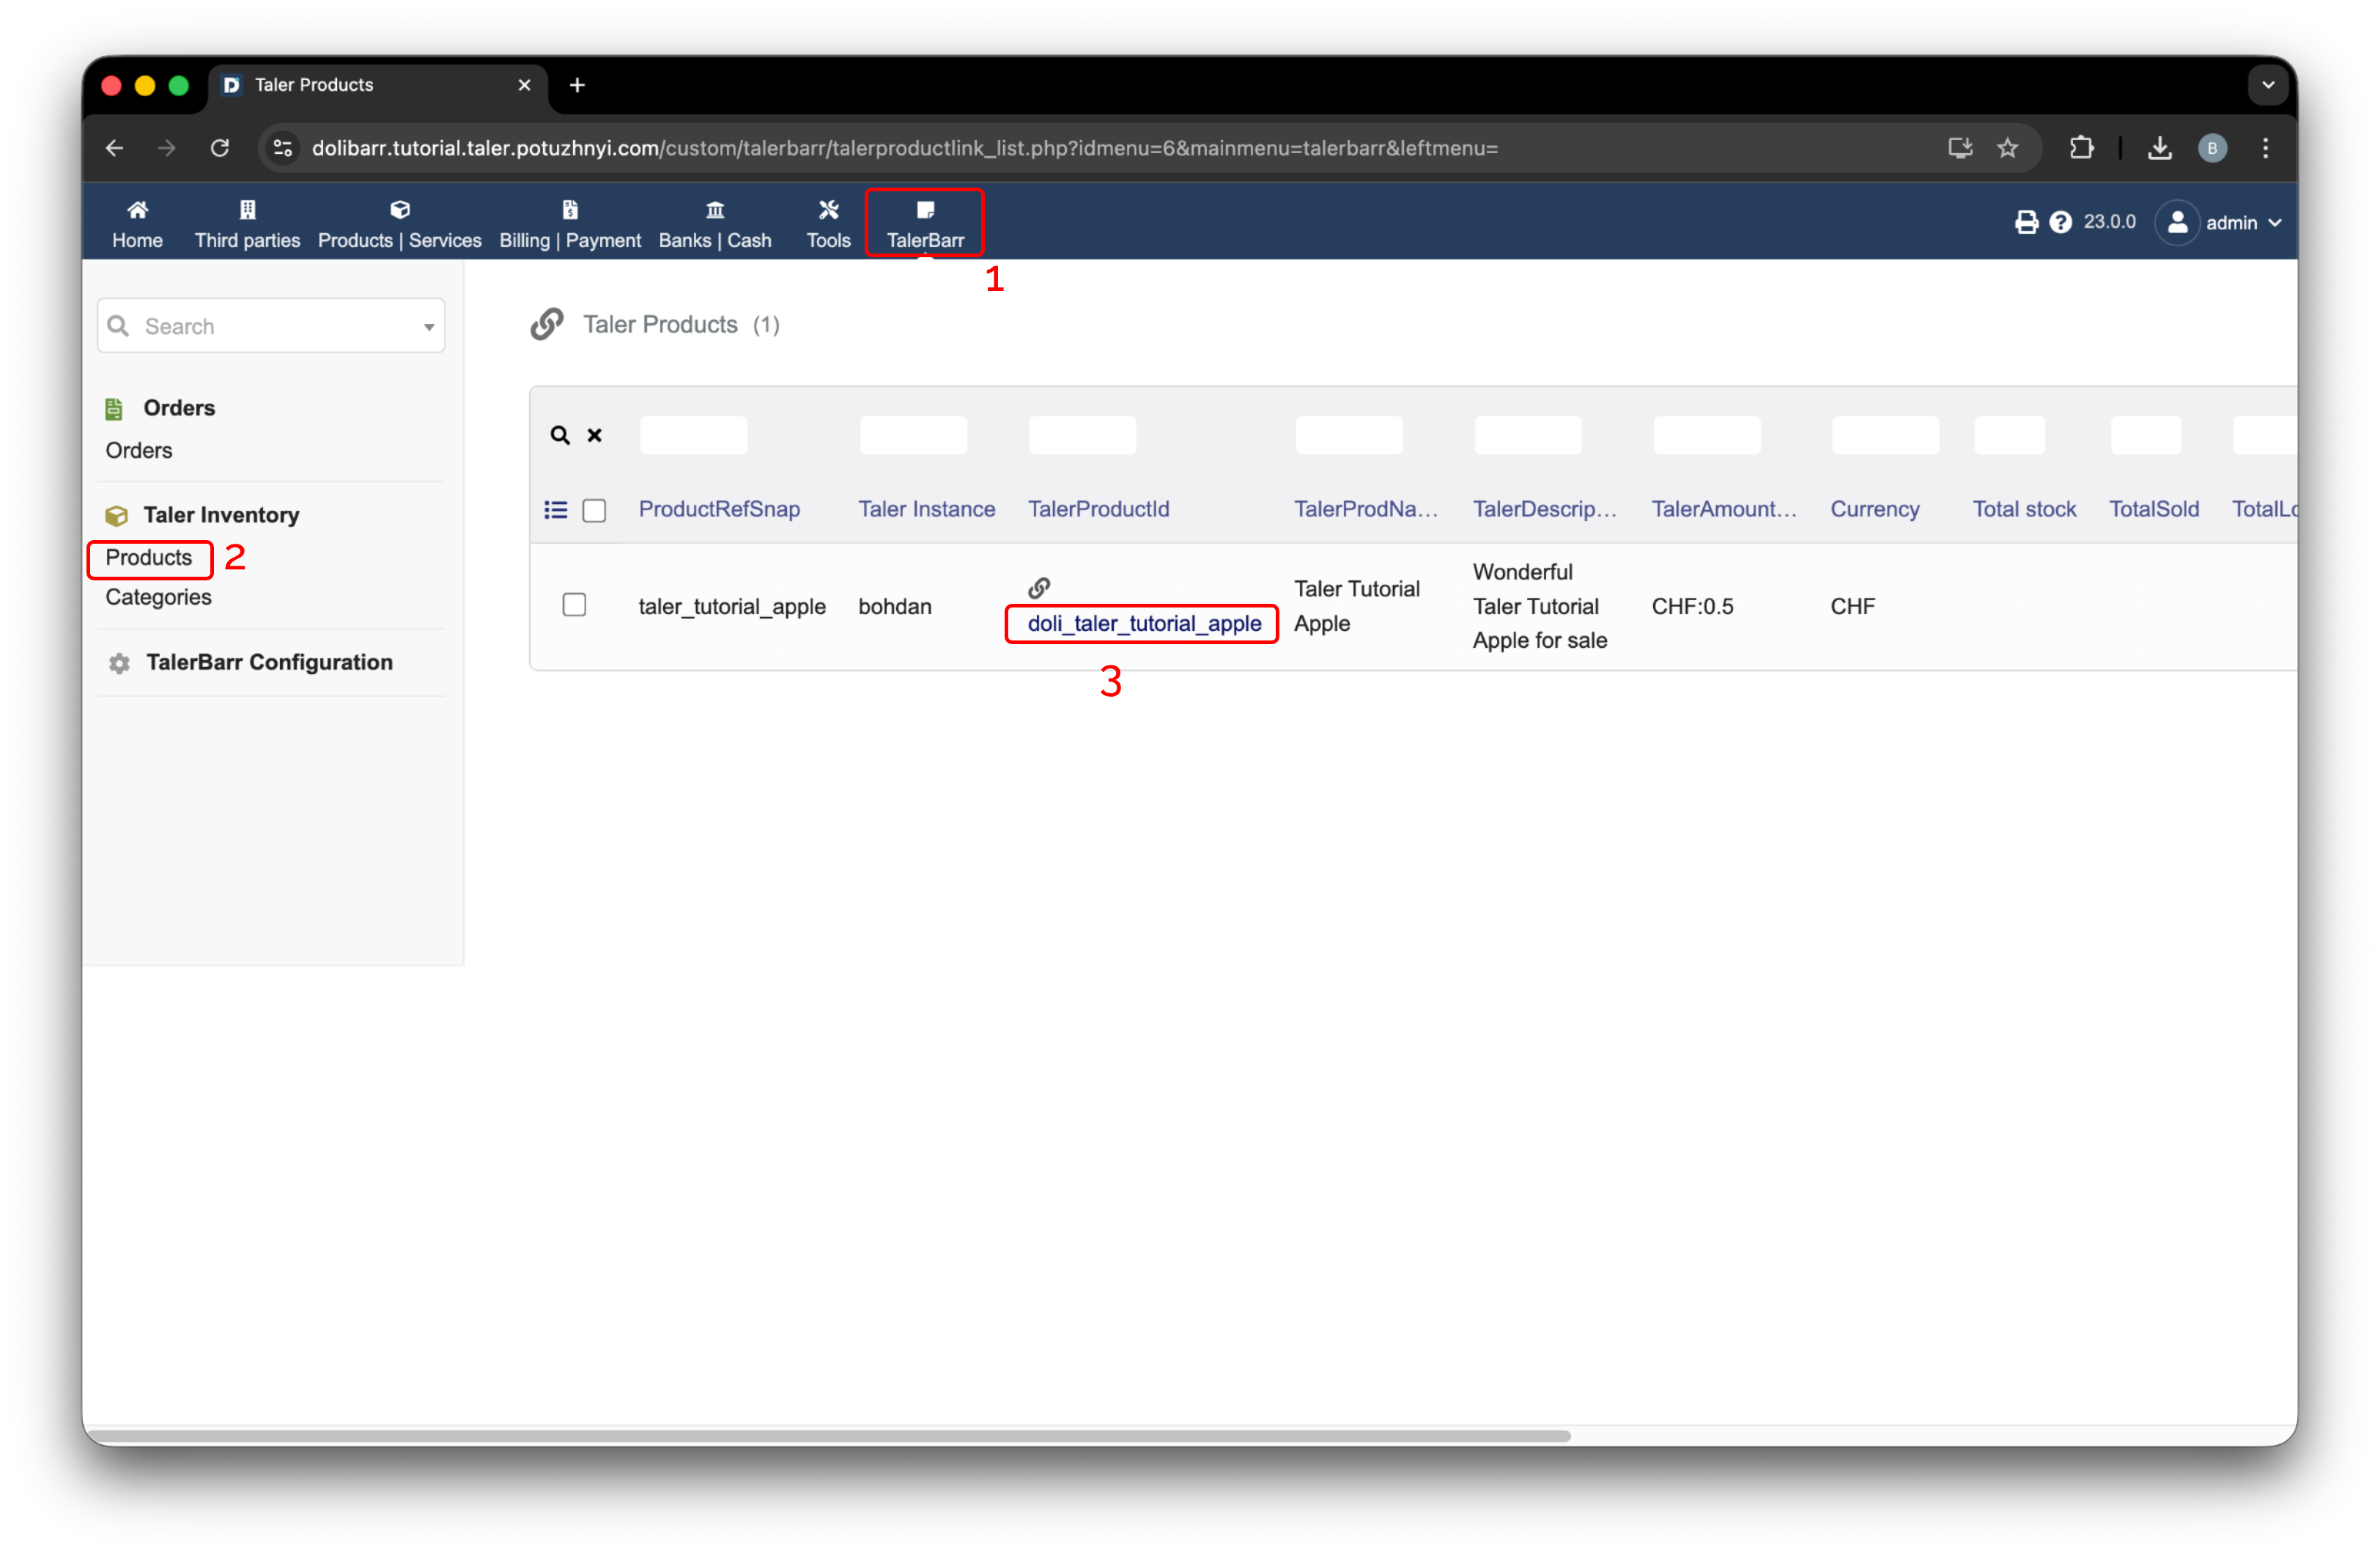
TalerBarr products list.#
After clicking it, a new screen opens. An example for the previously created product is shown below.
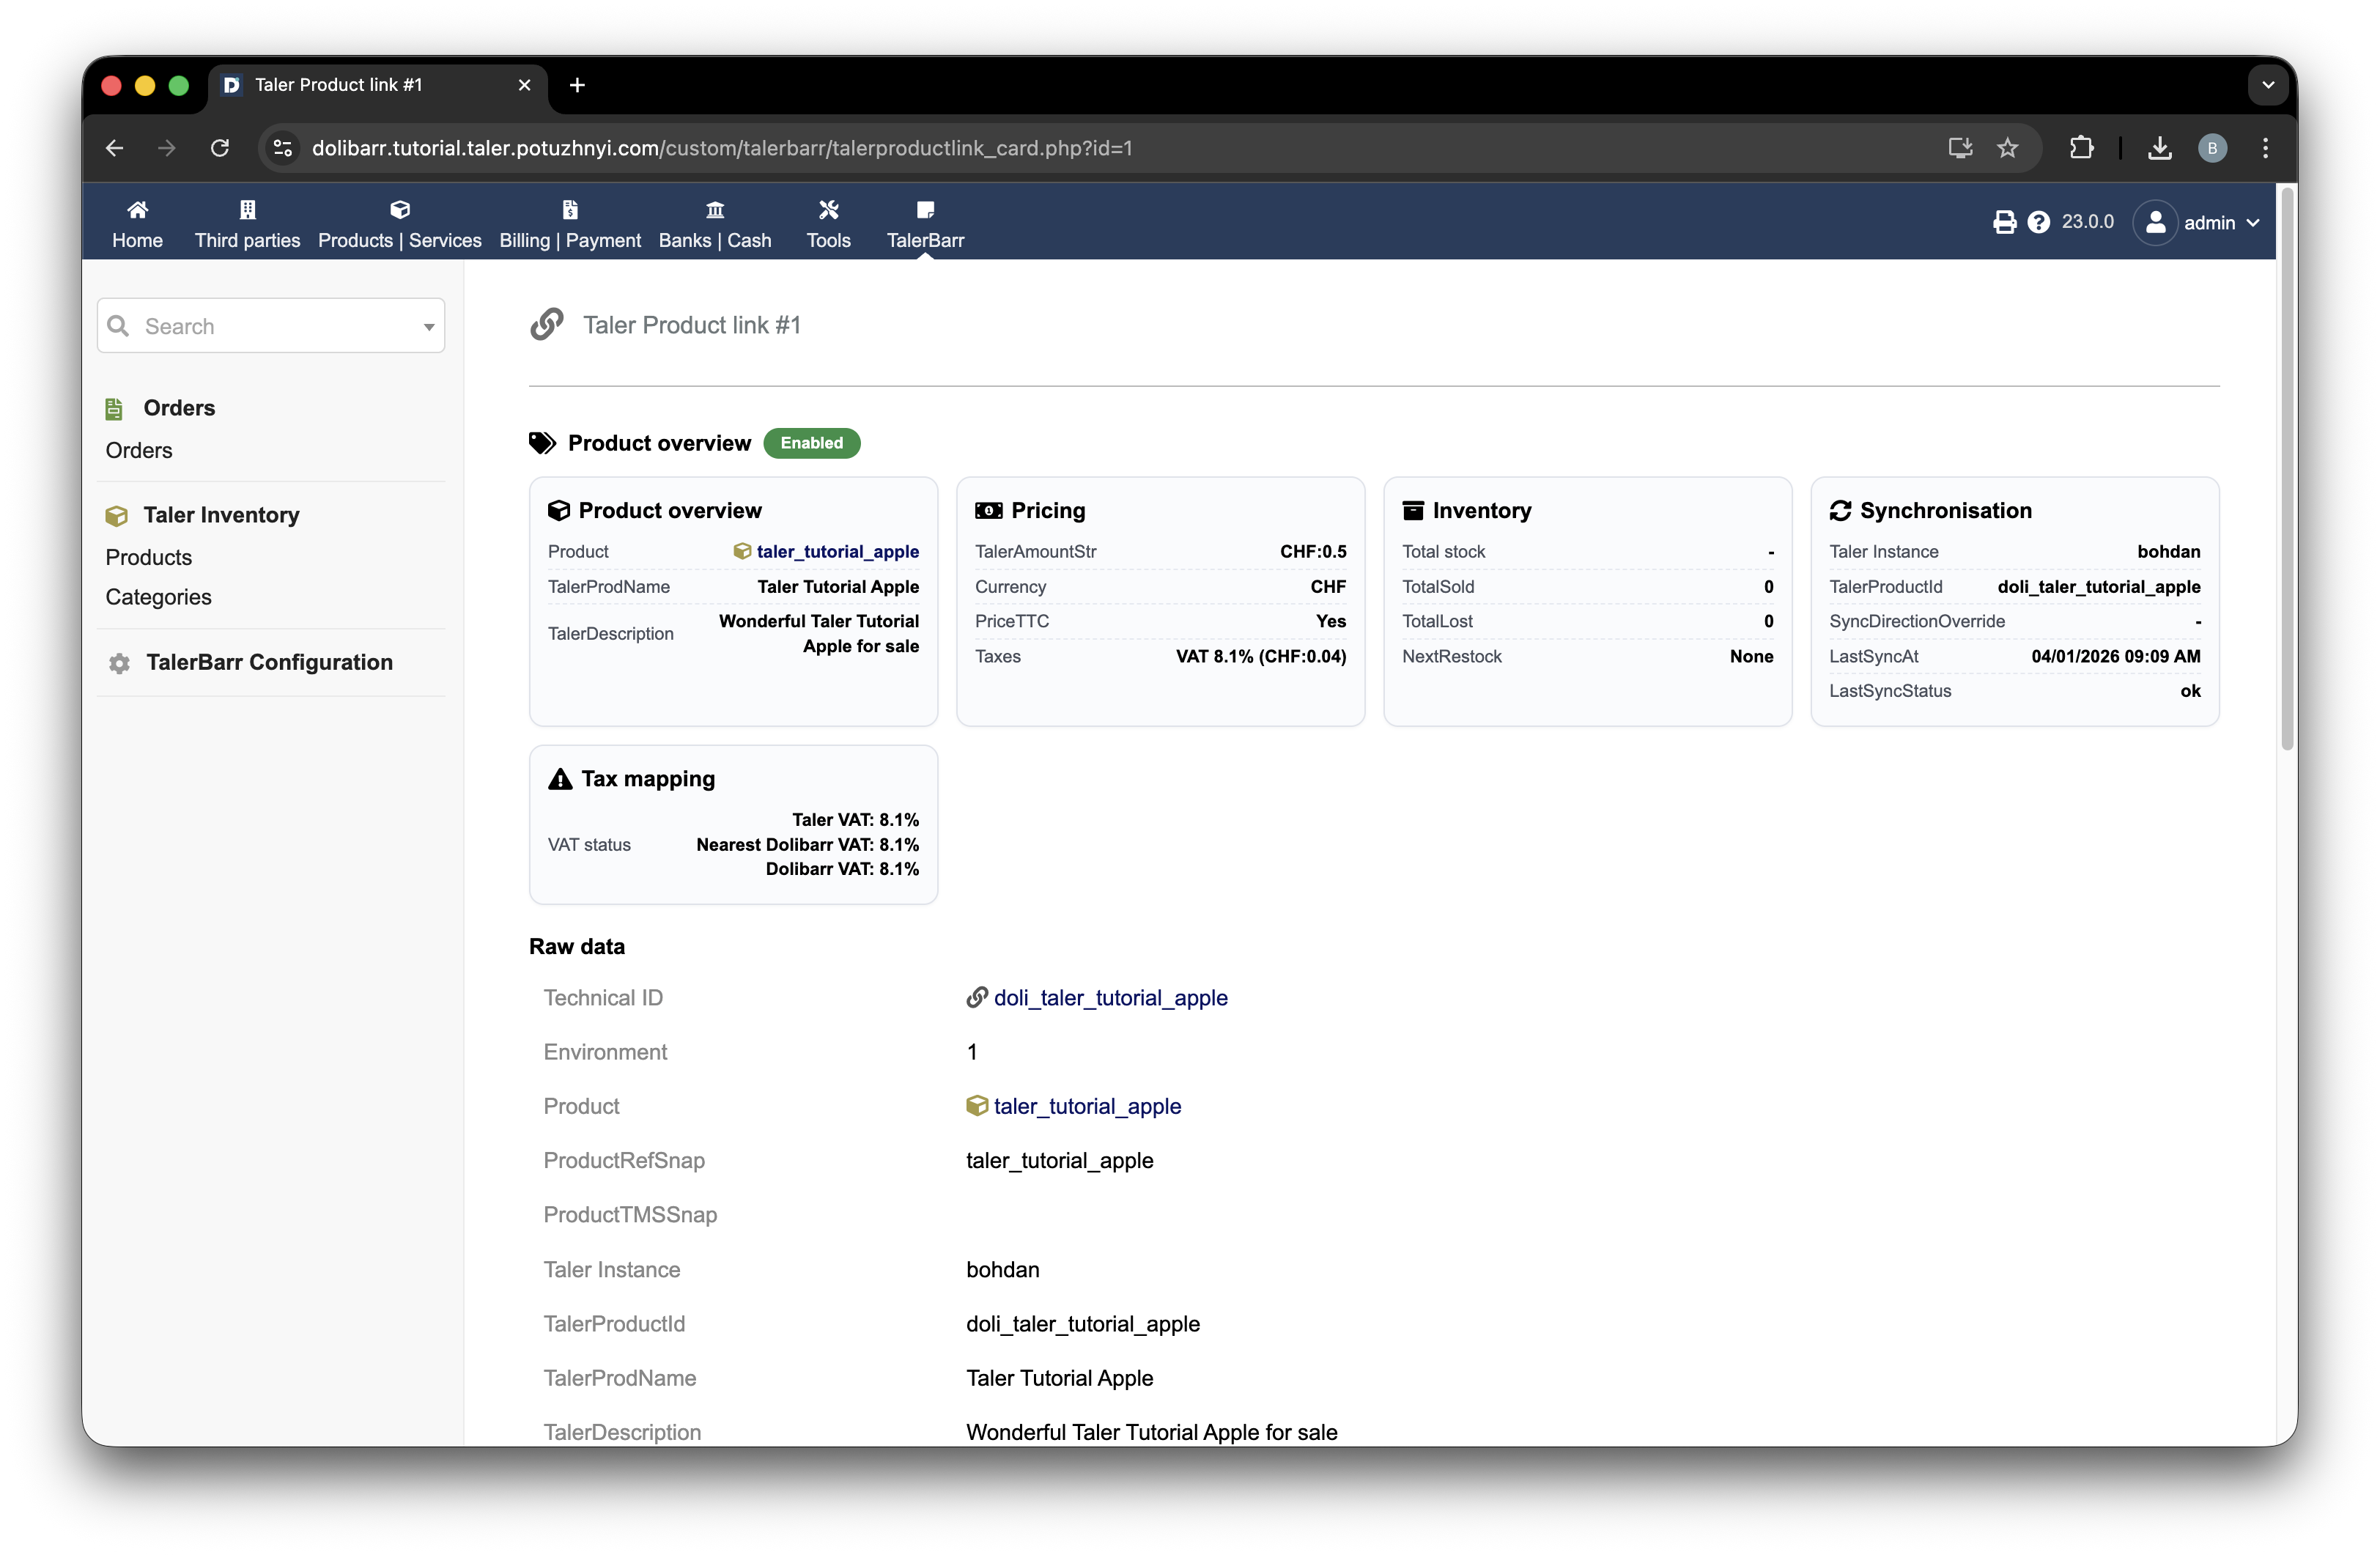
TalerBarr product card for the processed product.#
At this point, you can navigate to Taler Merchant and find the same product there.
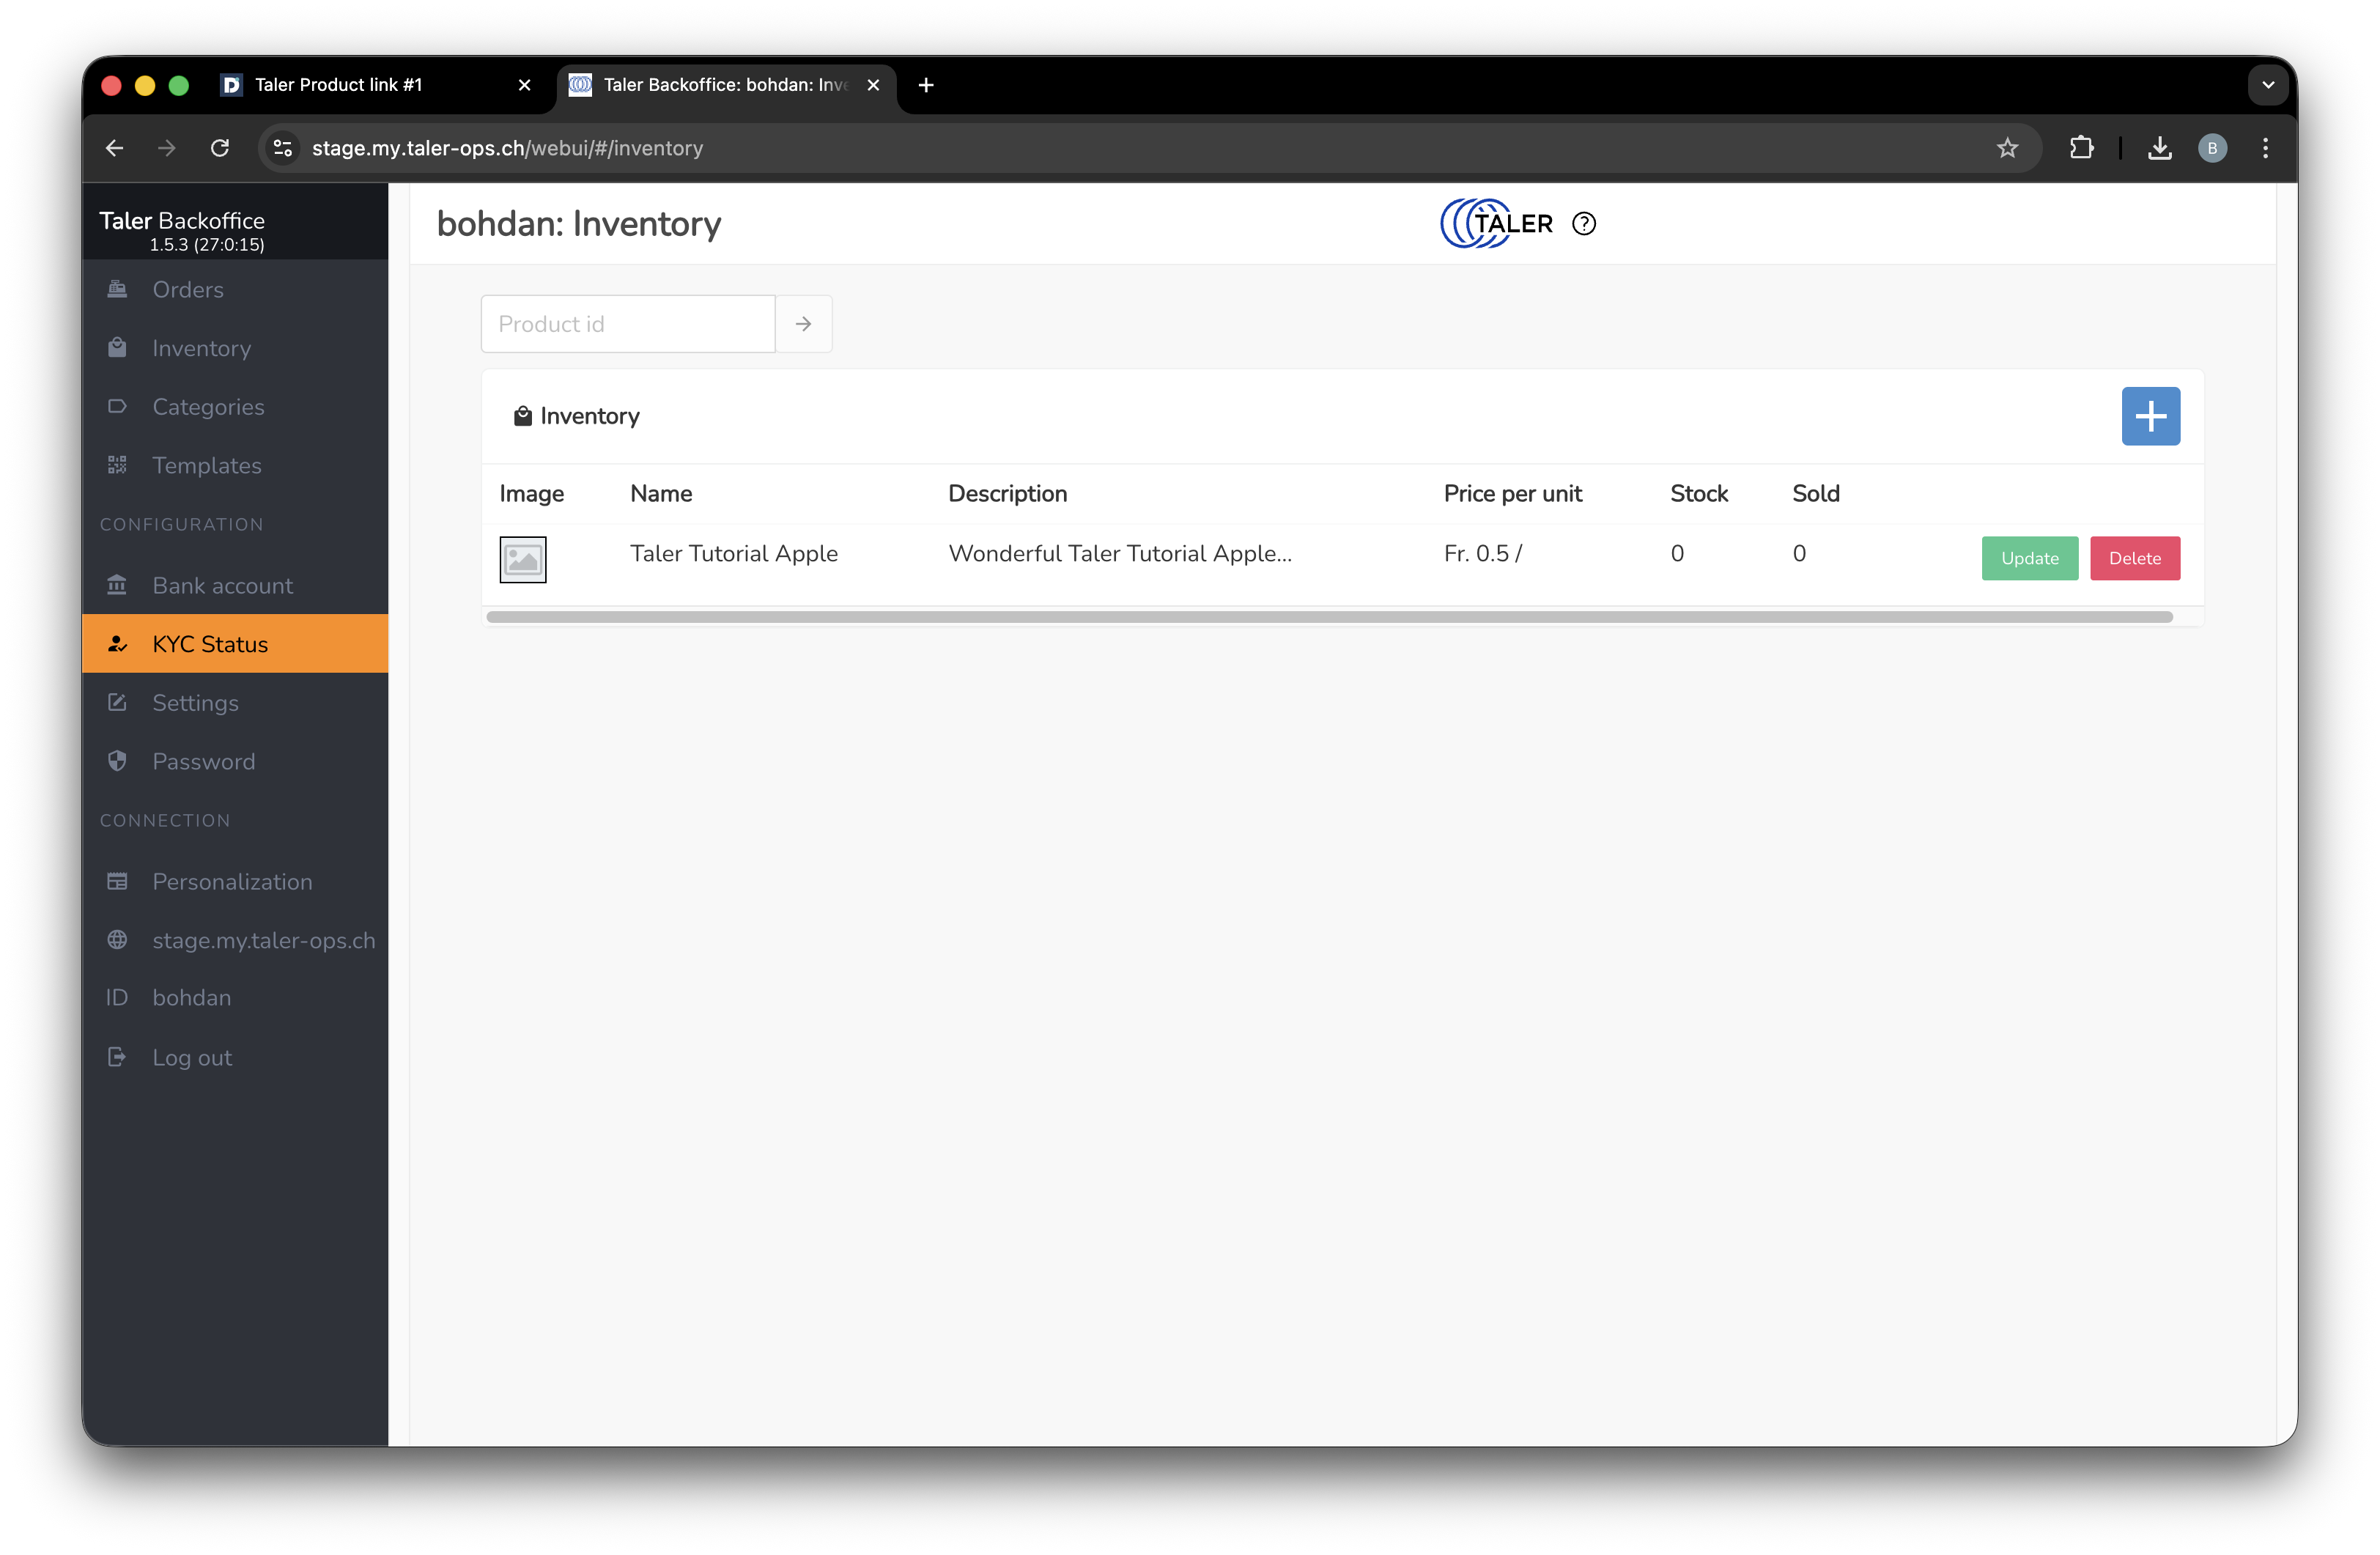
The same product visible in the Taler Merchant inventory list.#
2.3.4.2. How to operate inventory from Taler#
Before starting this flow, make sure that your configuration is set to Taler -> Dolibarr.
Afterwards, navigate to the Taler product creation page.
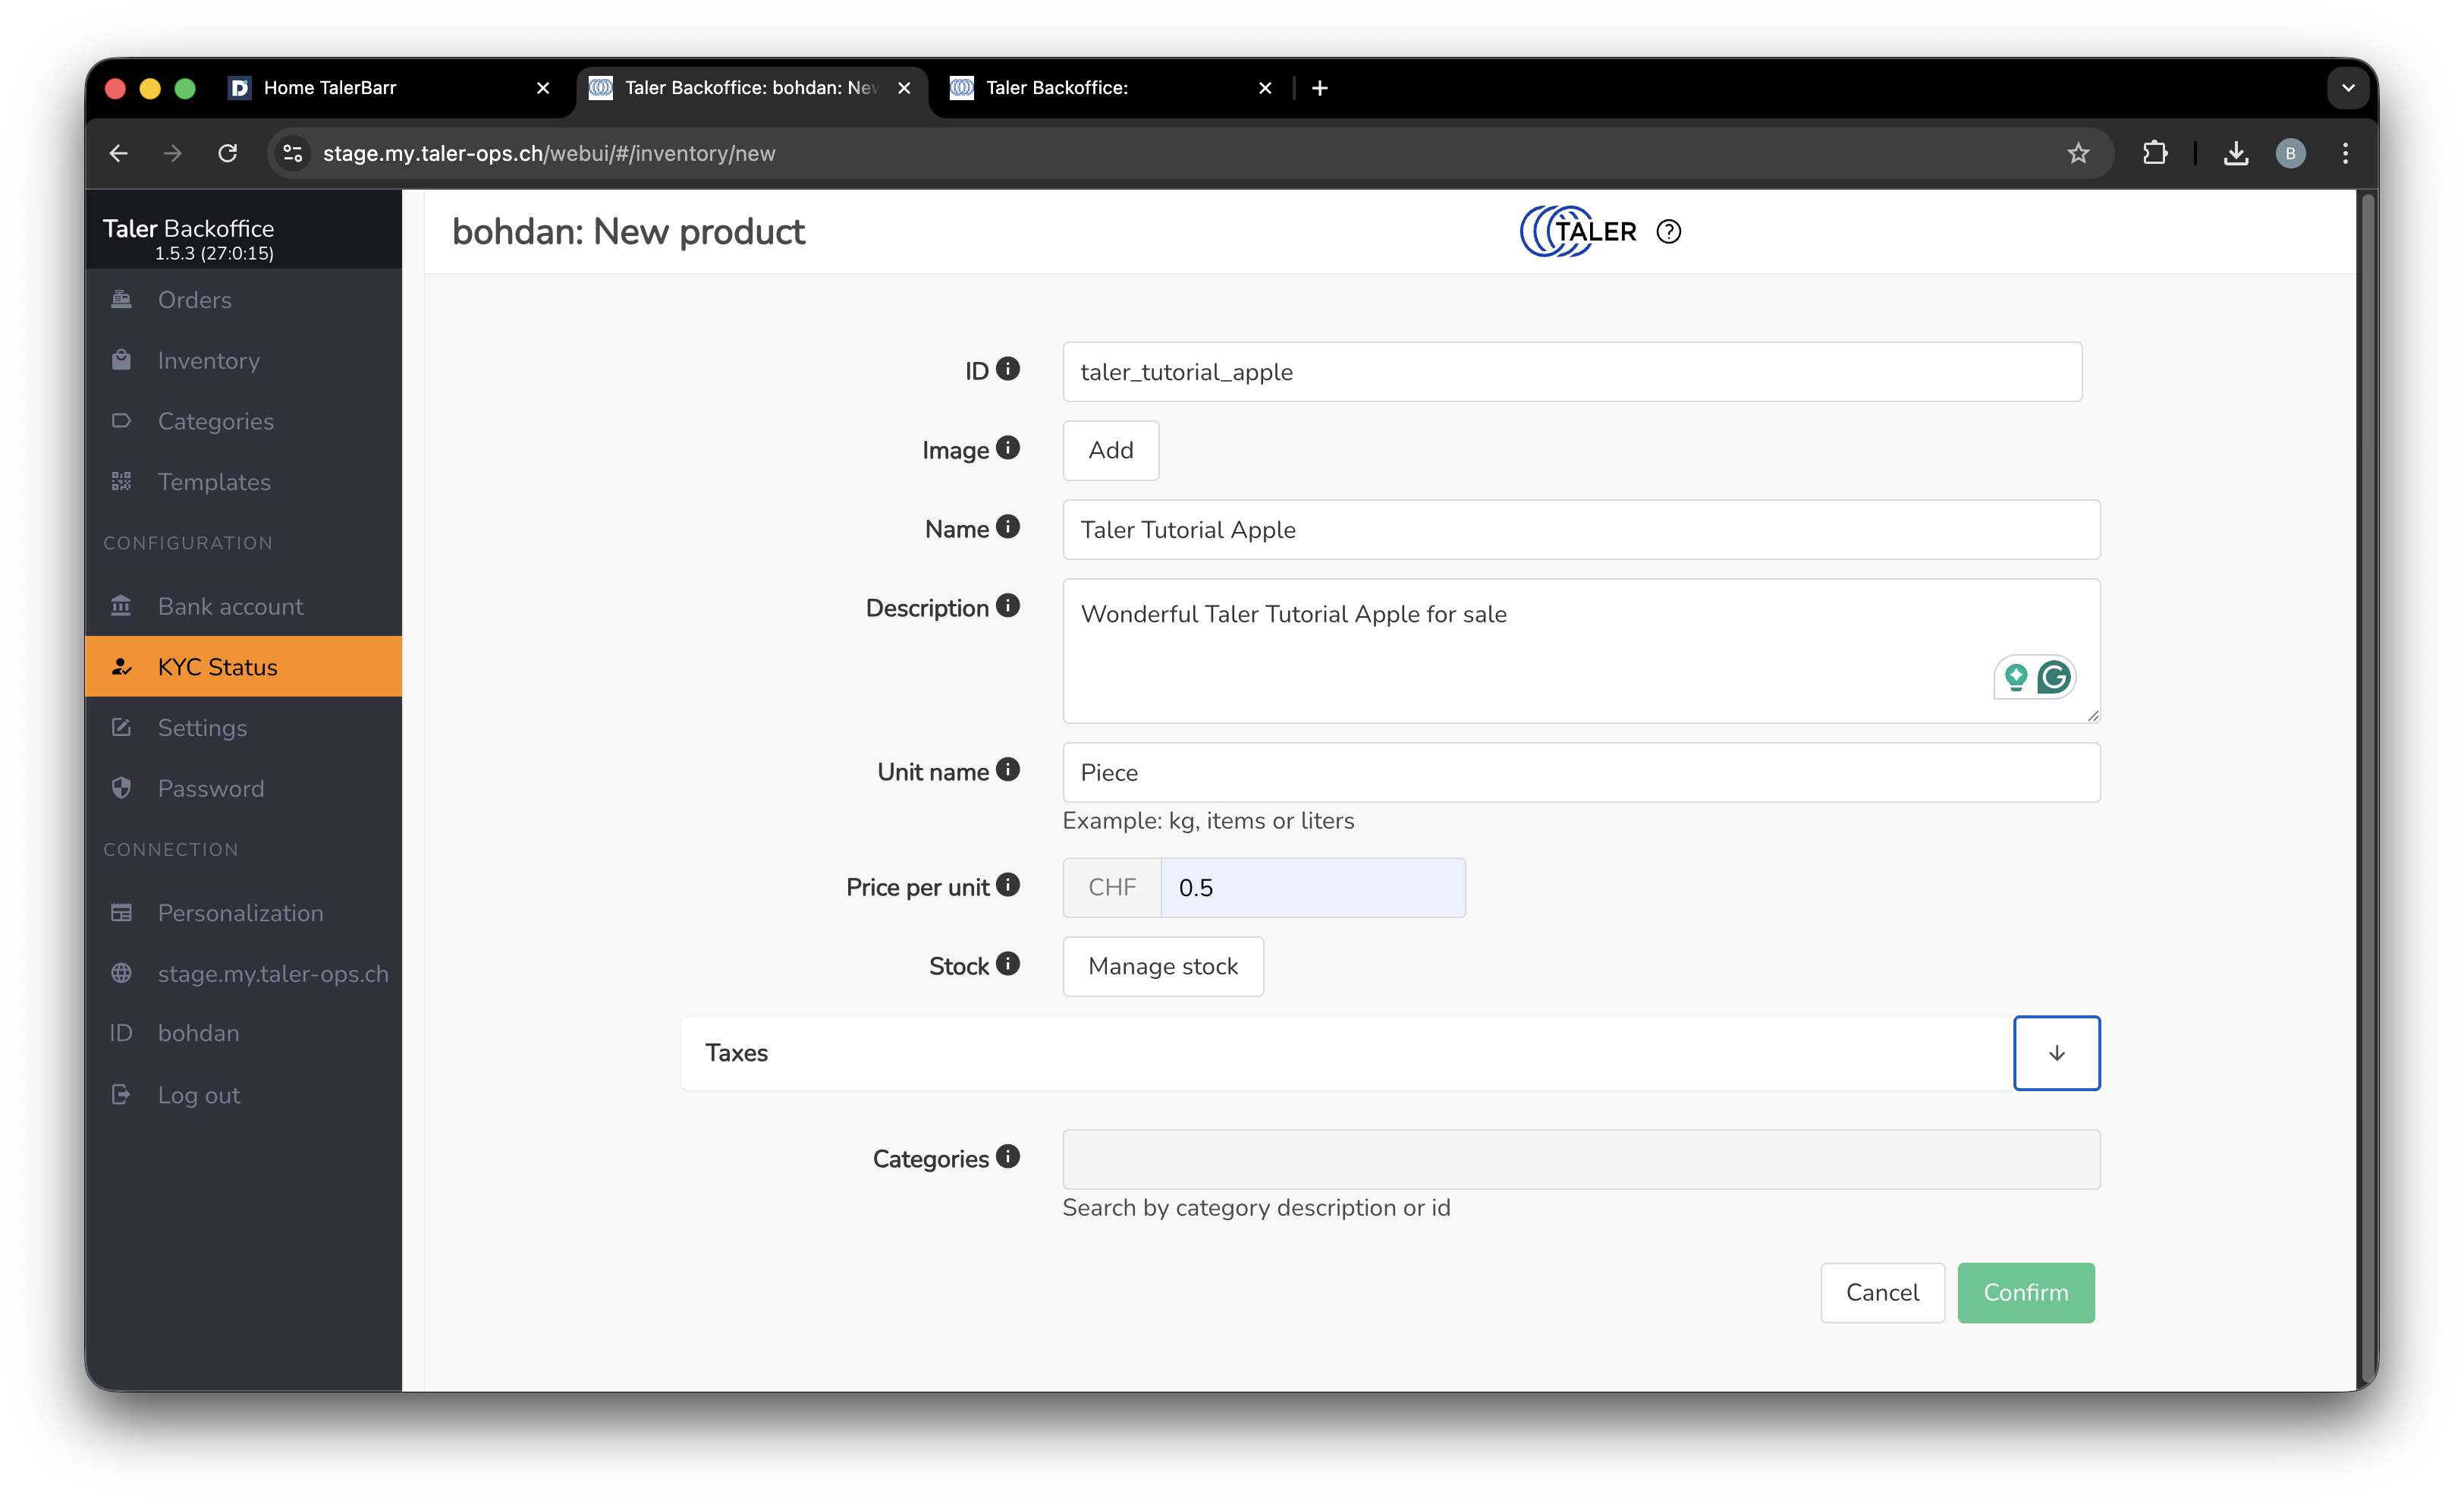
Creating a product on the Taler side.#
After you save the product, you can navigate to the TalerBarr products list page in Dolibarr, where you will find the newly created product. The screens are the same as in the module inventory products view shown in the previous subsection.
2.3.4.3. What TalerBarr synchronises and how it works#
The module tracks product links between both systems and keeps relevant inventory information aligned, including:
Product identity
Product name
Price
Stock quantity
Items sold
Items lost
Taxes
Inventory synchronisation is not only a manual action. Based on the module design and implementation reports, TalerBarr uses several mechanisms together:
Dolibarr-side triggers and the Taler webhook service are used to listen for inventory-related changes and process the relevant updates on the connected system.
A manual Run sync now action on the TalerBarr home page allows the merchant to force an immediate sync.
A daily background cron re-check helps recover from missed events or temporarily failing connections.
In simple terms, this means that synchronisation is normally event-driven during the day, while periodic background verification helps make sure that both systems remain aligned even if an error happens on one side.
2.3.4.4. Next step#
Once product synchronisation works, continue with Manage Orders to test the order workflow.