2.3.3. Konfigurácia TalerBarr#
Pri prvom otvorení TalerBarr modul skontroluje, či už existuje platná konfigurácia obchodníka. Pri novej inštalácii zvyčajne ešte nie je uložená žiadna konfigurácia, takže TalerBarr vás automaticky presmeruje na konfiguračnú stránku, ako je zobrazené nižšie.
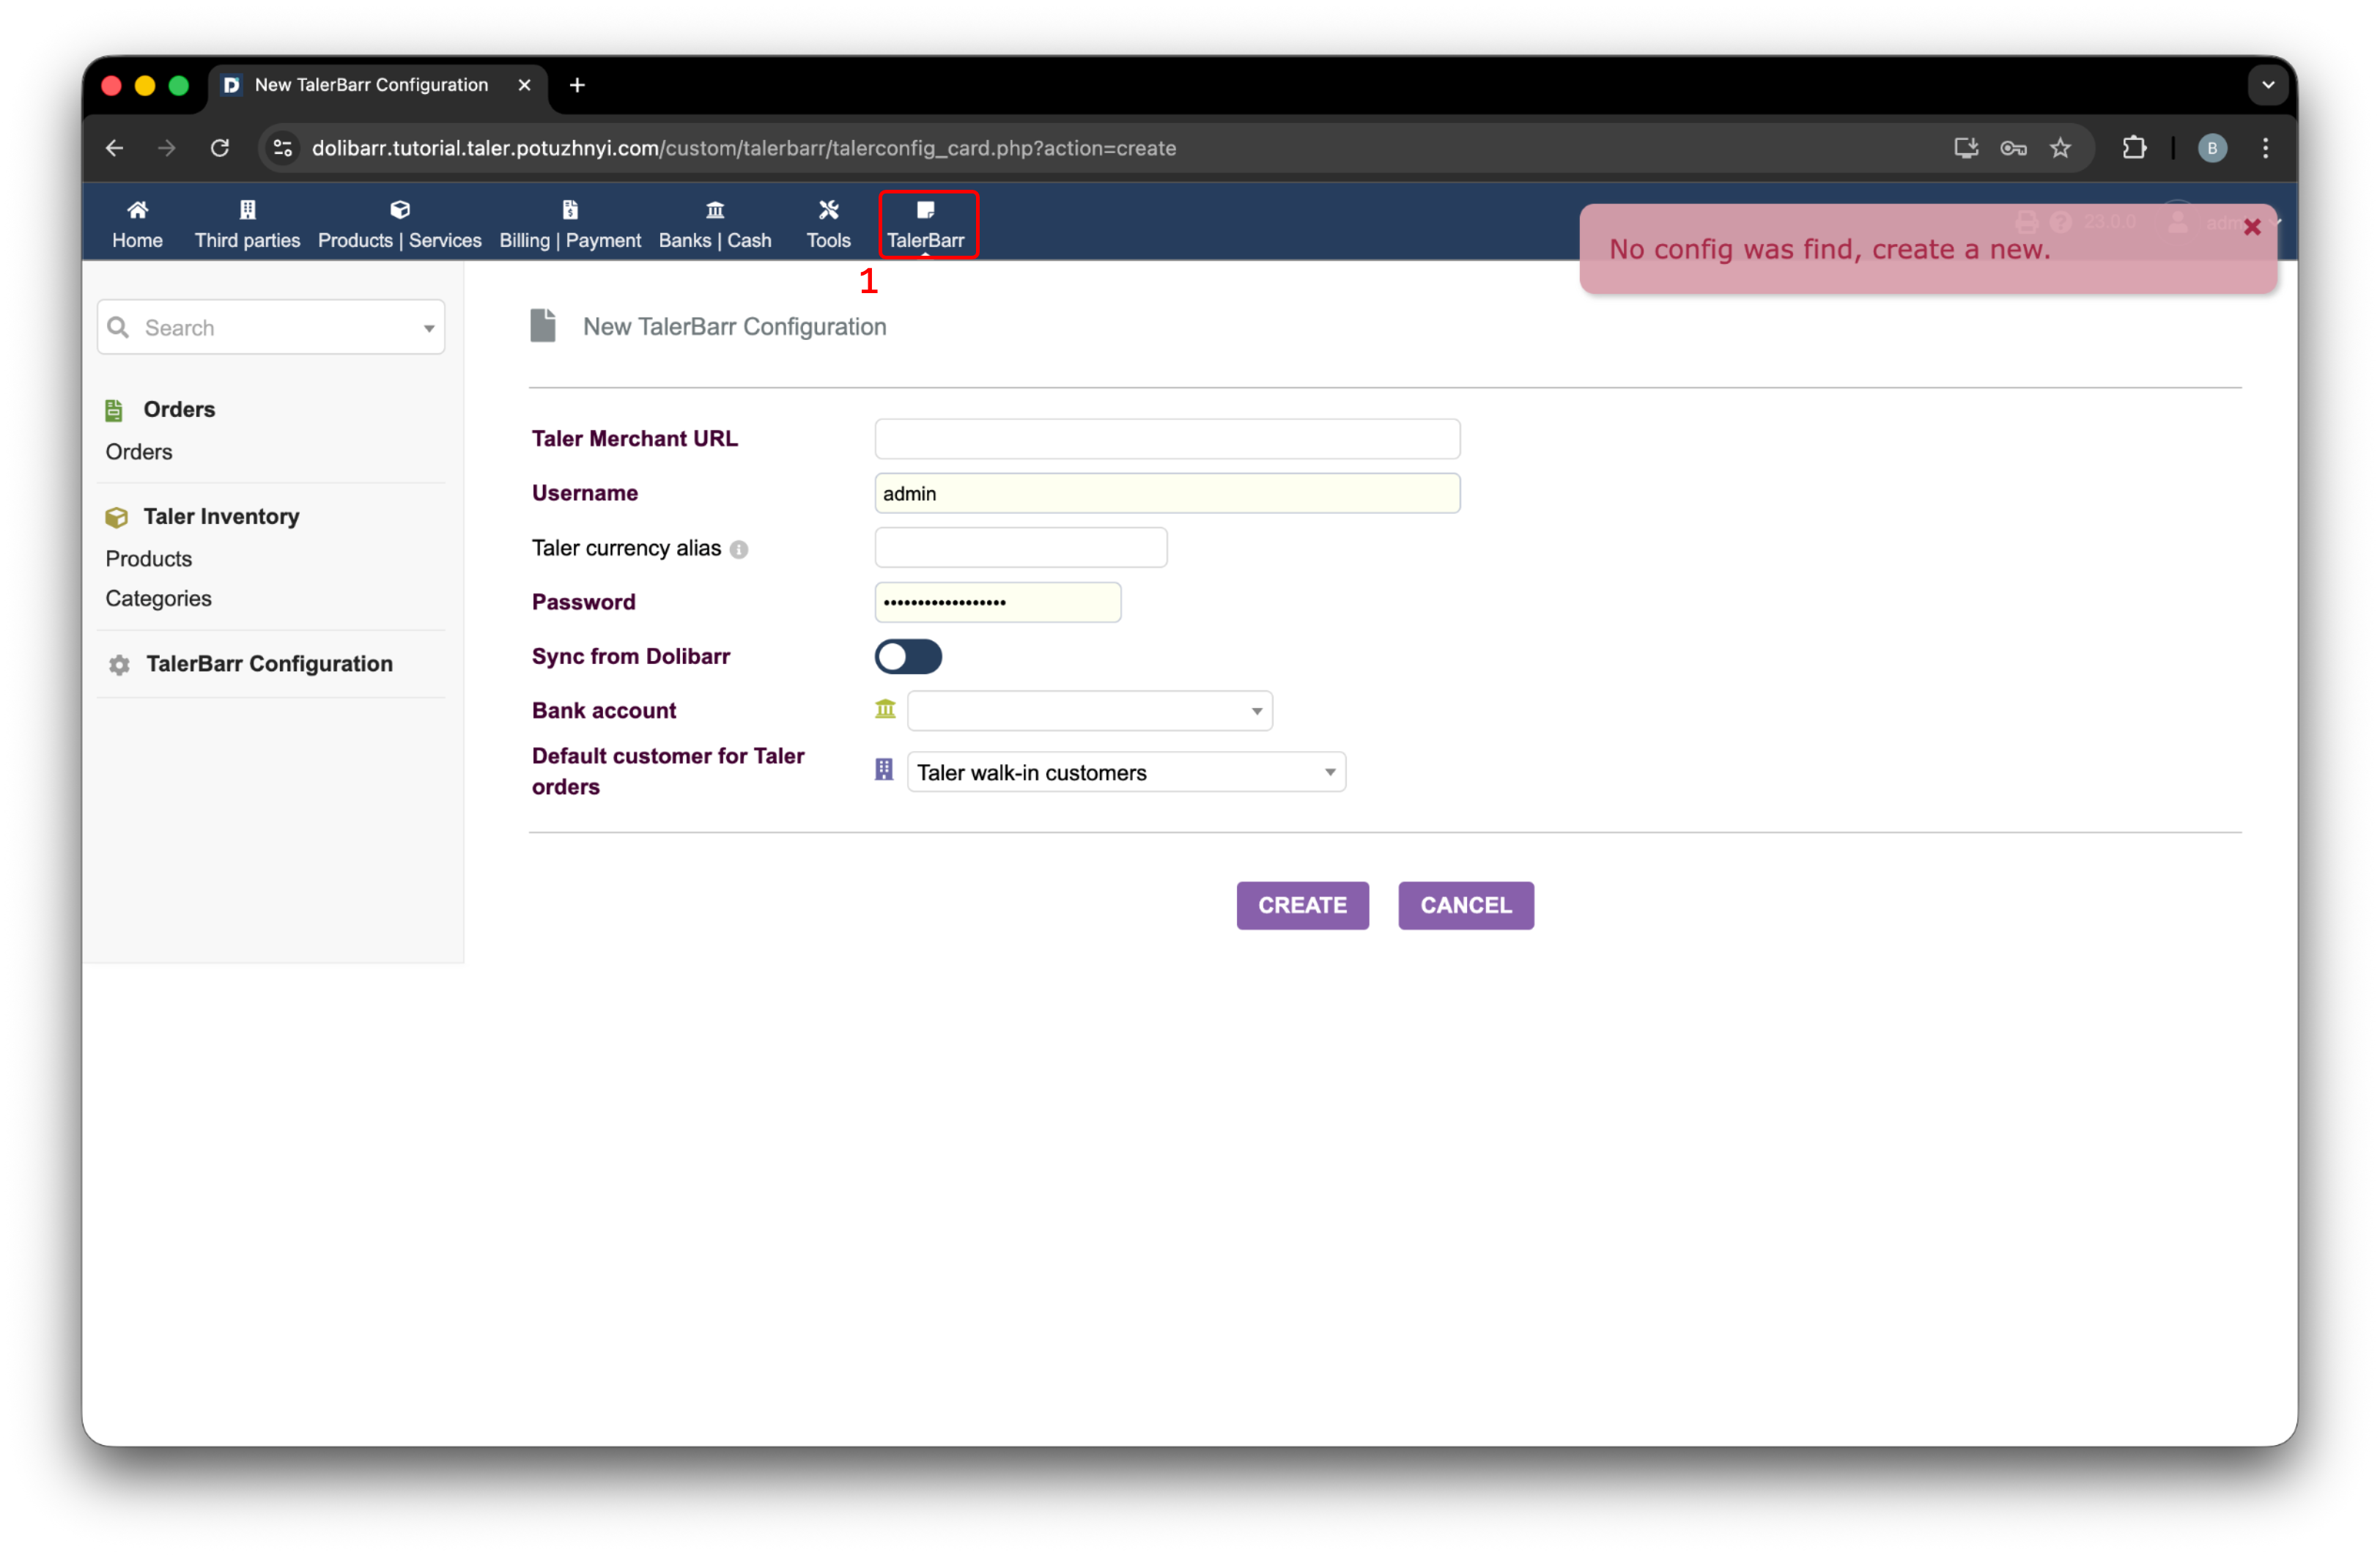
Úvodná konfiguračná stránka TalerBarr zobrazená, keď zatiaľ nie je k dispozícii žiadna konfigurácia obchodníka.#
2.3.3.1. Prehľad konfigurácie#
Konfiguračná karta uchováva všetky informácie, ktoré TalerBarr potrebuje na komunikáciu s backendom GNU Taler Merchant. V praxi je to miesto, kde prepojíte svoju inštanciu Dolibarr so svojou inštanciou obchodníka.
Polia na konfiguračnej karte sú:
Adresa URL Taler Merchant
Taler currency alias, užitočné pri testovacích nastaveniach, kde by sa testovacia mena mala mapovať na základnú menu Dolibarr. Napríklad sa to dá použiť, ak chcete platiť pomocou Kudos, zatiaľ čo účtovníctvo Dolibarr je v EUR, CHF alebo inej oficiálnej mene.
Username, používateľské meno inštancie Taler Merchant, ktorú chcete použiť
Password, pre vyššie uvedené používateľské meno
Sync direction, opísané v Výber smeru synchronizácie
Order sync timing (voliteľné), opísané v Výber časovania synchronizácie objednávok
Bank account, bankový účet Dolibarr, s ktorým budú prepojené bankové prevody
Default customer for Taler orders
Pri vytváraní konfigurácie si TalerBarr vyžiada prístupový token od backendu obchodníka. Postup je navrhnutý tak, aby vaše heslo nebolo v Dolibarr uložené obvyklým spôsobom. Autentifikačná požiadavka sa vykonáva z vášho prehliadača a Dolibarr dostáva iba výsledný prístupový token.
Ak je váš backend Taler Merchant nakonfigurovaný s viacfaktorovou autentifikáciou, zobrazí sa dodatočná overovacia obrazovka. Tento postup je opísaný v Postup dvojfaktorovej autentifikácie.
2.3.3.2. Výber smeru synchronizácie#
Smer synchronizácie určuje, ktorá strana pôsobí ako hlavný zdroj pravdy. Zjednodušuje to prevádzku aj údržbu. V súčasnosti sú podporované dva smery.
Dolibarr -> Taler Použite túto možnosť, ak je Dolibarr vaším hlavným zdrojom pravdy pre produkty a objednávky predaja a najmä chcete zo strany Taler dostávať aktualizácie stavu platby, vrátenia peňazí a vyrovnania.
Taler -> Dolibarr Použite túto možnosť, ak už máte inštanciu obchodníka Taler a chcete, aby strana ERP dostávala a udržiavala príslušné obchodné objekty, aby ste mohli využívať funkcie pracovných postupov a reportovania, ktoré systémy ERP bežne poskytujú.
Zvolený smer ovplyvňuje spracovanie zásob aj objednávok. Nemení to však skutočnosť, že informácie o platbách sa naďalej prijímajú zo strany Taler.
Hoci vám TalerBarr nebráni neskôr zmeniť konfiguráciu, odporúča sa podľa možnosti používať jeden smer synchronizácie. Počas vývoja bola zmena smerov testovaná, no prechod sa ukázal ako zložitý prípad. Kvôli stabilite a konzistencii dát je lepšie ponechať toto nastavenie nezmenené, keď je systém v aktívnom používaní.
2.3.3.3. Výber časovania synchronizácie objednávok#
Pri synchronizácii z Taler do Dolibarr modul podporuje dva prevádzkové modely:
When order is created Dolibarr dostane objednávku hneď, ako existuje na strane Taler.
Keď je objednávka zaplatená Dolibarr prijme objednávku až po tom, čo zákazník skutočne dokončí platbu.
Druhý režim je užitočný pre predajné automaty, kiosky alebo nastavenia rýchleho obsluhovania, kde nechcete, aby sa nezaplatená koncept aktivity presúvala do ERP a ukladala sa tam ako zbytočné dáta.
2.3.3.4. Bežný prihlasovací postup#
Každý konfiguračný postup začína hlavným konfiguračným formulárom. Na nasledujúcom obrázku môžete vidieť príklad vyplnenej konfigurácie.
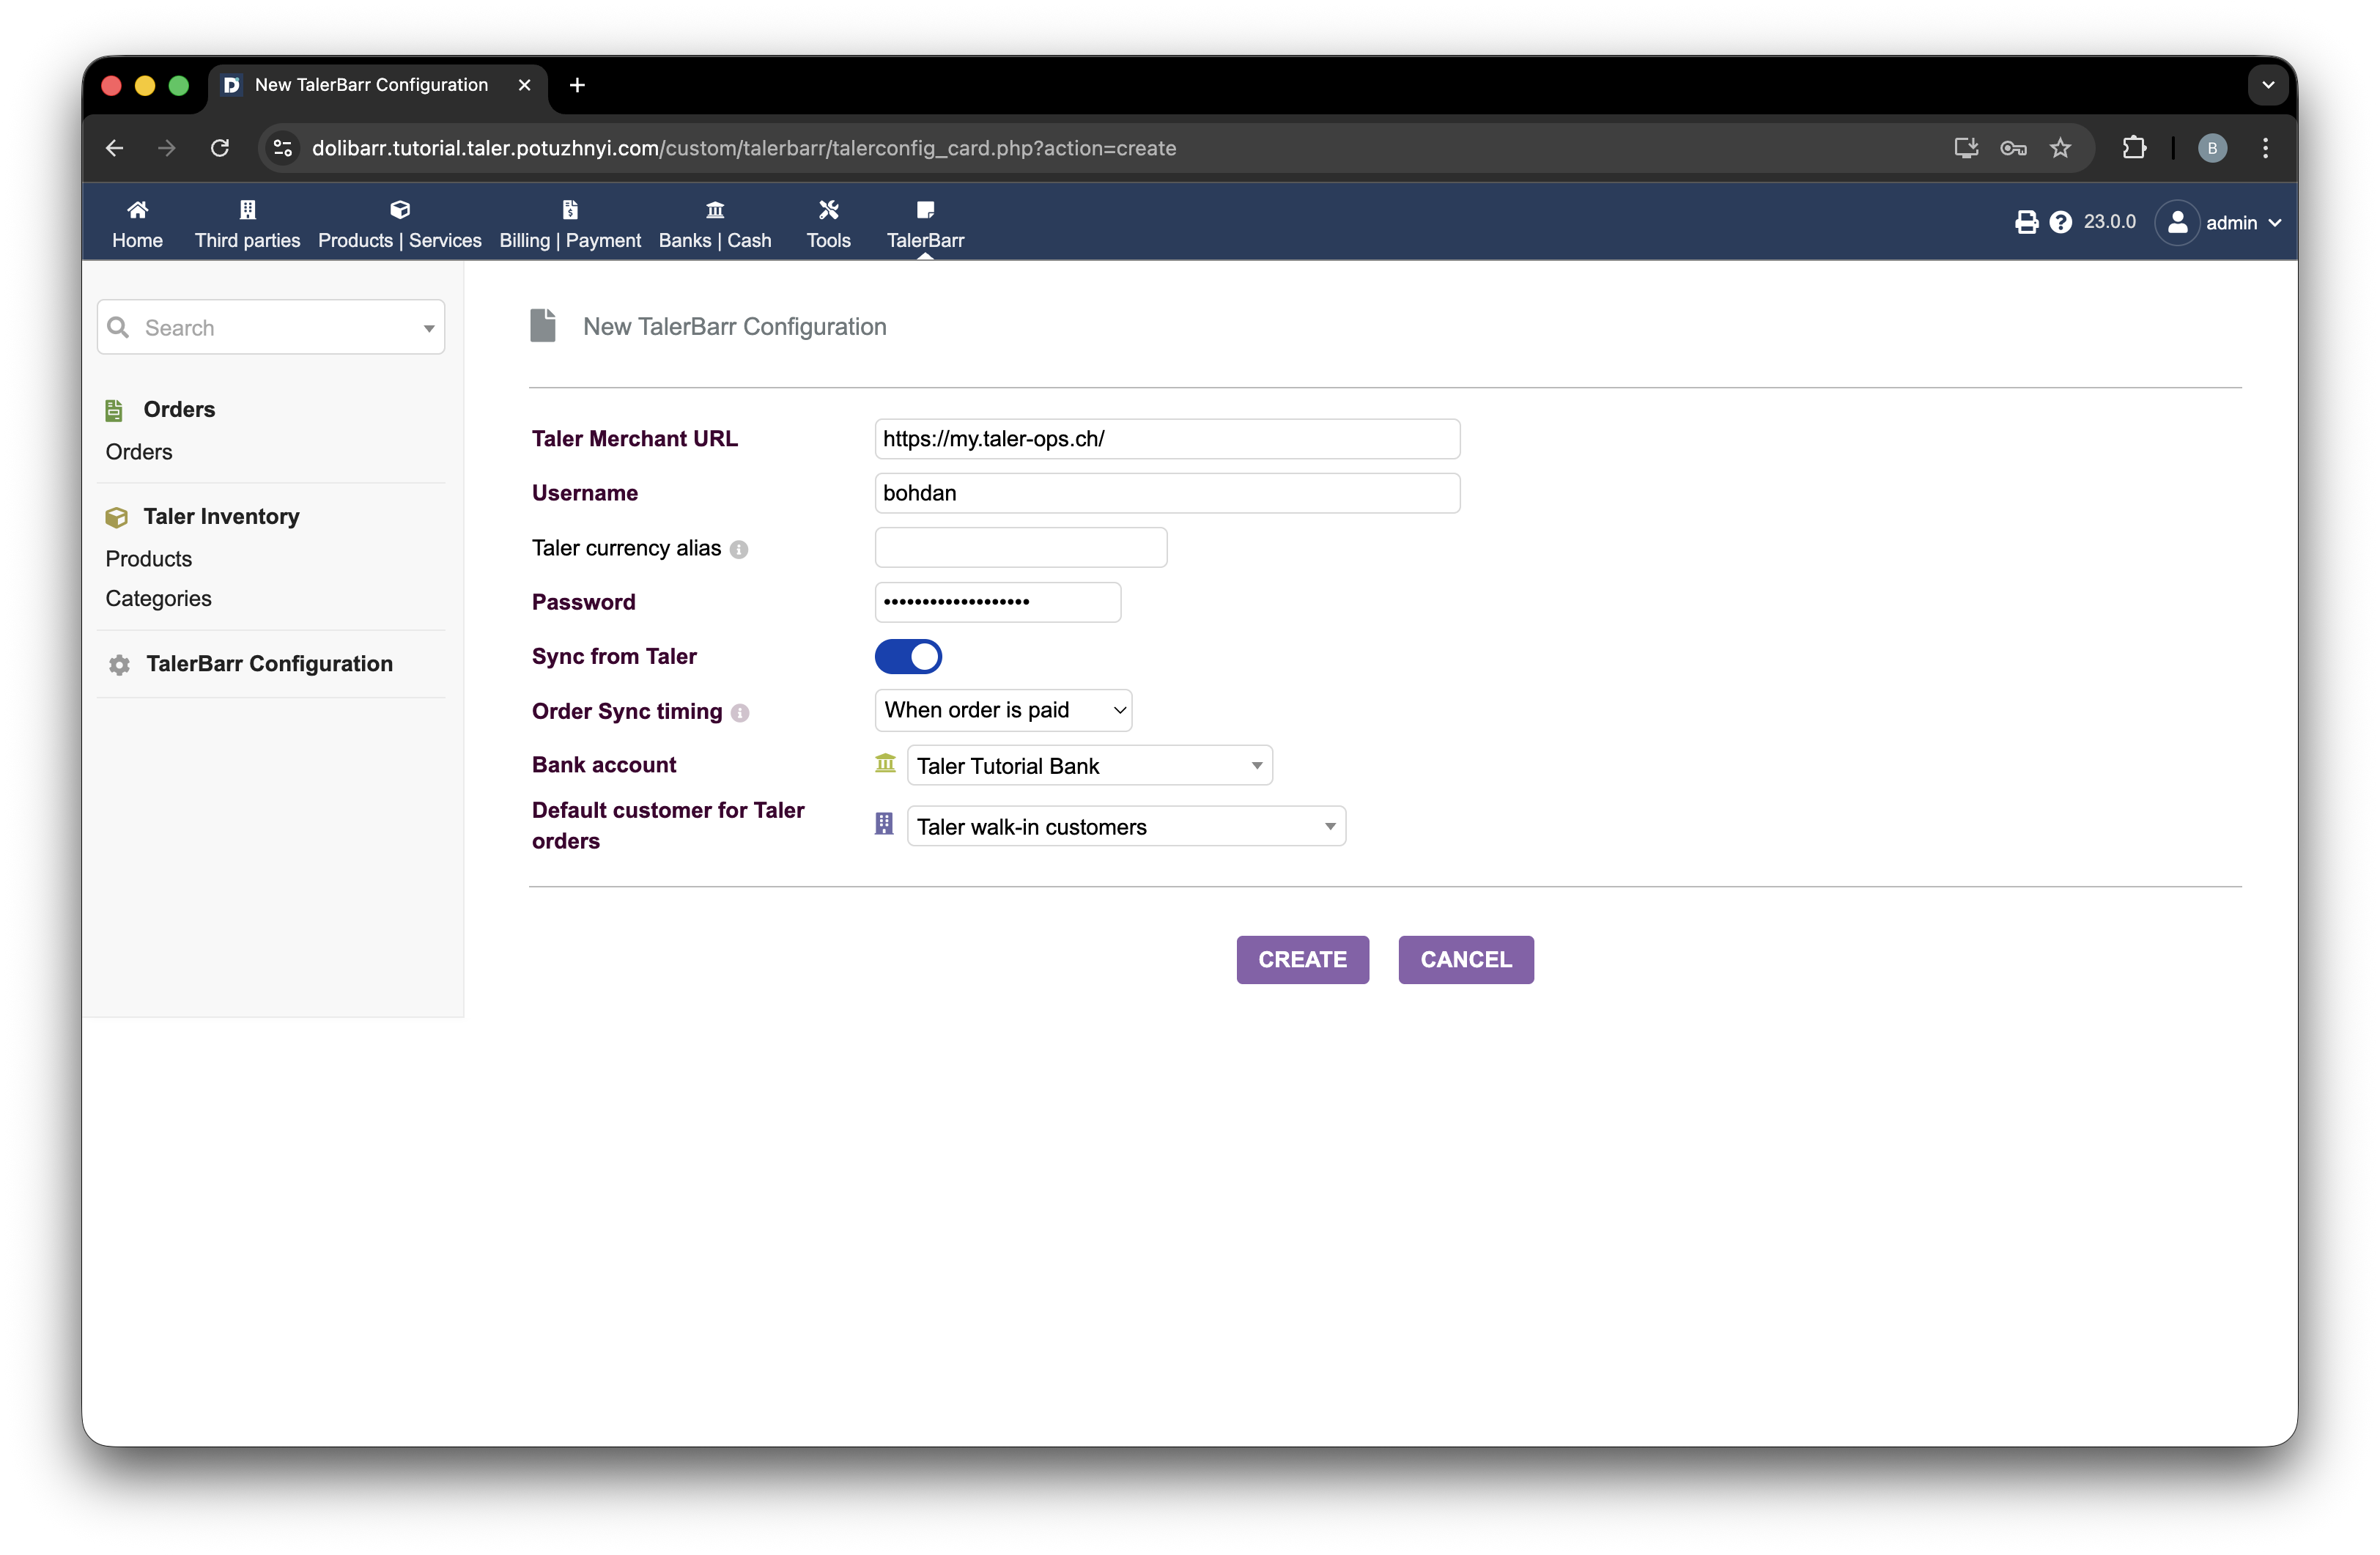
Príklad vyplneného konfiguračného formulára TalerBarr.#
Pred tým by ste mali vytvoriť bankový účet Dolibarr, ktorý zodpovedá účtu nakonfigurovanému na strane obchodníka Taler. V príkladoch tohto návodu používam bankový účet nazvaný Taler Tutorial Bank. Uistite sa, že ste bankový účet správne nakonfigurovali pred uložením konfigurácie TalerBarr.
Pokyny Dolibarr na vytvorenie bankového alebo hotovostného účtu nájdete v Create a new account / cash.
Hneď ako stlačíte Create, konfigurácia sa overí. Ak je niečo nesprávne, zobrazí sa chybové hlásenie. Ak vaše nastavenie vyžaduje dvojfaktorovú alebo viacfaktorovú autentifikáciu, budete presmerovaní na Postup dvojfaktorovej autentifikácie. Ak nie je potrebné žiadne ďalšie overenie, budete presmerovaní na Konfigurácia modulu a domovská stránka.
2.3.3.5. Postup dvojfaktorovej autentifikácie#
K tomuto prípadu dochádza, keď je váš backend Taler Merchant nakonfigurovaný na prácu s viacfaktorovou autentifikáciou. Keďže si TalerBarr vyžiada prístupový token namiesto priameho uloženia vášho hesla v Dolibarr, možno budete musieť potvrdiť svoje oprávnenie prostredníctvom jedného alebo viacerých ďalších kanálov. Presný počet a typ výziev závisí od konfigurácie backendu obchodníka. Všetky informácie potrebné na overenie sú zobrazené na obrazovke, ktorá sa objaví po prvom odoslaní konfigurácie.
Najprv sa zobrazí overovacia obrazovka. Na tejto obrazovke vyberiete metódu, prostredníctvom ktorej chcete potvrdiť svoju identitu. V nasledujúcom príklade sú k dispozícii dve možnosti: e-mail a SMS.
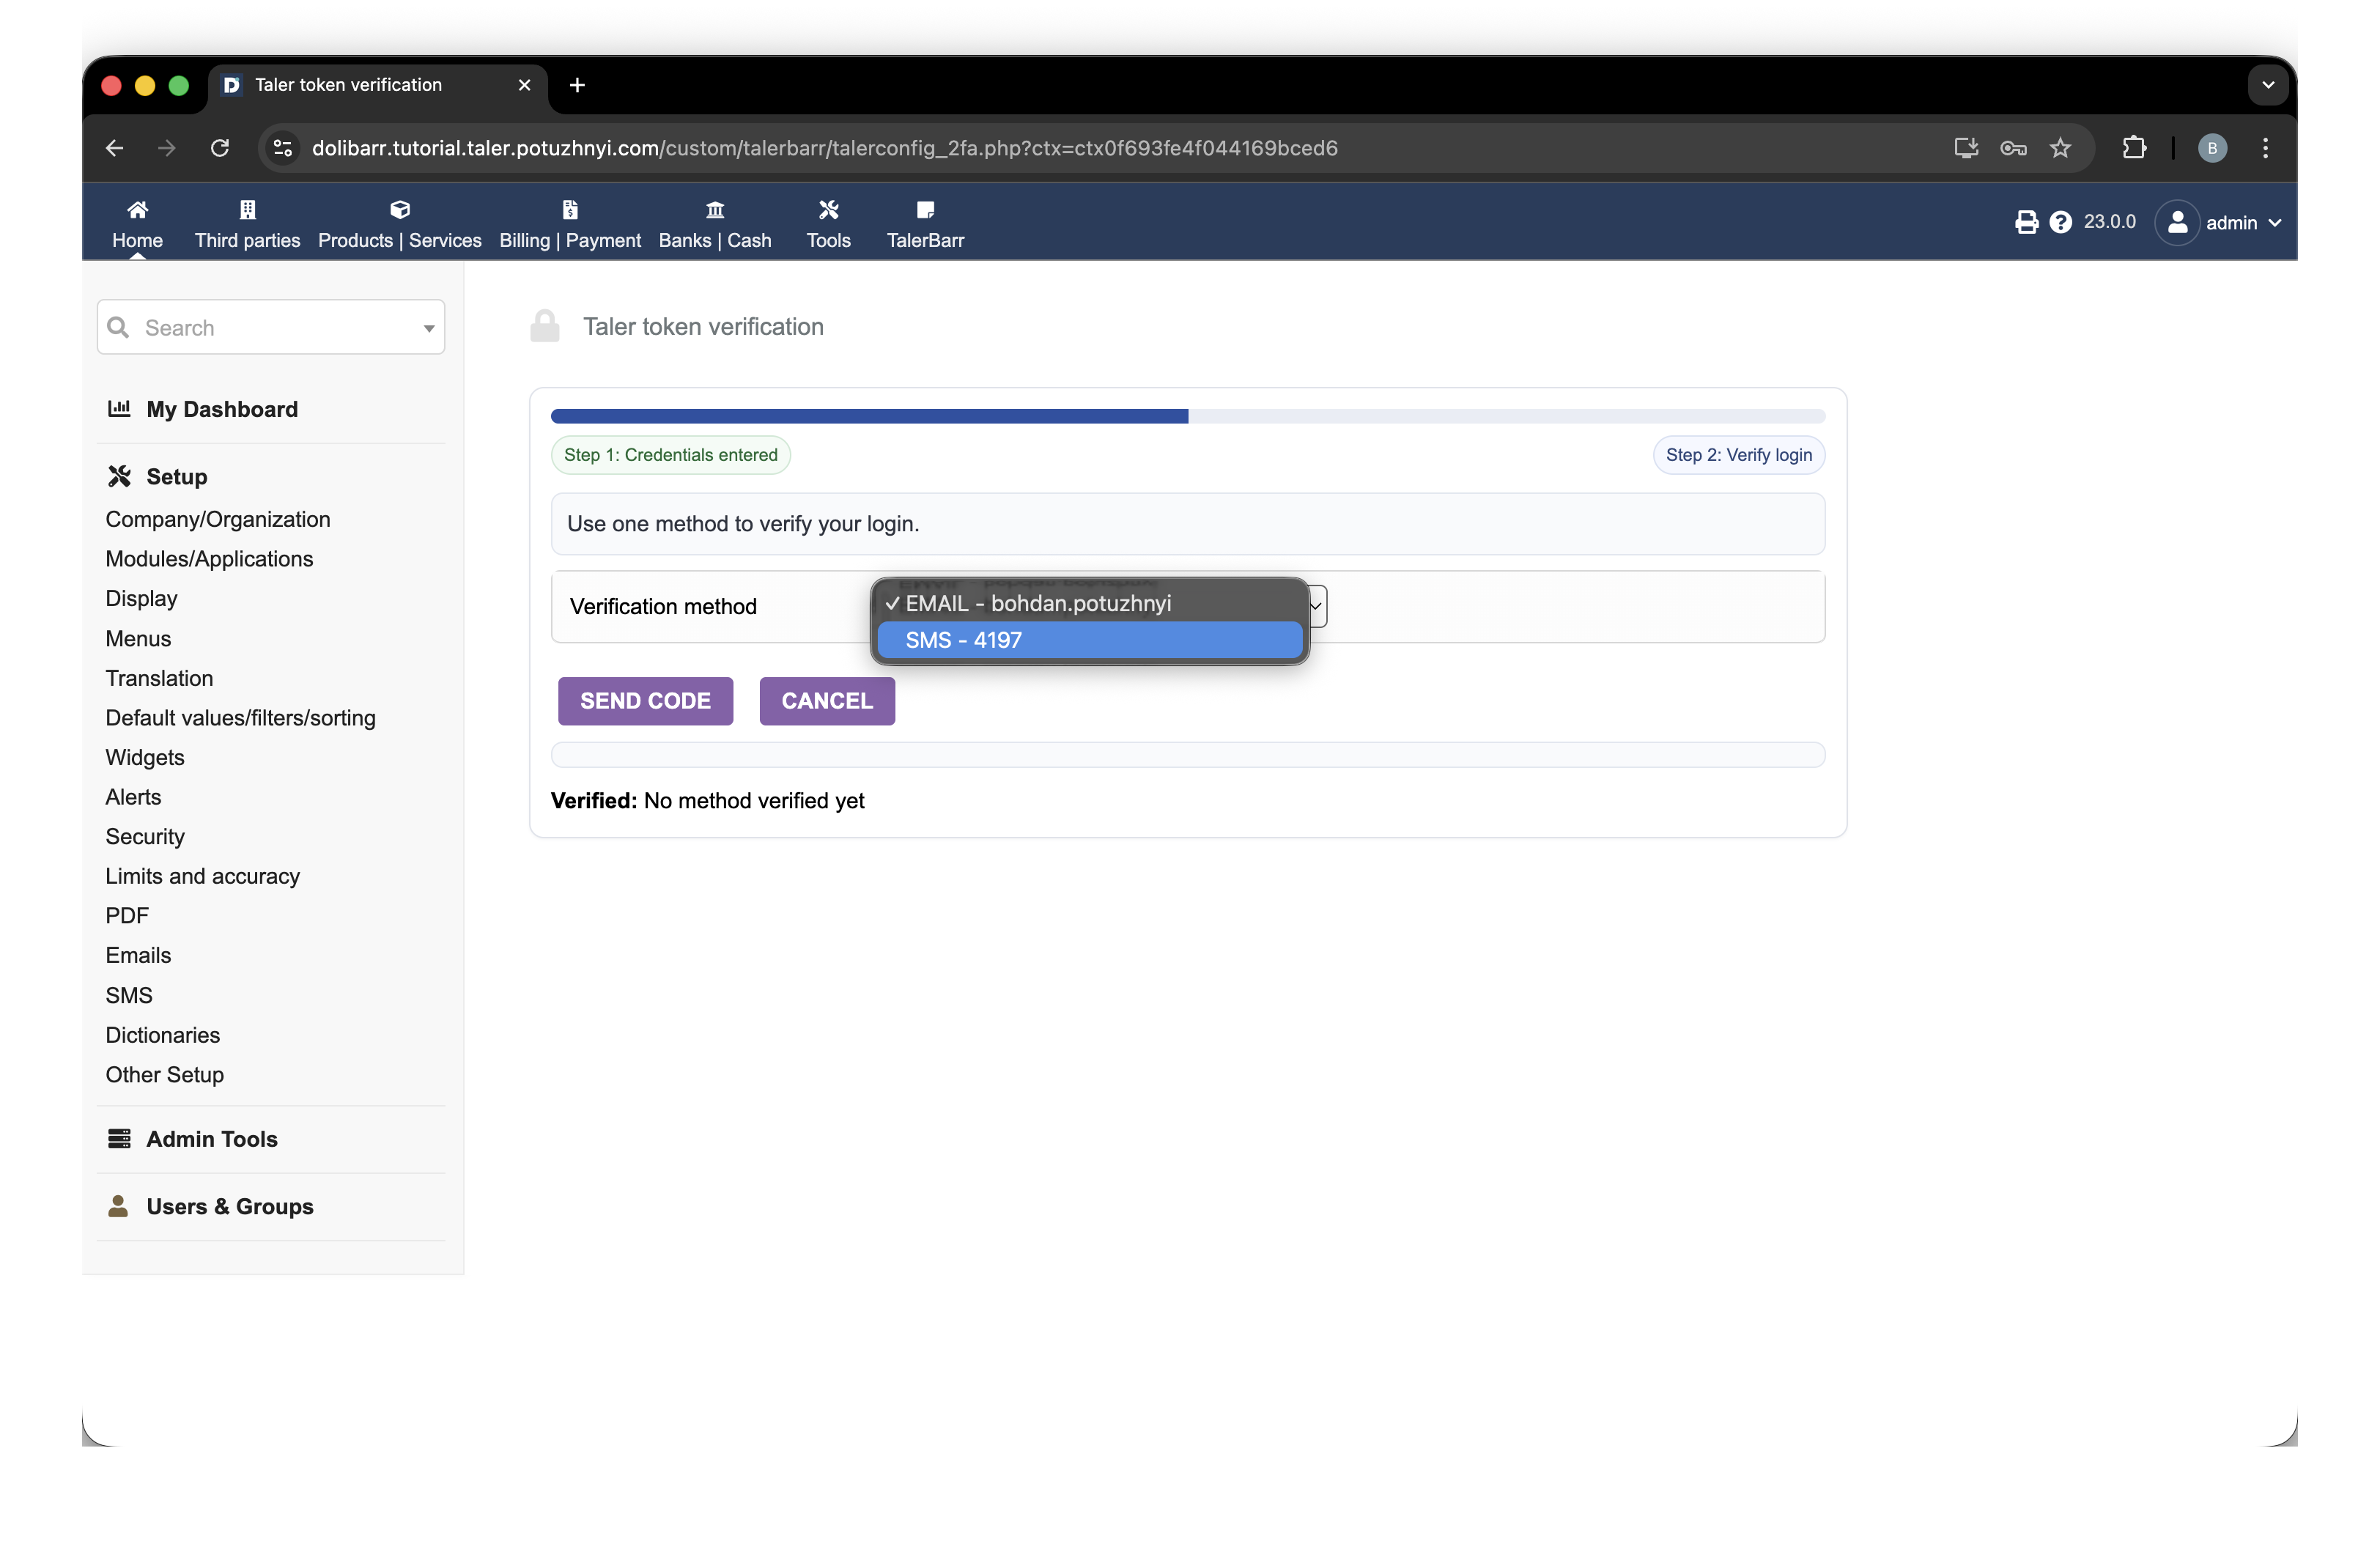
Obrazovka dvojfaktorovej autentifikácie s dostupnými metódami overenia.#
Po výbere metódy a stlačení Send code sa požiadavka odošle do systému Taler. Ak je požiadavka úspešná, uvidíte potvrdzujúcu správu spolu s novým poľom, do ktorého môžete zadať prijatý kód.
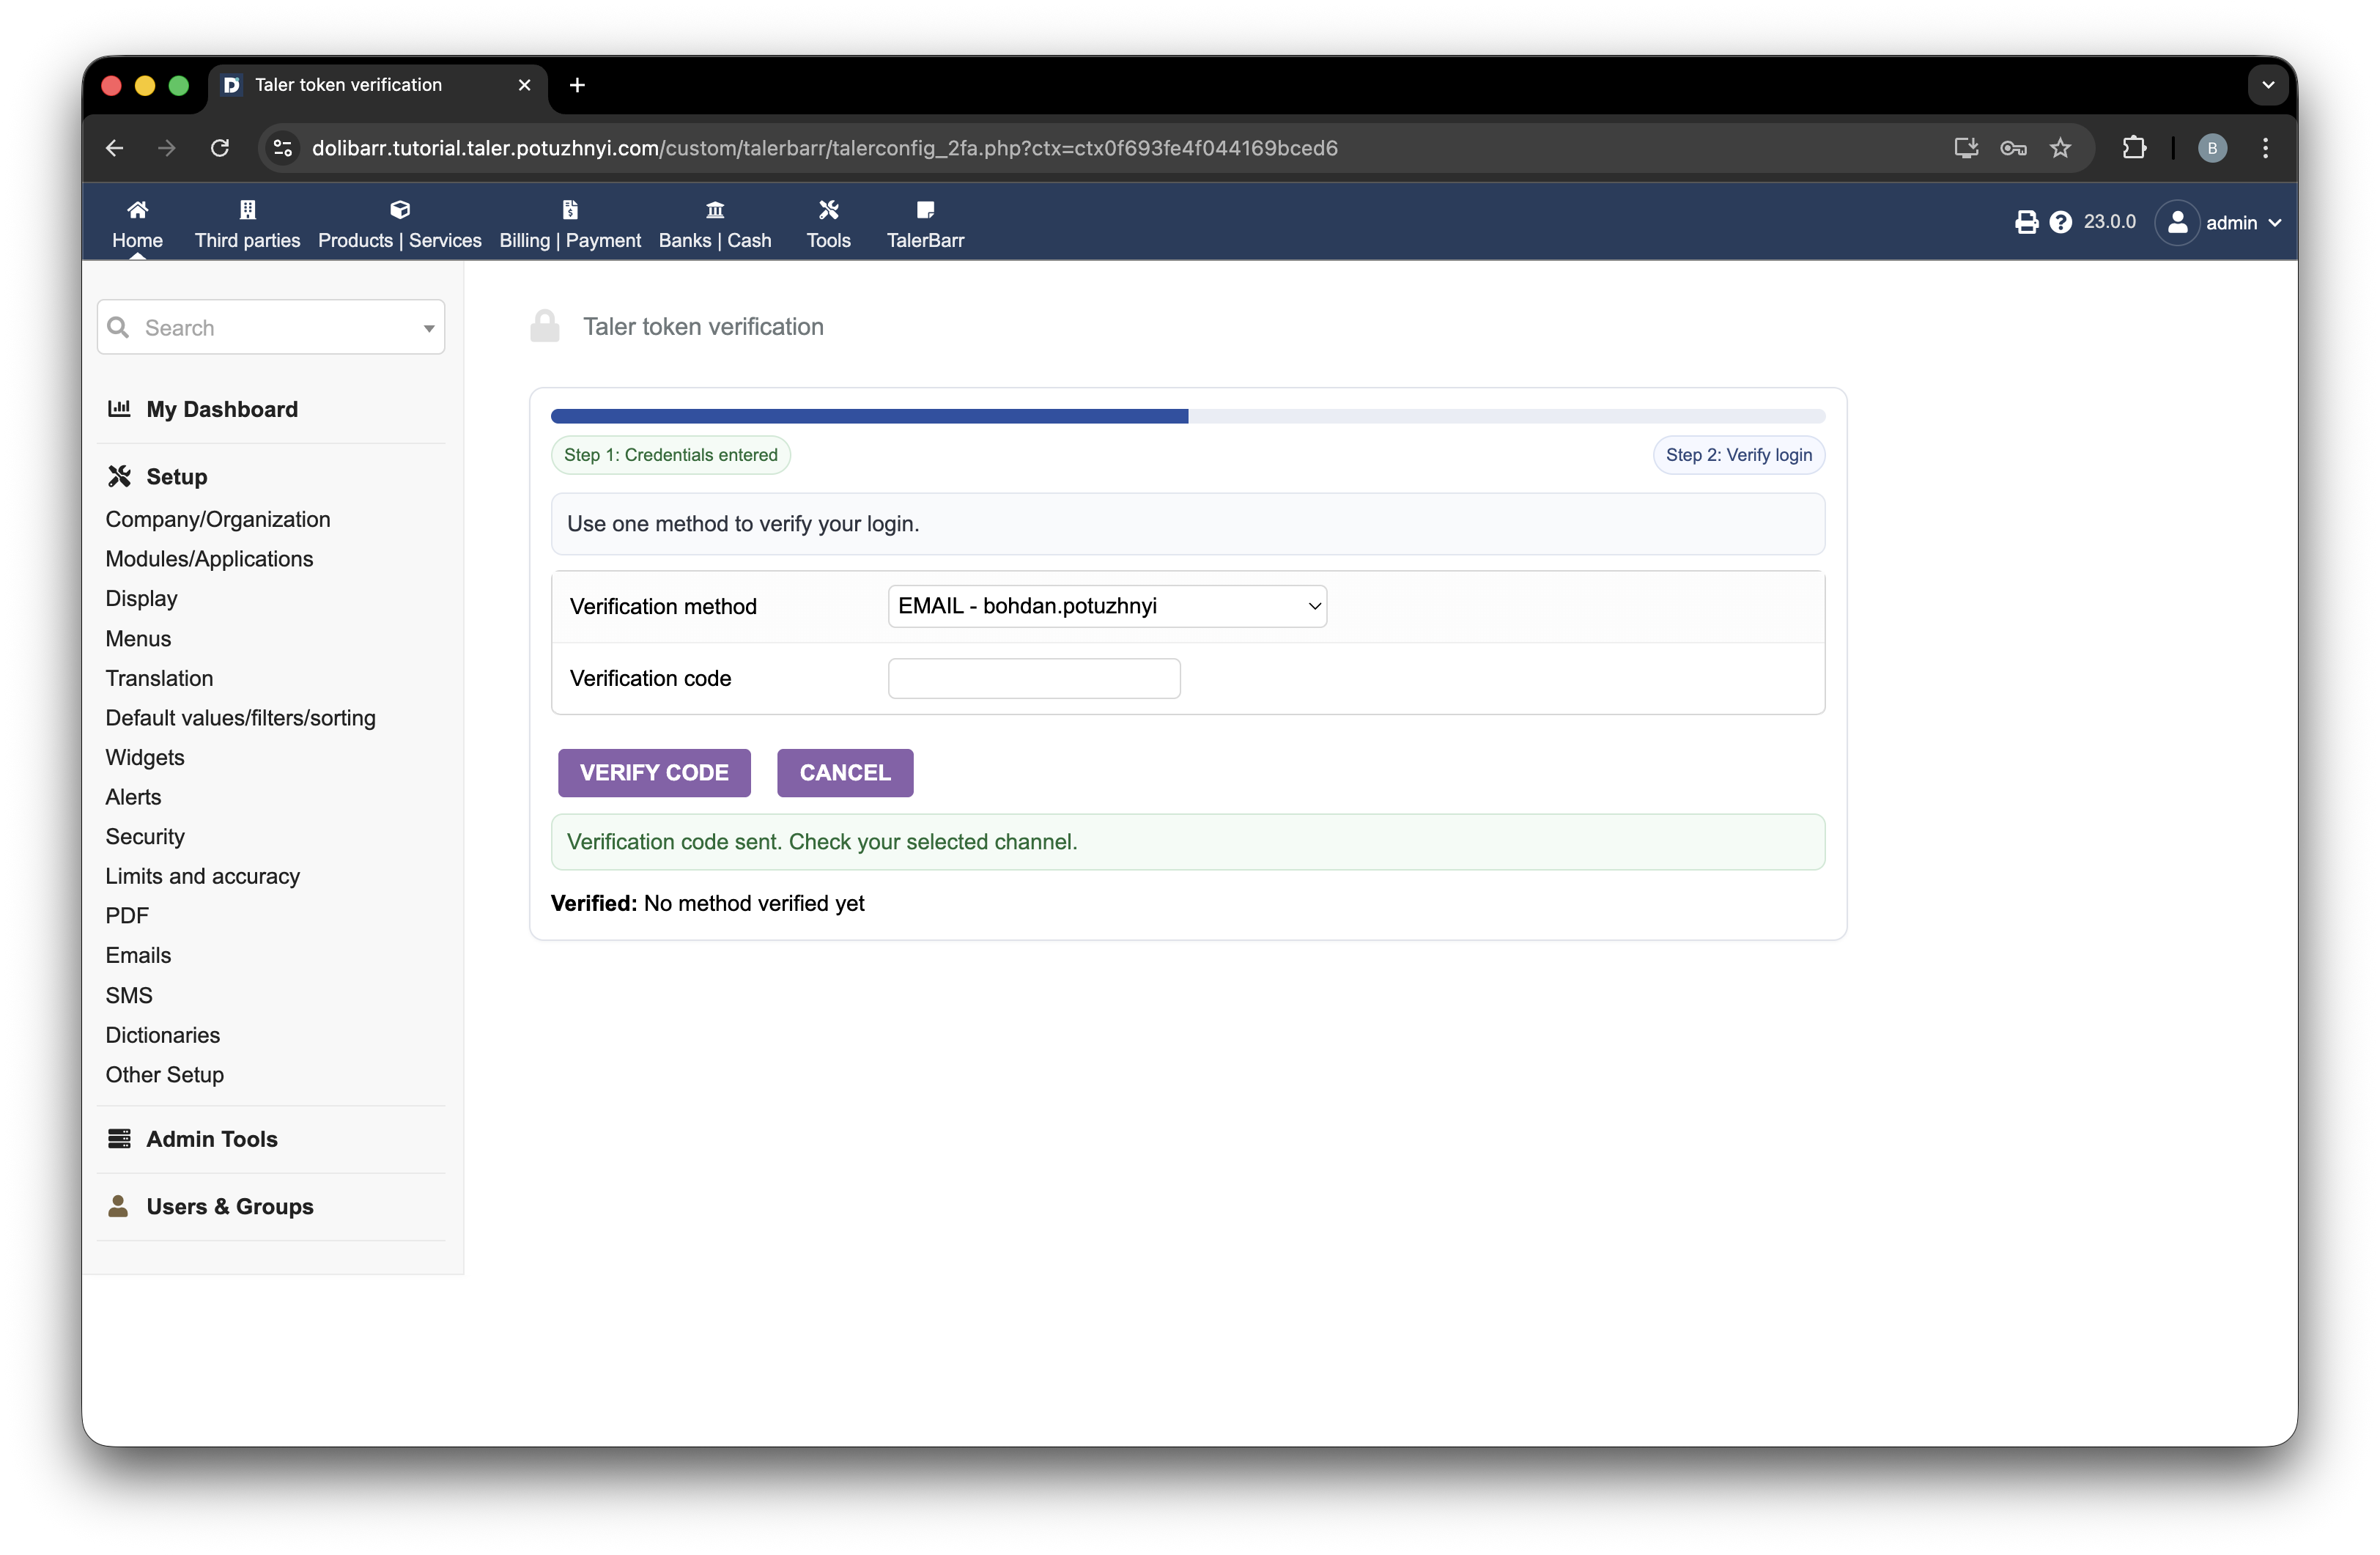
Obrazovka dvojfaktorovej autentifikácie po vyžiadaní overovacieho kódu.#
Hneď ako kód dostanete a zadáte ho, stlačte Verify code. Následne sa zobrazí prechodný stav, kým sa overenie spracúva, ako je zobrazené na nasledujúcom obrázku.
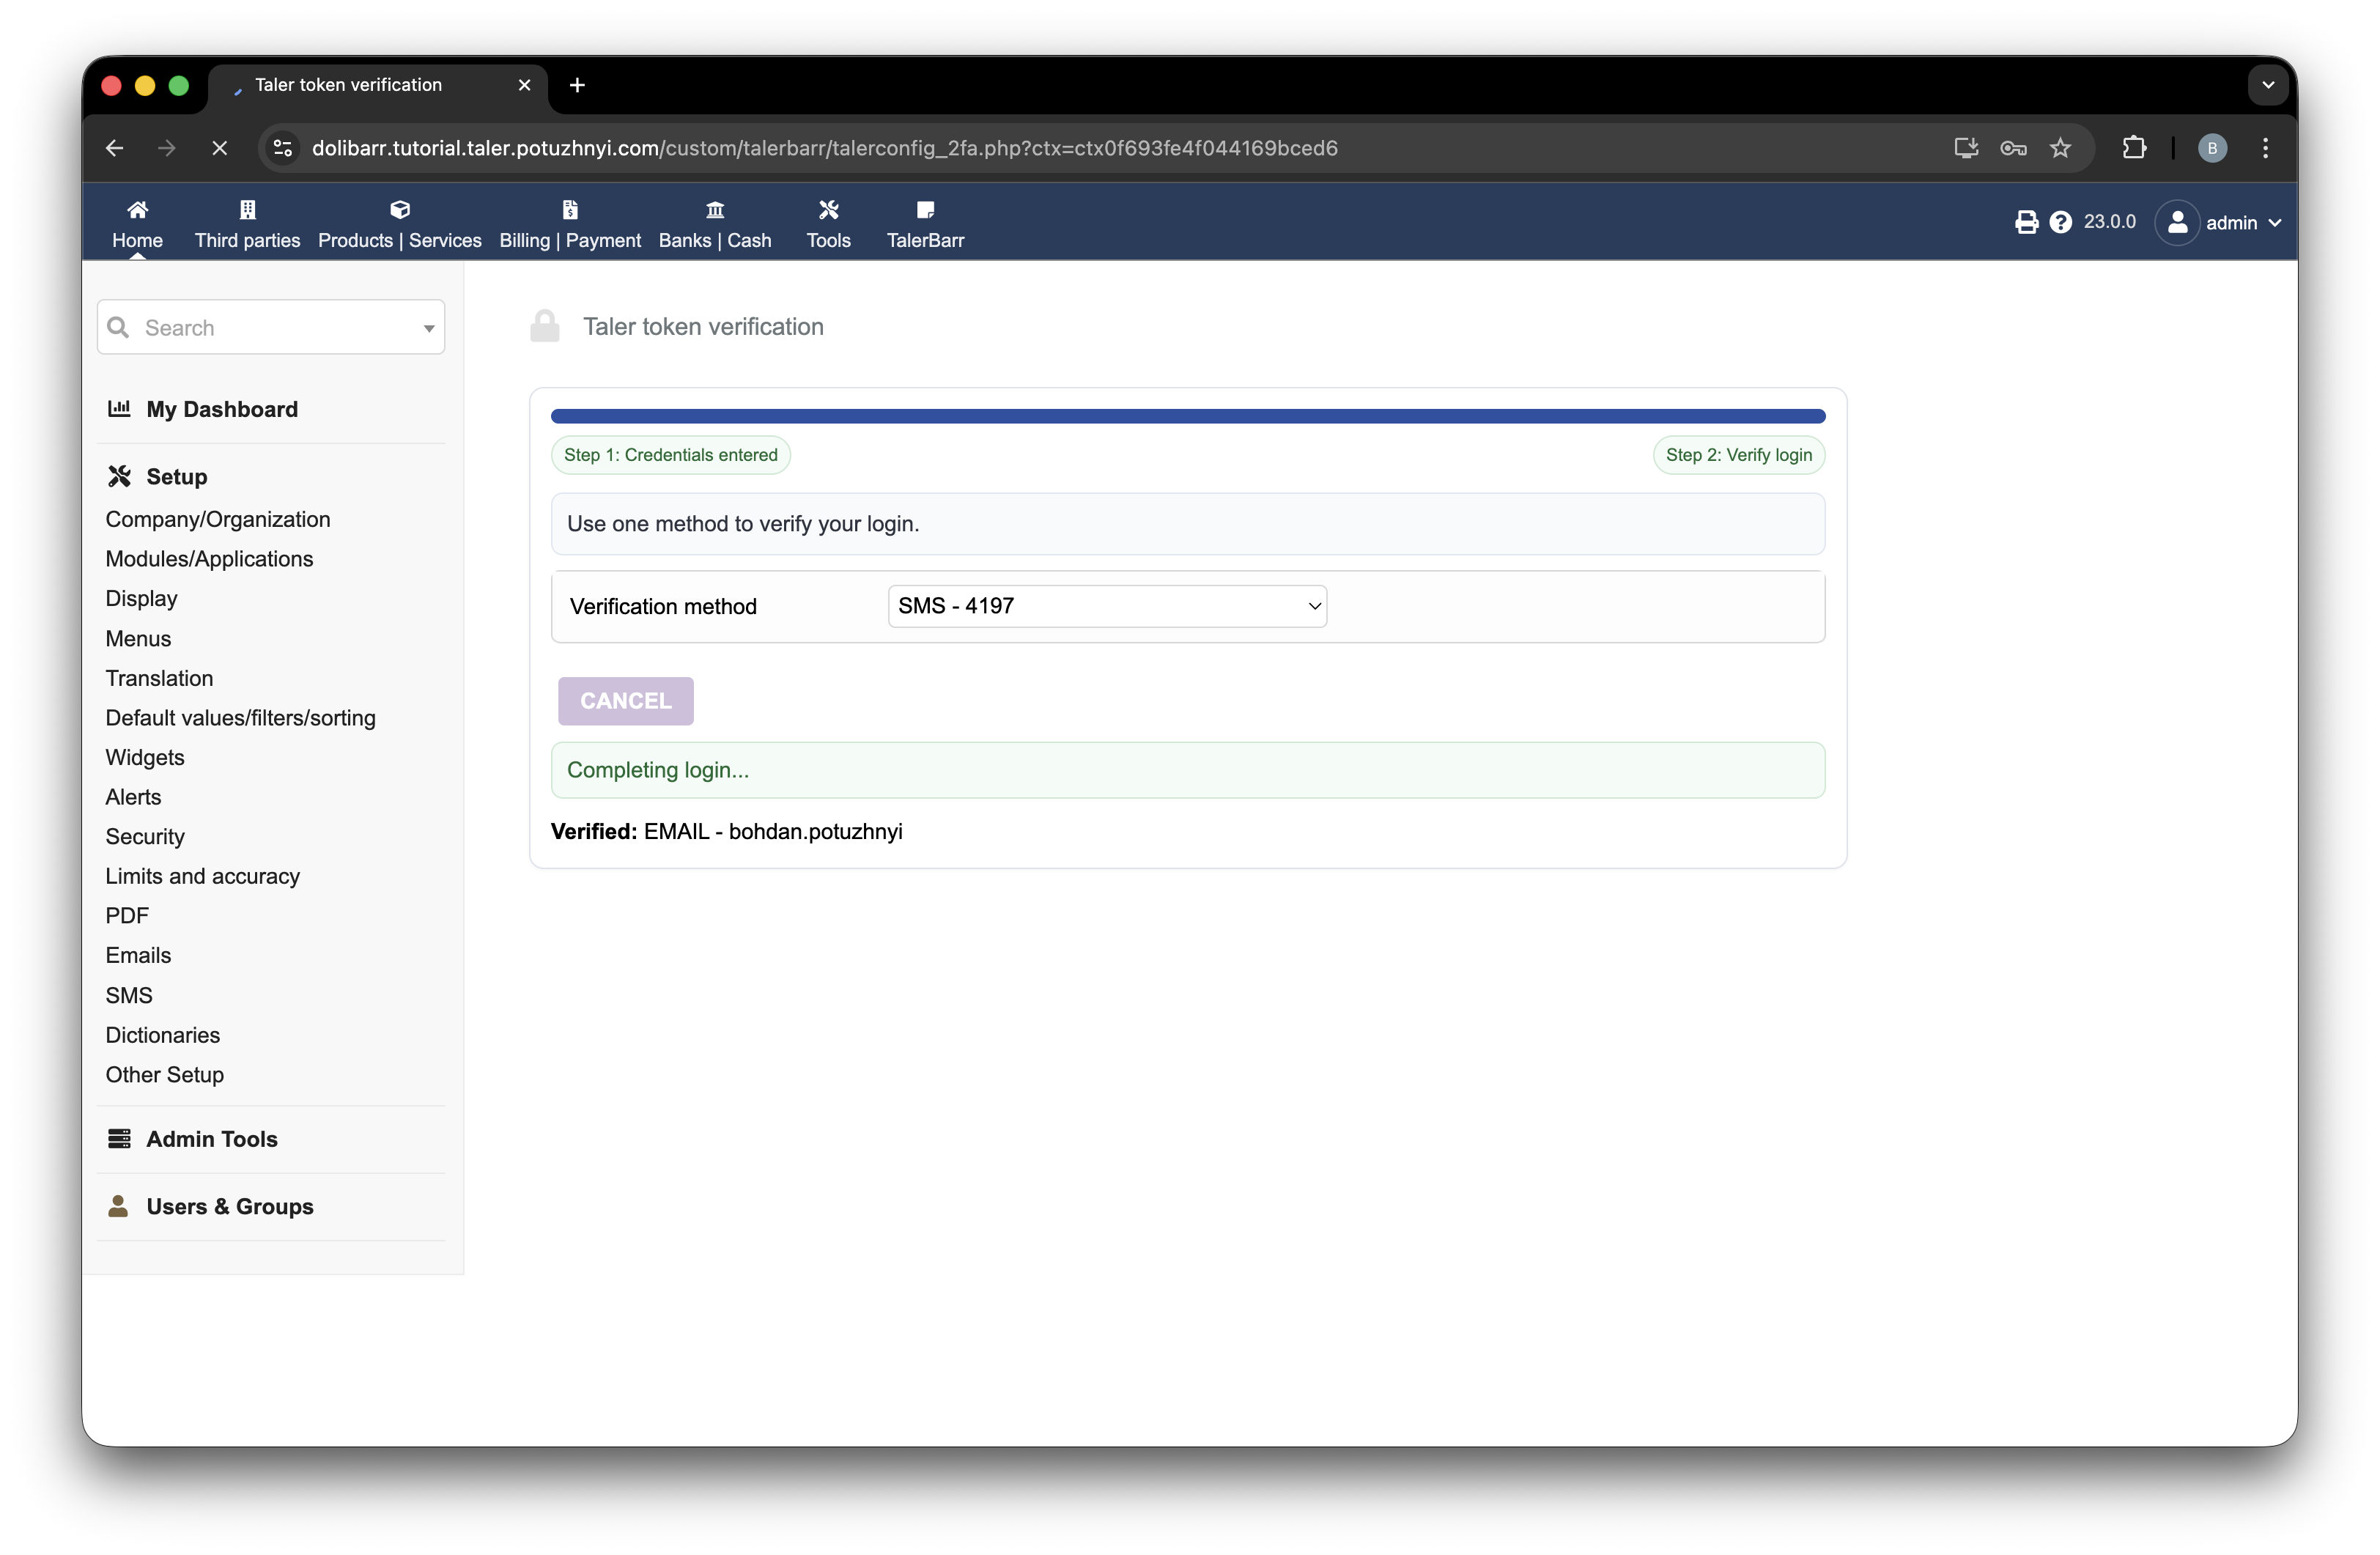
Prebiehajúce overenie dvojfaktorovej autentifikácie.#
Potom (v prípade úspešného overenia) budete presmerovaní na ďalšiu obrazovku.
2.3.3.6. Konfigurácia modulu a domovská stránka#
Po úspešnej kontrole konfigurácie je ďalšou obrazovkou obrazovka konfiguračnej karty.
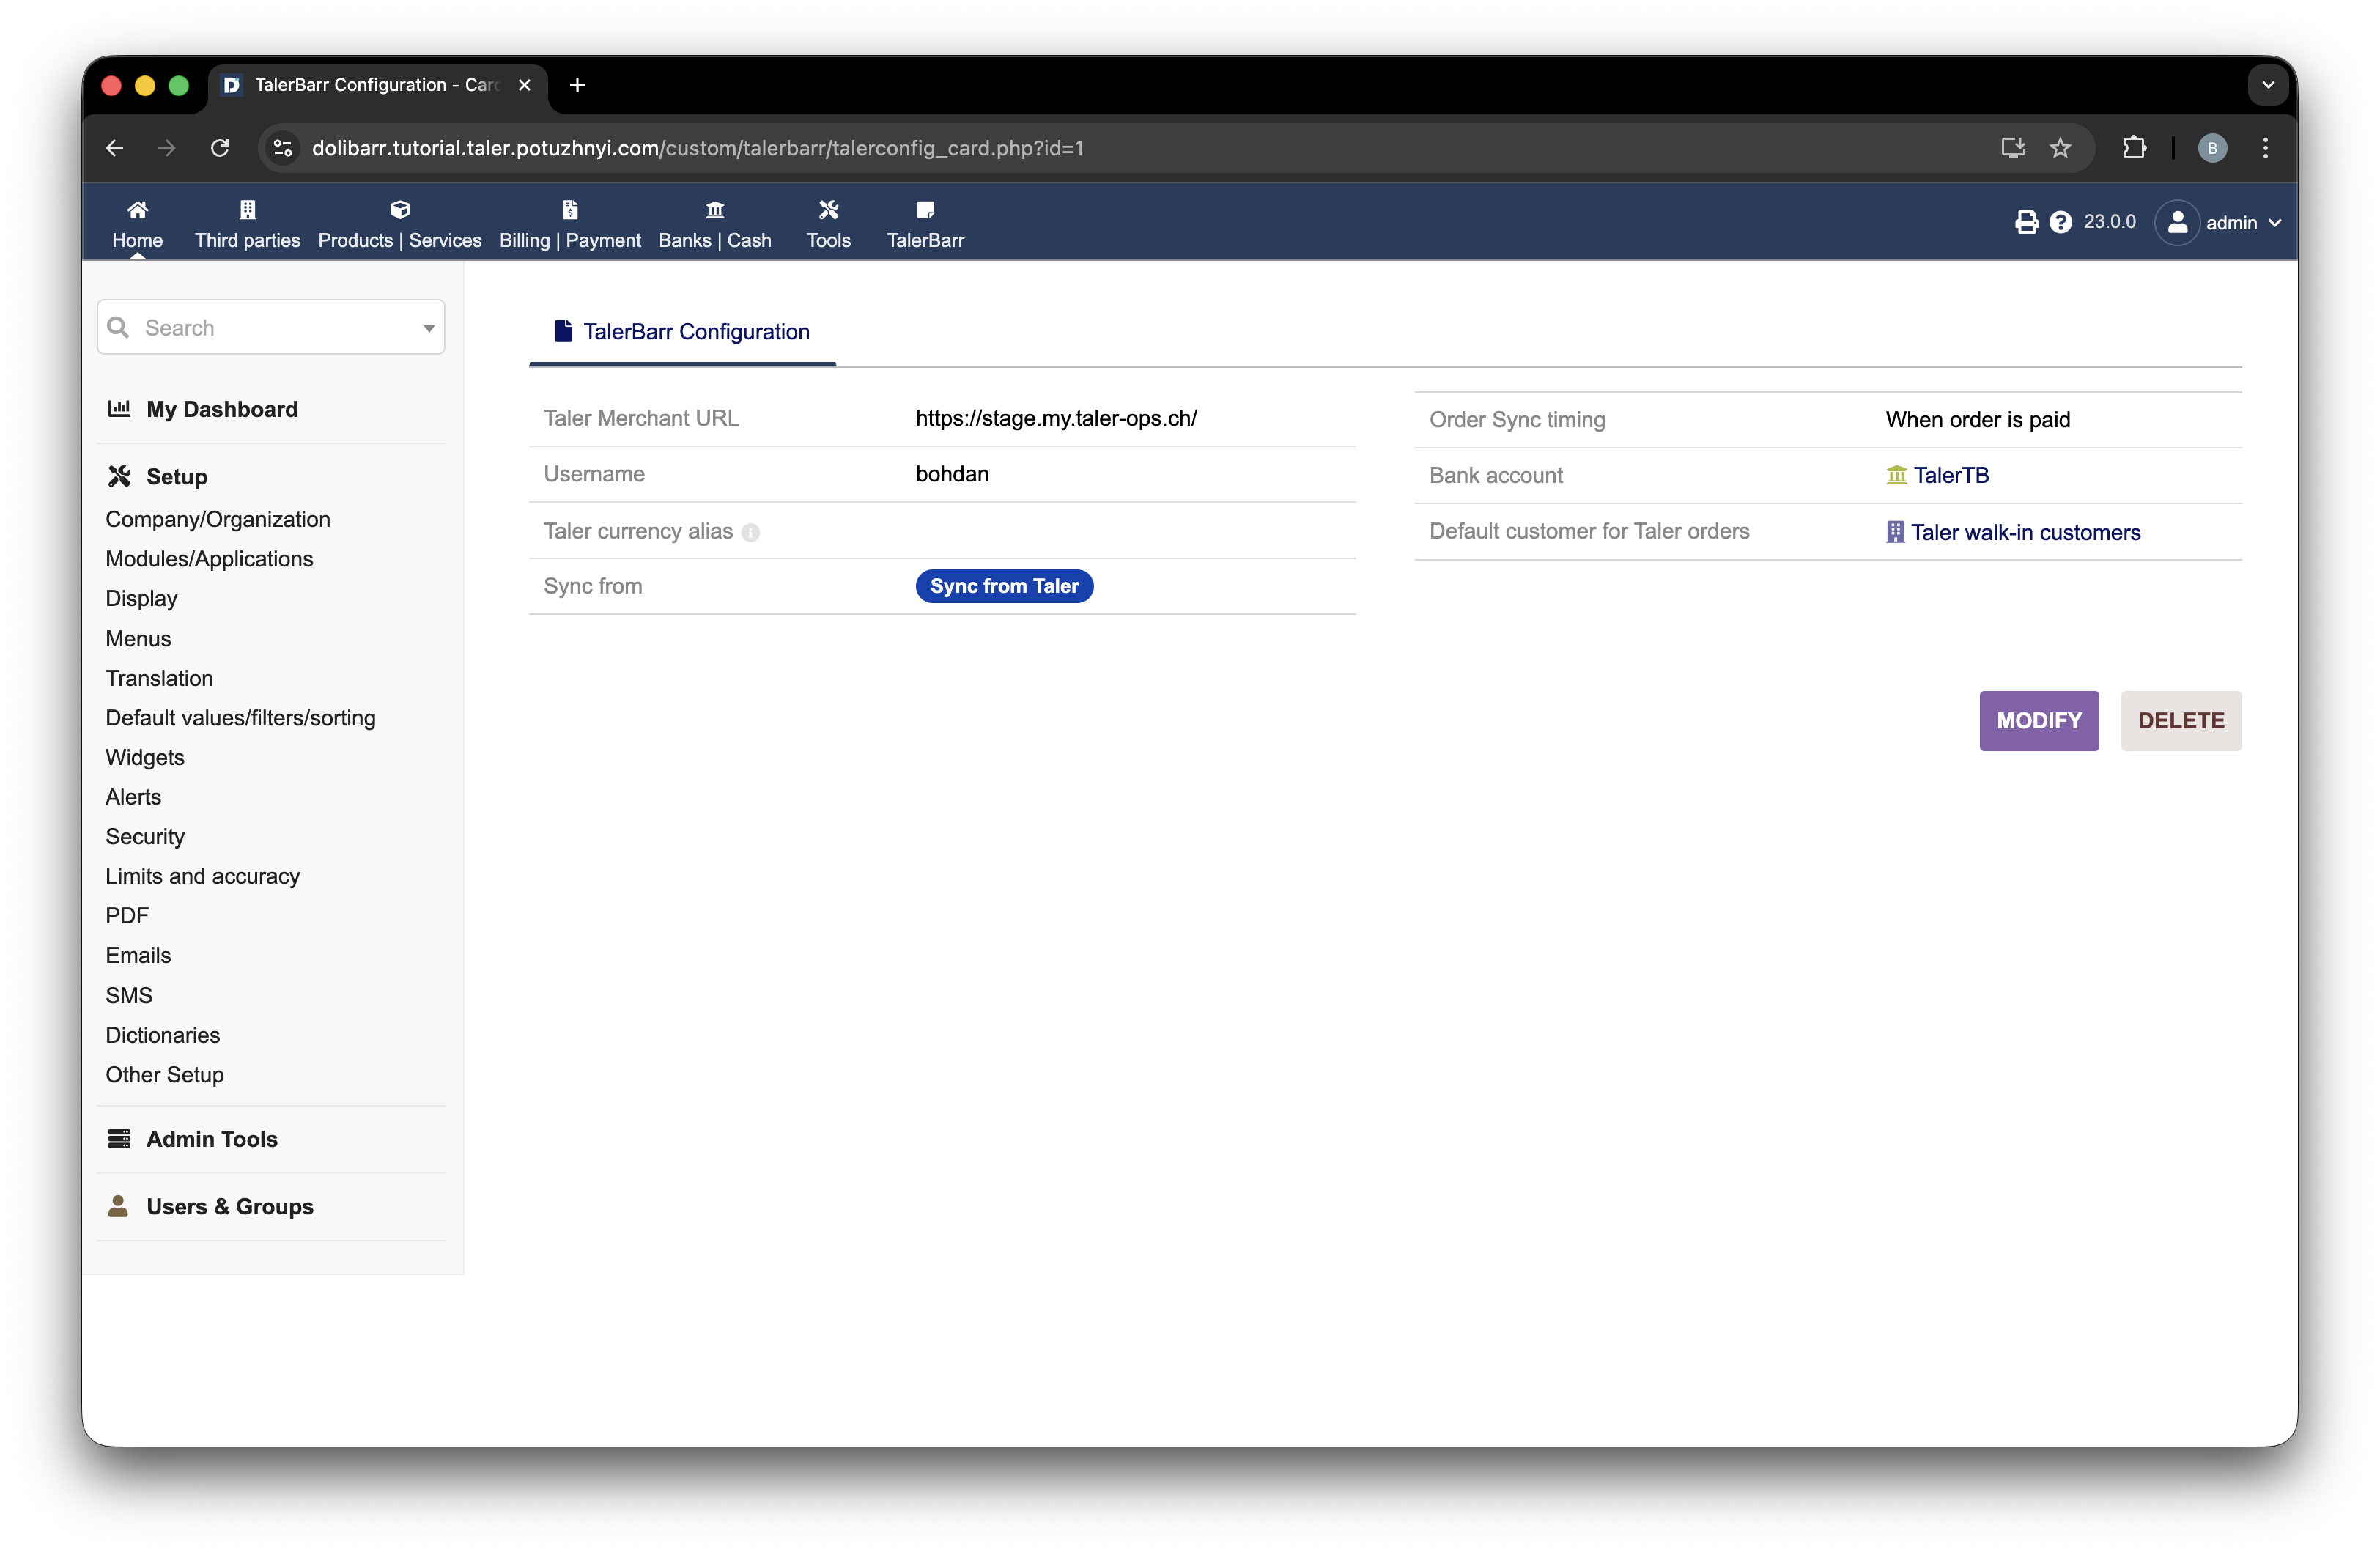
Konfiguračná karta TalerBarr zobrazená po úspešnom overení.#
Táto obrazovka obsahuje krátky prehľad vašej konfigurácie.
Potom môžete prejsť na domovskú stránku kliknutím na hornú lištu. Na domovskej stránke modul poskytuje malú sekciu štatistík spolu s krátkym prehľadom počtu produktov a objednávok, stavu konfigurácie a informácií o poslednej synchronizácii.
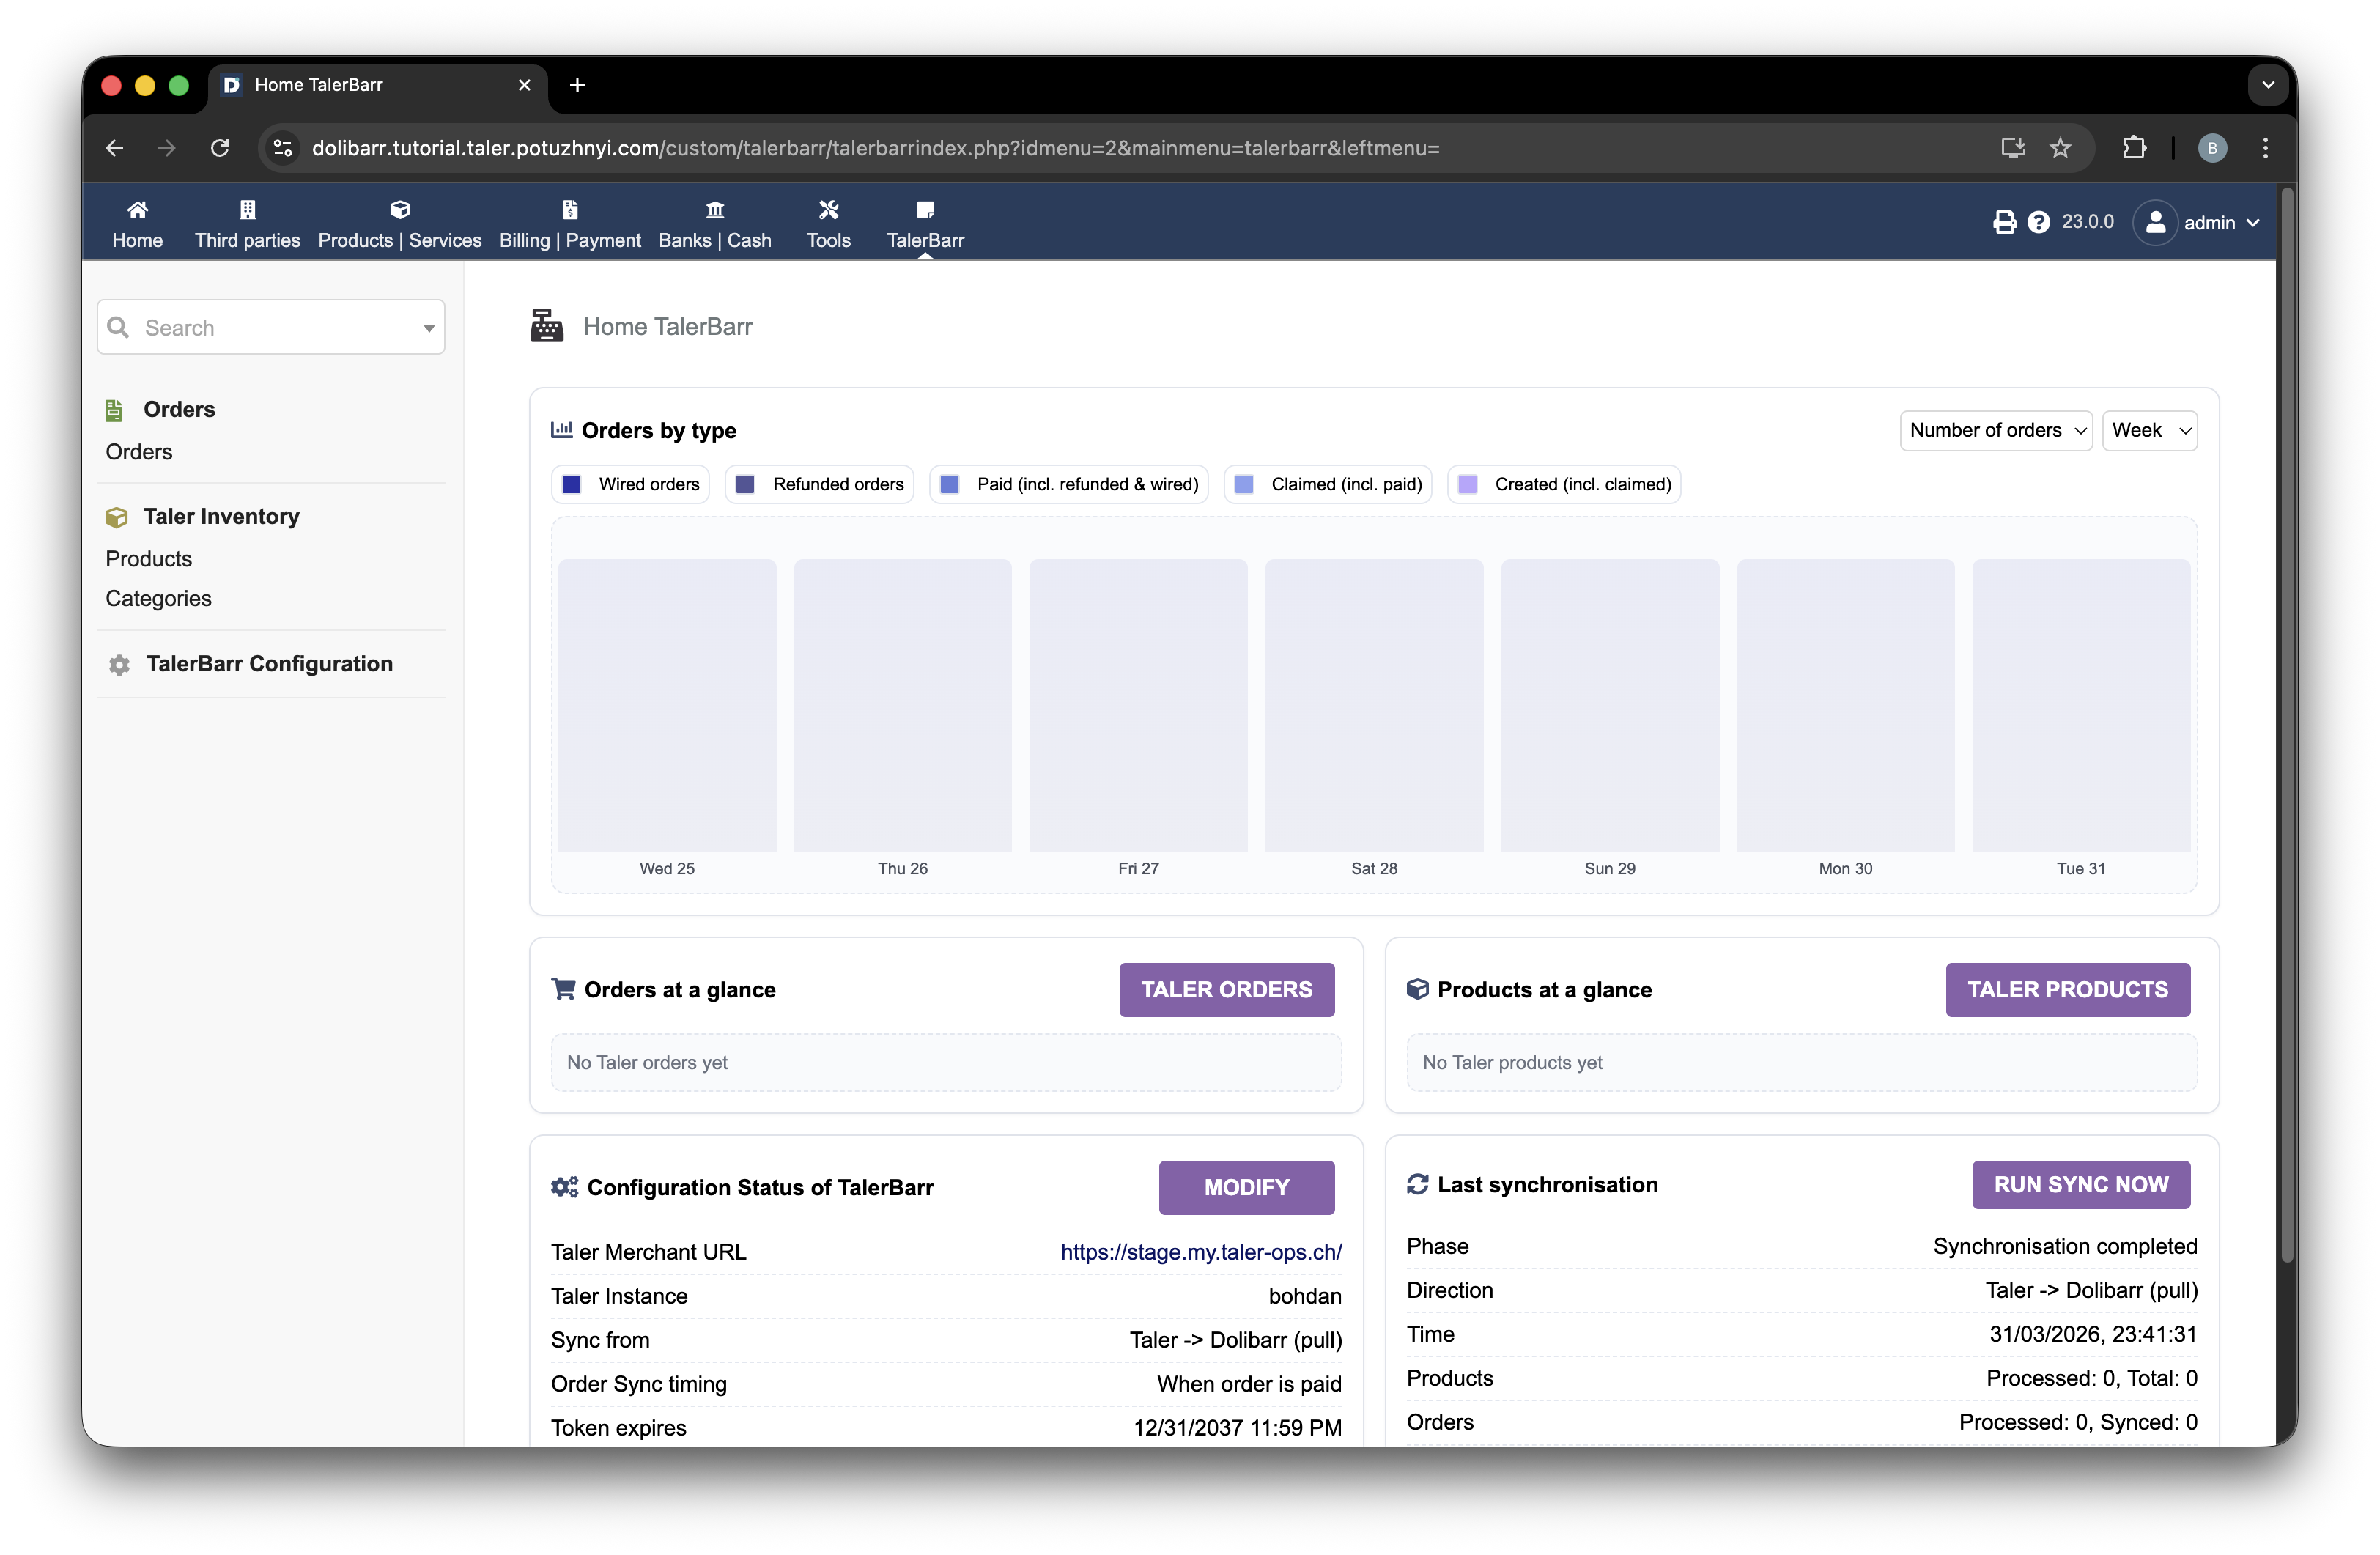
Domovská stránka modulu TalerBarr s prehľadom konfigurácie a synchronizácie.#
Odtiaľ pokračujte ďalšími návodmi, aby ste sa naučili pracovať s Správa zásob a Správa objednávok.